**WARNING: This post contains graphic photos of the turkey butchering process. If learning how to butcher a turkey isn’t your thing, feel free to skip this post. If you don’t eat meat, I respect that decision, and you won’t hurt my feelings if you click over here to learn how to make amazing mashed potatoes instead. However, my family and I have made the conscious choice to raise and eat meat, and I ask you to respect our choices as well.
DANG IT.
I did it again.
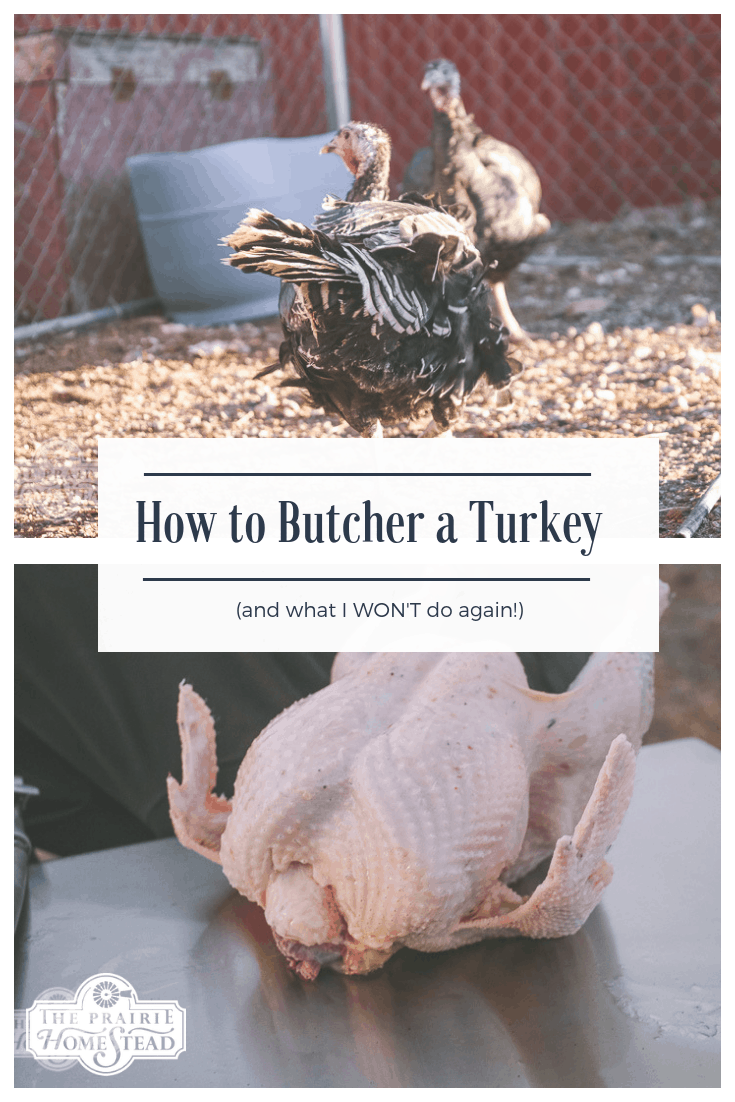
I told myself I wouldn’t let our turkeys get to 89 pounds before we butchered them this year.
And guess what I did?
(Ok… maybe not exactly 89 pounds, but close.)
Butchering turkeys isn’t a whole lot different that butchering chickens. They’re just bigger and stronger and hurt more when they beat you with their wings… Yay.
Thankfully Christian was willing to do the hard parts so I could document the process for ya’ll.

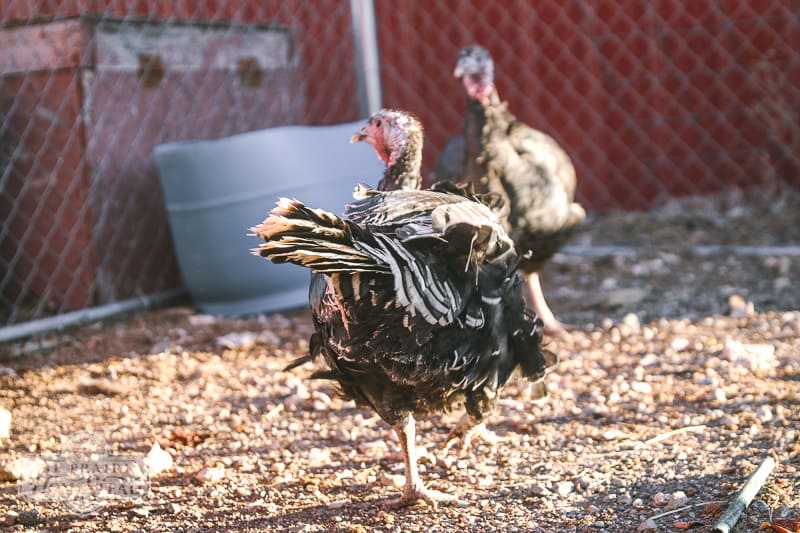
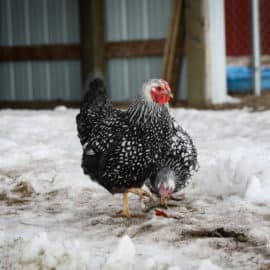
Raising turkeys is something I enjoy, not only because it’s fairly simple, but also because I get a kick out of their personalities. They aren’t the most intelligent birds, but they do have a quirkiness about them, which was especially evident one year after we pardoned a particularly big Tom we had. He lived for several years afterwards and ended up being a watchdog of sorts. (He wouldn’t attack anyone, but he’d stalk anyone new who set foot on the property (he had no concept of personal space), which is quite intimidating.)
And of course, turkeys taste really good too. And if you haven’t had a brined, pastured turkey, you are missing out. Big time.
This time when turkey butchering day rolled around, I had my camera fired up and ready to go. You can follow along on our turkey butchering adventures on YouTube, or keep reading for step-by-step instructions.
VIDEO: Butchering Turkeys + The Two Things I Won’t Do Again
How to Butcher Turkeys
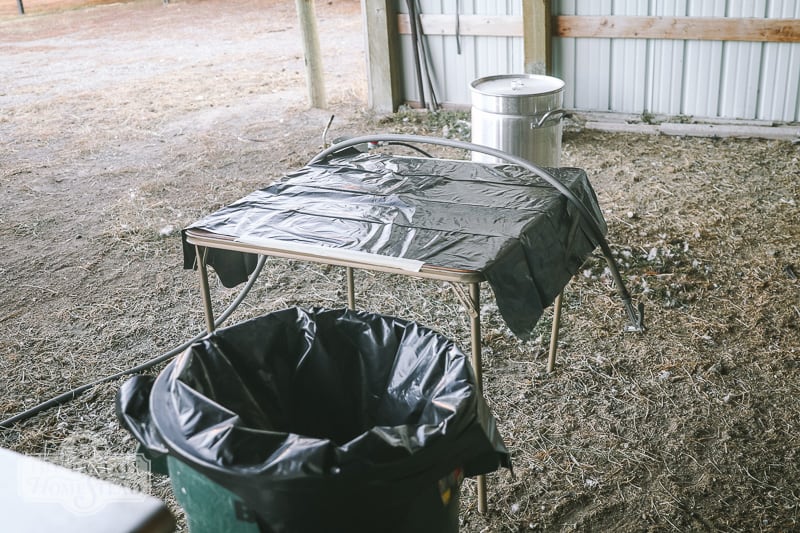
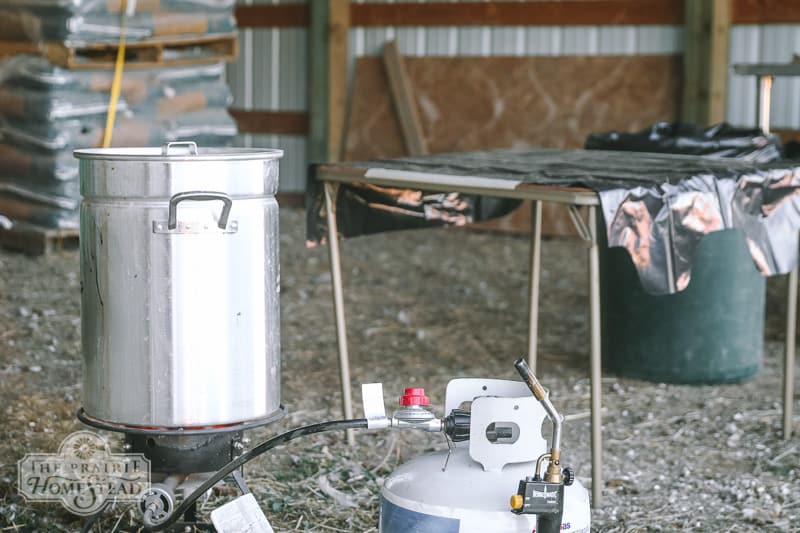
Equipment You’ll Need for Butchering Turkeys
- A large killing cone (see below for ideas if you don’t have a cone)
- 2-3 buckets to catch blood and innards, plus a trash can for feathers
- A hose or sprayer to rinse birds and the workspace
- Sharp knives (we like this one)
- Poultry shears (these are handy for removing the head)
- A turkey fryer and thermometer (not 100% necessary, I suppose. But scalding the bird before plucking is a bazillion times easier)
- Stainless steel table(s), or other clean, easy-to-sanitize surface
- Large heat shrink bags or some other type of freezer wrap
- A big cooler filled with ice to chill the birds before you wrap or bag them.
Prep & Set Up
Regardless of what type of birds we are processing, we like to withhold food the night before butchering day. This ensures they have an empty crop, which makes the cleaning process easier. If you forget to do this, it’s not the end of the world– just a little messier on butchering day.
We set up two tables– one for plucking and one for eviscerating (removing the internal organs). If you have a lot of birds to process, it’s nice to have extra helpers so you can set up an assembly line process. I would not recommend attempting butchering day by yourself.
About 30 minutes before you begin, fill the turkey fryer with water and begin heating it. The water needs to be around 150 degrees F to properly scald the turkeys for plucking, and take it from me– it’s a PAIN to have to sit there and wait for it to heat when you have birds to pluck.

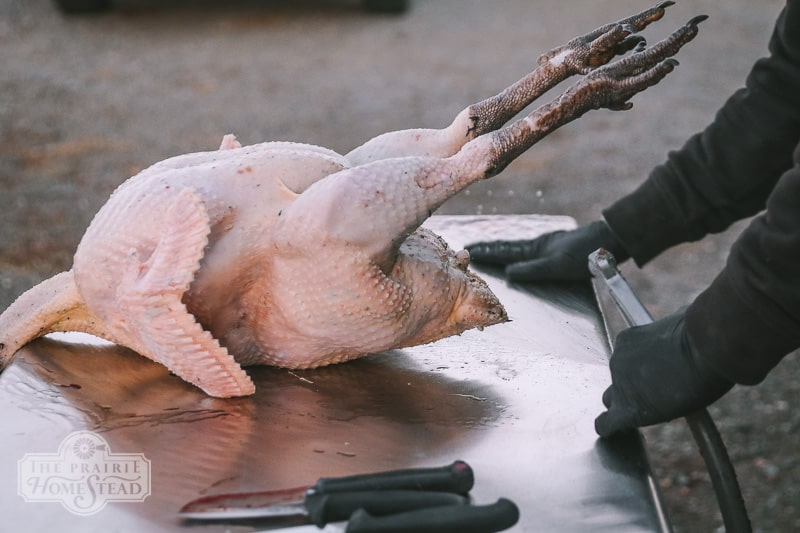
Dispatching the Turkeys
For us, the biggest obstacle to overcome in our turkey butchering operation is always the initial kill. With our chickens, we use a special killing cone which I prefer since it is a more humane option. Holding a bird upside down tends to sedate them a bit, and the cone shape keeps them from flopping around.
However, when you have an 89-pound turkey, our small chicken cone doesn’t quite work. (And no, I didn’t think to plan ahead to order a turkey cone. C’mon people– we’re just lucky this is happening BEFORE Thanksgiving!)
Therefore, we were left relying on good old-fashioned farmer ingenuity. I’ve seen folks use an old feed bag in place of a cone– they cut a small hole in the bottom of the bag for the turkey’s head to go, and the rest of the bag helps to keep them from flopping. (Although I’m not entirely sure HOW exactly they get the turkey in the bag to begin with…. Hmmm…)
Since we had extra help this year, we laid the turkey on a table and had one person hold it while the other personal made a quick cut to the jugular with a sharp knife. While this isn’t a method I would recommend if you’re doing a ton of turkeys, it worked well for our two birds, and it was a very calm death.
After the cut is made, we wait for the blood to drain into a bucket and the reflexes to stop before we proceed. It usually takes a few minutes.
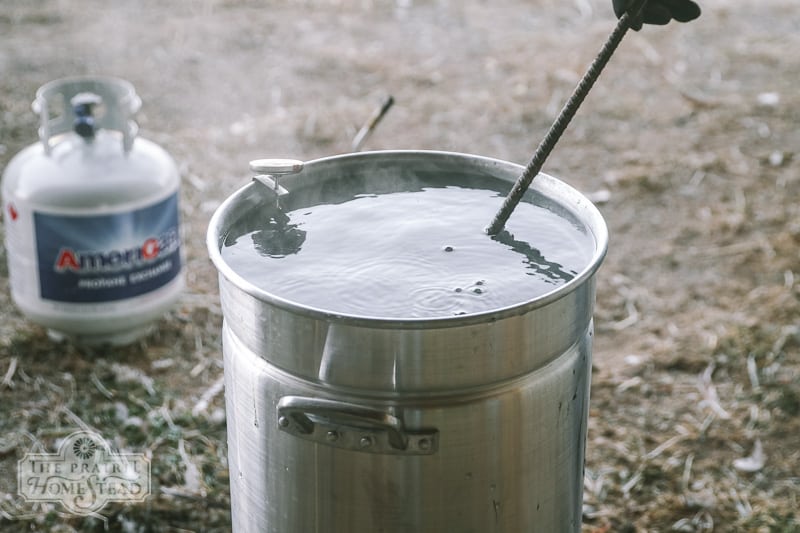
Scalding the Turkeys
If you have a mechanical chicken plucker, you are a very wise person. We do not have one (yet). We are not wise people.
So guess who is usually the official chicken plucker? (If you guess me, you’d be right.)
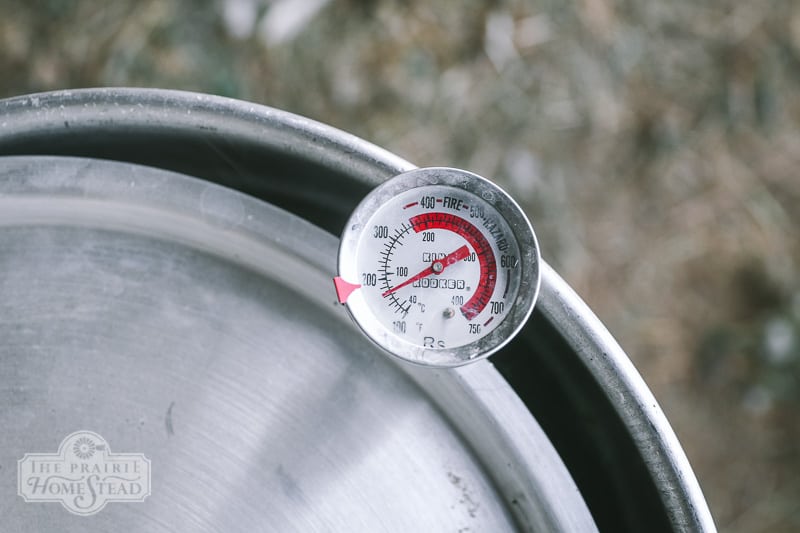
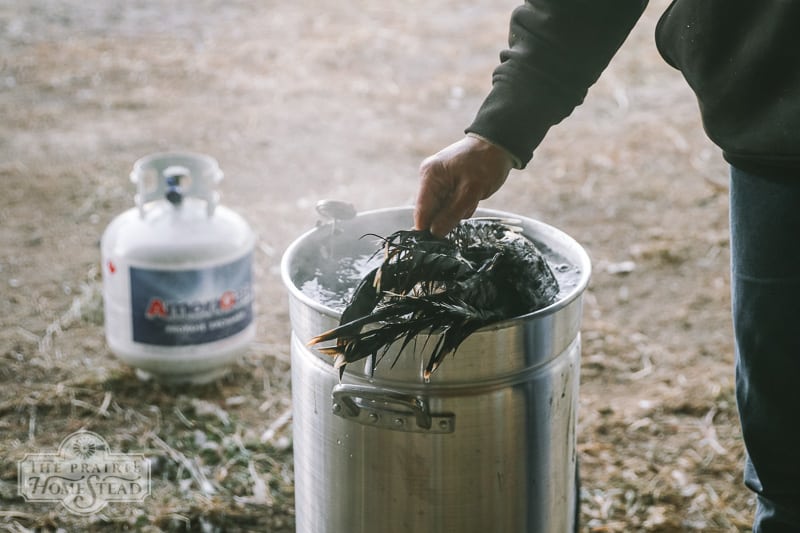
In order to speed up the plucking process, we scald the turkeys first, which helps the feathers come out much easier. To scald a turkey, plunge it into the hot water (145-155 degrees F) and let it sit for 3-4 minutes. I like to swirl it around a bit to give the water a chance to permeate all the surfaces and feathers. You’ll know it’s ready to pluck when you pull on the tail feathers and they come off easily. Be careful not to overscald the bird, as it will cause the skin to tear, which makes plucking a nightmare…
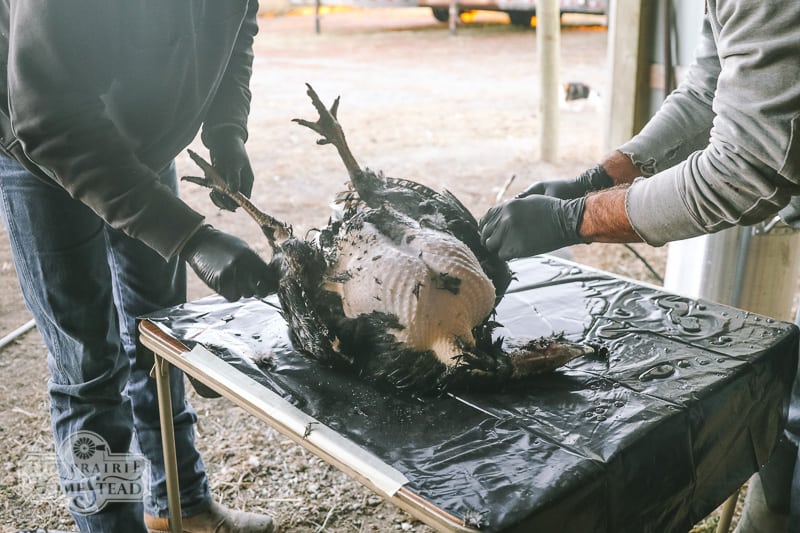
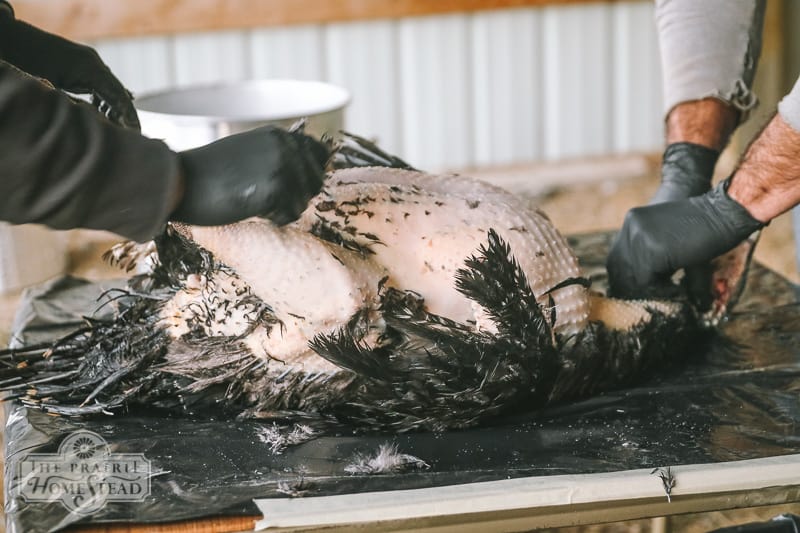
Plucking a Turkey
Once the turkey is sufficiently scalded, take it over to your plucking table and get to work! There isn’t really a science to plucking– just keep pulling feathers until there aren’t any more feathers left to pull. I sometimes wear rubber gloves while I pluck as the rubber helps me to grab the tiny feathers a bit easier.
Cleaning & Eviscerating
(For more pix of this process from a different angle, check out my How to Butcher a Chicken post. The process is exactly the same for chickens.)
After you’re done plucking, rinse the bird with cool water, then cut off the head and legs with poultry shears or a knife.
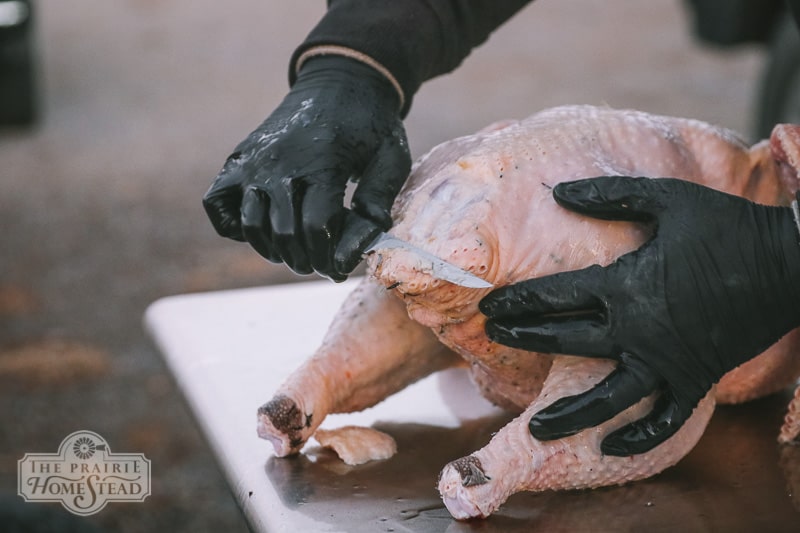
There is an oil gland on the back end of the turkey that will cause the meat to have an unpleasant taste if it bursts. Slice down behind it and trim it off.
Make a slice in the skin with your knife above the breastbone at the base of the neck.
I couldn’t get a good pic of this with our turkeys, so here is a picture of the process from when we did our chickens:
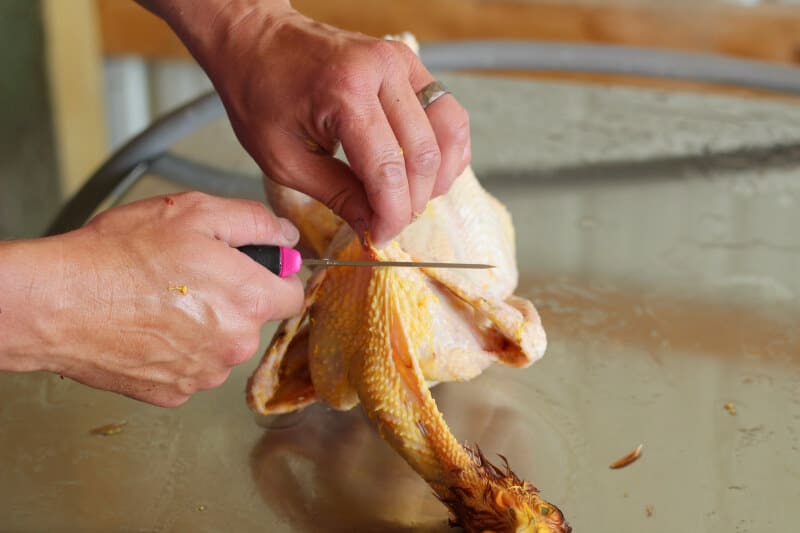
Tear down with your thumb to find the crop, windpipe and esophagus. Pull the esophagus and windpipe out of the neck cavity, and break the connective tissue around the crop. However, do not pull this assembly out completely– leave it attached.
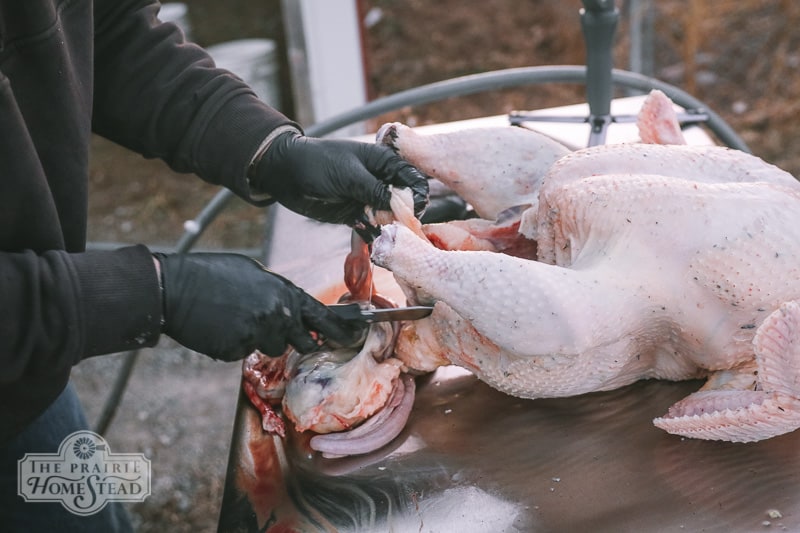
With the bird still on its back, flip it 180 degrees so you can work on the back end. Cut right above the vent, and tear open the carcass with both hands. Put your hand into the carcass, pull the fat off the gizzard, and then hook your finger down and around the esophagus. Pull this out– you should have a handful of connected internal organs now (as you can see above). Cut down either side of the vent and underneath to remove all the guts, in one pull. Now go back in to remove the lungs and windpipe, or anything else that didn’t quite come out the first time.

Chill that Turkey!
As with any freshly butchered meat, it’s important to get it cold as quickly as possible. We like to do this by immediately placing the cleaned birds into a cooler filled with ice water. If you have a fridge big enough, that works too. (But who has fridge space for an 89-pound turkey? Not me.) Some folks leave the birds in the ice water for 1-2 days before wrapping for the freezer. We usually leave them as long as the ice will last (at least 6 hours, though). Once they are completely chilled, use heat shrink bags or freezer wrap to cover them (if you’re using bags, they should come with instructions), and pop them into the freezer.
I did not have heat shrink bags big enough for these turkeys, so I used plastic wrap and freezer paper. It wasn’t pretty, but it worked (I guess).
You did it! I’m so proud of you. Who would have thought you’d be butchering 89-pound turkeys when you grew up? Just proof that dreams do come true. 😉
And now, the only thing left to do is cook that baby! Here’s my complete pastured turkey brining and roasting tutorial. (This is the only way I prepare our turkeys– it’s amazing…)
Pray for me as I try to jam these guys into my very average oven….
Other Poultry Posts You Might Like:
- What to Do with a Broody Chicken
- Beginners Guide to Chicken Coops
- Raising Meat Chickens: Our First Year
- How to Build a Chicken Run

Hi, Jill.
Just came across your homemade hand cream recipe. Sounds like good stuff. Will it bother people with nut allergies? Would like to experiment with different essential oils. Is this your own recipe, and if so could we use it as a fundraiser for our nonprofit? Thanks. Keep up the good work! Kevin
Hi Kevin,
Not sure about the nut allergies, but you can also play around with swapping out different ingredients if you are concerned. Feel free to use the recipe to make hand creams for your fundraiser!
You don’t “put the turkey in the bag” you put your arm in the bag and your hand through the hole you cut, grab the turkey by the head/neck then you turn the bag in-side-out as the turkey “goes in the bag”. Hope that makes sense. I use the same technique with produce and meat (organic of course) at the grocery store. I put my hand in the bag, grab the product and turn the bag in-side-out as I “bag” my product.
DUH. Yes, that makes sense. I’m slightly embarrassed I didn’t think of that. Thanks Jerry! hehe 🙂
Hi, I just butchered a turkey today (5 days before cooking.) My thought process is it wouldn’t make sense to freeze it just to take it out of freezer to thaw in 3 days. But after reading some things now I’m second guessing that decision. Any suggestions?
Mine were huge this year as well and I raise a couple for other folks. Way to big to fit in the plucker I have, the scald pot or the cold water bucket…and worse yet I do this alone and am old as dirt. My lessons this year were, to be very careful grabbing a turkey from the flock as his buddy may beat the living tar out of you and second, dwarf turkeys are much better sized for my household. That said , I do have some funny stories to tell. Oh, and the turkey bags I so carefully bought ahead of time did not even fit those big ones either. Never to old to learn something new!
Look up the brain stick method on you tube. We did this & it saved much time. We hung our turkeys upside down, brain stick (yes they still try to “beat you” with the wings), then slit the throat to drain. With rubber gloves on, did the feathers, no scalding ( p.u that stinks!!!). This method worked well for us
and we even started using it on chickens
I had no issues with the actual deed Laurel, it was that when I grabbed the legs of the one I wanted to process his buddy jumped in and beat the heck out of me. Still black and blue from that! Next round I just went in and shot , easy quick and less traumatic for everyone. I dry plucked them all and it was much easier than I thought on the turkeys and will just plan on that next year. I own an awesome plucker and use it on the chickens all the time, but it was just not up to the job of a 40 lb turkey. Next year we will be raising our own Dwarf Whites and will eliminate most of this craziness.
Jill,
What kind of pan/roaster do you use to cook an 89 pound turkey?
Thanks
Laurel
See the first part of the post– I was just being silly about the 89 pounds. 😉 But, with our very large turkeys (25-30lbs) I use a large roasting pan and hope it doesn’t hang over the side!
My Wyoming friend taught us to wack the turkey on the head to make it’s feathers release easy peasy. I would never butcher a turkey without doing this first!
Oh wow– I haven’t tried that! So you don’t have to scald it then?
This is such a great post- dispatching and cleaning turkeys is hard work, and this was an excellent overview of the entire process! You really can’t beat a home-raised bird, and turkeys are so much fun to raise to boot.
Thanks Krystal! Agree- you can’t beat a home-raised bird!
I literally laughed out loud picturing the 89lb turkey. What a monster!! 😉
I love this post; very informative. We are on the brink of adding turkeys to our homestead, and it’s nice to see that the process of butchering is so akin to how to do a chicken. Just on a bigger scale (89lbs!! LOL)
Thank you so much for sharing.
I think you’ll really enjoy raising turkeys! And they taste good too 😉
My hubs made the turkey kill cone. We’ve done it many ways but the cone is best since turkey flapping can knock ya out. Nothing like getting whacked in the face with a wing. Ouch!
Cool– what did he make it out of? And I agree– the flapping is brutal!
Plain old sheet metal and some metal fasteners.
We made a “comfort cone” using some scrap fencing / hardware cloth material (picture the galvanized steel used for rabbit cages) and a couple of cable ties. Lined it with cardboard so feathers etc couldn’t get out. Cost was about 6 cents or whatever bulk-priced cable ties cost.
We don’t have a turkey fryer for scalding so used a utility sink. Hot water from our solar hot water system gets to about 140 degrees which translates into about 120 after the sink has absorbed some of the heat. We added two stock pots of boiling water to get temperature hot enough to scald the turkeys.
I so enjoyed your video! Thank you for filming it. You guys are delightful….. We’re laughing here because our turkeys may beat out your ’89’# turkeys and we’re scared! LOL! Butchering is happening this weekend. We do 30ish chickens every year and only a couple turkeys. This year we’ve got three and it’ll be interesting we think….We’ve enjoyed our little aliens, I call them that as they’re so quirky. Thanks for the info. Happy Autumn to your family from ours in Alaska. MMc
I just butcher 5 white broad breasted turkeys. I may have forgotten got to remove the crops witch I’m pretty sure we’re empty. Before freezing them. Will that be OK? I also didn’t wait that long to put in freezer. Maybe 3 hours on ice. How will that effect it.
There were a whole bunch of eggs in my turkey, does any one know why?