If you want to know how to confuse a homestead kid…
Get a turkey from the store.
Poor Prairie Girl didn’t know what to think when she walked into the kitchen as I was cramming apples and onions into a big ol’ raw turkey.
“Mommy… WHO is that?!”
She had just been outside and knew our big turkey was still strutting around the yard. The little turkeys we had brought home this spring had been eaten by raccoons, so she couldn’t figured out where this bird had come from.
I was met with blank stares as I explained this wasn’t one of our turkeys, but rather one I got at the natural food store. It took her a while to believe me as I explained you can purchase already-dead turkeys in town.
Then Prairie Boy came into the kitchen, and I ended up having the same conversation all over again with him…
So I’m thinking maybe we should plan on a field trip to the meat counter at the grocery store? Poor little confused homestead kids. 😉

But anyway, I did purchase a free-range, non-GMO turkey for this recipe. We’ve had the best of intentions of growing our own birds for several years now, but the predators have had other ideas. The one Tom we have left ended up getting a pardon his first year, and now I suspect he’s too tough to taste good anyway…
Just as soon as I can keep the coons away from my turkeys, we will be eating our own pastured birds. But in the meantime I’m thankful for natural, local options so we’re not completely turkey-less.
Everyone has a favorite way to prepare a turkey, but I have fallen head-over-heels with brining. Brining deeply infuses the entire bird with flavor and makes it amazingly tender and moist. Brining is especially awesome when dealing with pastured turkeys as they haven’t been pumped full of flavorings and broth like conventional turkeys (thank goodness…). There are wet and dry versions of brining, but I prefer the wet version.
There are several parts to my technique (brining/stuffing/herb butter/basting liquid), and any of them can be omitted from the process if you’d rather mix and match a bit. However, when you combine them all together, it results in a turkey that’s TO DIE FOR. Promise. 🙂

How to Cook a Pastured Turkey
- 1 pastured turkey, thawed and rinsed
- 1 medium apple, cut into chunks
- 1 medium onion, cut into chunks
- Container for holding turkey and brine
To Make the Brine:
- 1 gallon water
- 1 cup salt (I use Redmond Salt)
- 1/2 cup honey
- 5 bay leaves
- 1 tablespoon black peppercorns
- 2 springs fresh sage (or 1 tablespoon dried sage)
- 2 sprigs fresh thyme (or 1 tablespoon dried thyme)
To Make the Basting Liquid:
- 1.5 cups broth (here’s how I make and can my homemade broth)
- 1/2 cup apple cider
- 1/4 teaspoon ground black pepper
- 4 drops wild orange essential oil* (optional)
- 2 drops lemon essential oil* (optional)
- 2 drops thyme essential oil* (optional)
*I’ve added food-grade essential oils to my basting liquid for several years now and they add a lovely punch of flavor. However, you can easily omit them if you don’t have them.
Prepare the Turkey and Brine:
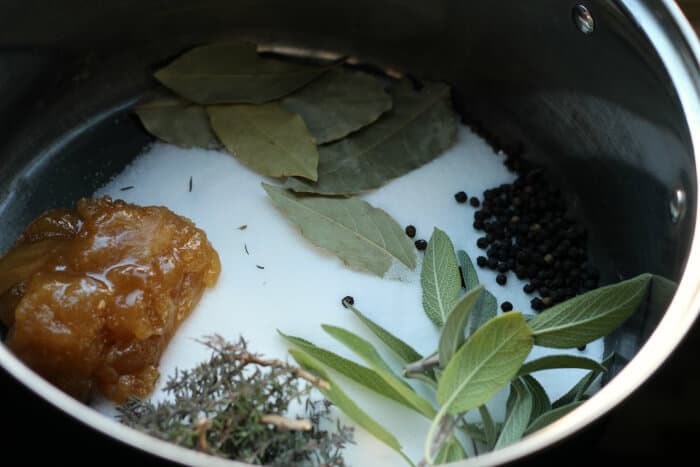
In a pot on your stovetop, combine the salt, honey, and herbs with 4 cups water. Bring to a simmer and stir until the salt is dissolved. Remove from heat, and mix in the remaining water. Set aside and allow to cool completely.
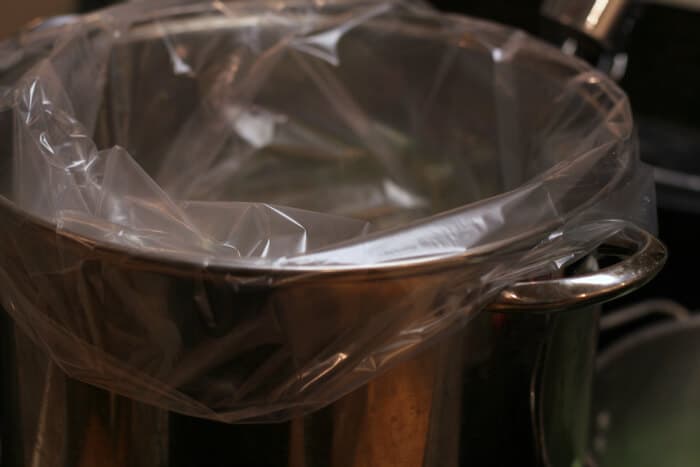
Pour the cooled brine into a large container and add the turkey. (I’ve used food-grade plastic 5-gallon buckets in the past. Or, you can use a large non-reactive (i.e. glass or stainless steel) pot. If you’re not sure if your pot is non-reactive or not, simply line it with an oven bag and place the brine and turkey in the bag.)
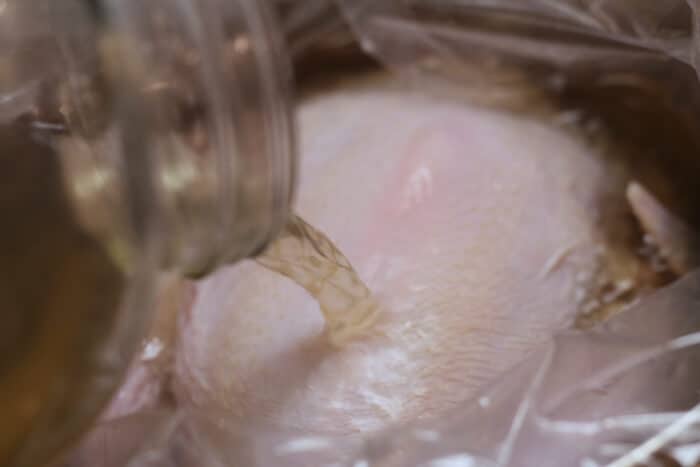
If the turkey doesn’t want to stay full submerged weigh it down with a clean plate, or brick, or whatever.
Leave the turkey and brine in a cool place for 12-18 hours. If you have room in your fridge, that’s great. My fridge is always precariously jam-packed with not an inch to spare, but thankfully it’s always cool been enough in the shop or on the deck. (If you’re leaving it outside, make sure it’s not accessible to any curious animals.)
After the brining period is complete, pull the turkey out of the brine and rinse under cool water. This will remove the excess brine to make sure the finished bird isn’t too salty. Dry the turkey completely (I used paper towels for this).
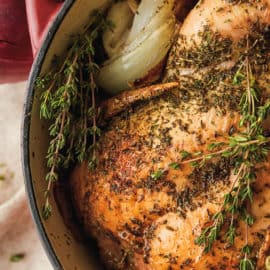
Set the turkey on a rack in a roasting pan, breast side up, and stuff it with the apples and onions.
Use a spatula to gently separate the skin from the meat around the breast and thighs. Stuff generously with garlic sage butter that I’ll show you how to make right now—>
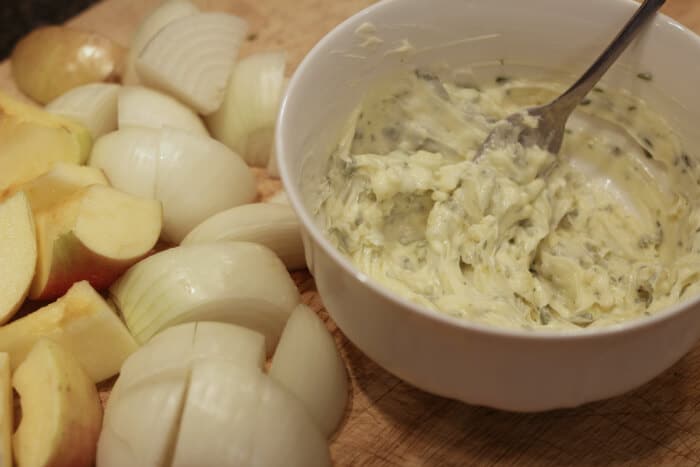
Garlic Sage Butter Recipe:
- 5 tablespoons butter, softened
- 1/4 cup sage leaves
- 2 cloves garlic
In a food processor, combine the softened butter, garlic, and sage. Process until smooth.
If you don’t have a food processor, simply mince the garlic and sage with your knife, and using a fork to thoroughly mash them into the butter.
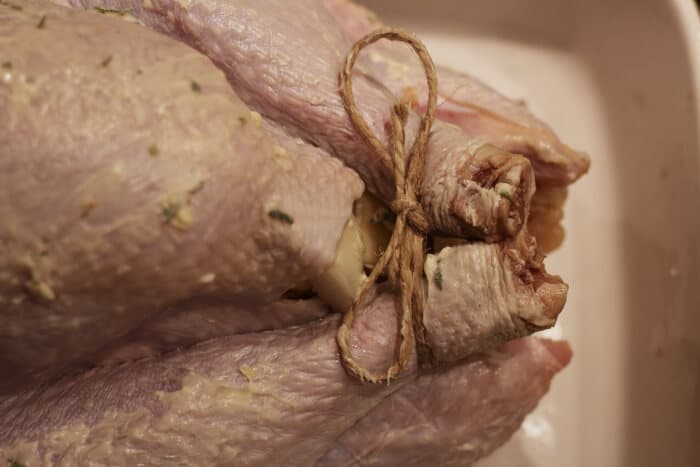
Tie the legs together with a bit of twine, and tuck the wings close to the body. If you have leftover garlic sage butter, rub it on the turkey’s skin.
Pour the basting liquid in the bottom of the pan, and place in a preheated 325 degree oven.
Cooking times will vary, but plan on about 13-15 minutes per pound. Baste the turkey every 45-60 minutes, and if the breast starts to get too brown, cover with a piece of foil. (I had to do this about 2/3 of the way through the cooking time with this turkey).
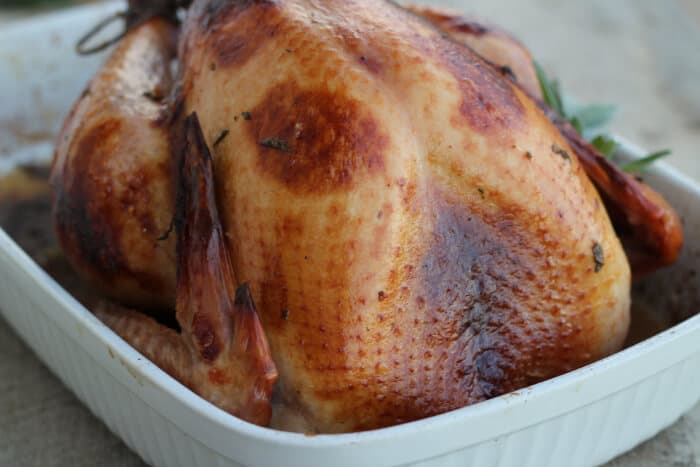
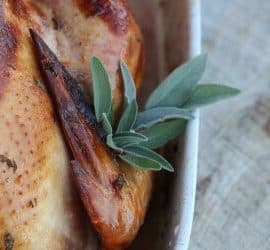
The turkey is done when it fills your house with a mouth-watering aroma and your meat thermometer reads 165 degrees when you stick it into the thickest part of the turkey.
Allow the turkey to rest for 10-15 minutes before cutting.
Some people caution against making gravy with the drippings from a brined turkey, as it can be too salty. But whenever I’ve made this recipe, it results in the most perfect gravy ever. Just be sure to taste it lots as you make it to check for saltiness– and you can always dilute it with some extra broth if it ends up being a tad on the salty side.

Pastured Turkey Notes:
- Don’t brine kosher or “enhanced” turkeys. They already contain flavorings and salt and brining them will make ’em WAY too salty.
- If you want to keep your brine super basic, you can skip the honey/herbs, and just use plain ol’ salt and water. But I love the extra flavor the sweetener and seasonings add.
- If you’re like me and don’t have an rack that’ll fit in the bottom of your roasting pan, use veggies instead. Simply slice up some onion wedges or celery stalks–lay them on the bottom of the pan, and set the turkey on top.
- Do not, I repeat, DO NOT throw away the turkey carcass when you’re done with it! Turn that baby into some amazingly nourishing broth.
- The apples/onions I stuff the turkey with are mainly for flavor–we don’t eat them alongside the turkey. However, I do toss them into my broth when I’m ready to start simmering the bones.
- I know some folks cook turkeys breast-side down, and that’s fine. You might think cooking it breast-side up would dry it out, but following this method, I haven’t had an issue with that at all.
Other From-Scratch Thanksgiving Favorites:

How to Cook a Pastured Turkey
- Category: Main Dish - Meat
Ingredients
- 1 pastured turkey, thawed and rinsed
- 1 medium apple, cut into chunks
- 1 medium onion, cut into chunks
- Container for holding turkey and brine
- To Make the Brine:
- 1 gallon water
- 1 cup salt (I use Redmond Salt)
- 1/2 cup honey
- 5 bay leaves
- 1 tablespoon black peppercorns
- 2 springs fresh sage (or 1 tablespoon dried sage)
- 2 sprigs fresh thyme (or 1 tablespoon dried thyme)
- To Make the Basting Liquid:
- 1.5 cups broth
- 1/2 cup apple cider
- 1/4 teaspoon ground black pepper
- 4 drops wild orange essential oil* (optional)
- 2 drops lemon essential oil* (optional)
- 2 drops thyme essential oil* (optional)
Instructions
- In a pot on your stovetop, combine the salt, honey, and herbs with 4 cups water. Bring to a simmer and stir until the salt is dissolved. Remove from heat, and mix in the remaining water. Set aside and allow to cool completely.
- Pour the cooled brine into a large container and add the turkey. (I’ve used food-grade plastic 5-gallon buckets in the past. Or, you can line a large stockpot with a oven bag and place the brine and turkey in the bag.)
- If the turkey doesn’t want to stay full submerged, or tries to float to the top, weigh it down with a clean plate.
- Leave the turkey and brine in a cool place for 12-18 hours. If you have room in your fridge, that’s great. I never do, but thankfully it’s always cool enough in the shop. (Just make sure if you’re leaving it outside that it’s not accessible to any curious animals.)
- After the brining period is complete, pull the turkey out of the brine and rinse under cool water. This will remove the excess brine to make sure the finished bird isn’t too salty. Dry the turkey completely (I use paper towels for this).
- Set the turkey on a rack in a shallow roasting pan, breast side up, and stuff it with the apples and onions.
- Use a spatula to gently separate the skin from the meat around the breast and thighs. Stuff generously with garlic sage butter.
- Garlic Sage Butter Recipe:
- tablespoons butter, softened
- /4 cup sage leaves
- cloves garlic
- In a food processor, combine the softened butter, garlic, and sage. Process until smooth.
- If you don’t have a food processor, simply mince the garlic and sage with your knife, and using a fork to thoroughly mash them into the butter.
- Tie the legs together with a bit of twine, and tuck the wings close to the body. If you have leftover garlic sage butter, rub it on the turkey’s skin.
- Pour the basting liquid in the bottom of the pan, and place in a preheated 325 degree oven.
- Cooking times will vary, but plan on about 13-15 minutes per pound. Baste the turkey every 45-60 minutes, and if the breast starts to get too brown, cover with a piece of foil. (I had to do this about 2/3 of the way through the cooking time with this turkey).
- The turkey is done when it fills your house with a mouth-watering aroma and your meat thermometer reads 165 degrees when you stick it into the thickest part of the turkey.
- Allow the turkey to rest for 10-15 minutes before cutting.
- Some people caution against making gravy with the drippings from a brined turkey, as it can be too salty, but whenever I’ve made this recipe, it results in the most perfect gravy ever. Just be sure to taste it plenty as you make it to check for saltiness– and you can always dilute it with some extra broth if it ends up being a tad on the salty side.
Listen to the Old Fashioned On Purpose podcast episode #45 on this topic HERE.
I had to laugh with the kids being shocked about buying a turkey. In August we ran out of homemade applesauce just before apple season in NY and my son informed me he was opening the last jar we canned so I would need to make more. I said it would be a few weeks before apple season so I would have to pick up a jar from the store and he replied with a shocked look on his face “you can buy that in the store”???? Priceless!
I love it!!
Oh how I hate raccoons and opossums and poultry eating critters!
And baby turkeys are expensive- sorry to hear about that. ?
Your turkey looks great!
Yes, they aren’t cheap! Hopefully we’ll do better in 2016. 🙂
A note about the coons (and possums, ferral cats, etc) getting your birds… I lost about 20 rare breed hens in a months time about 3 years ago. My large coop and chicken/turkey yard is on the pasture side of my fence. I started keeping one of my Great Pyrenees in with the chickens and turkeys at night (these dogs are nocturnal by nature) and since then, I’ve lost one hen~ to old age. I know these dogs are generally used to guard goats but trust me, they do just as well with poultry.
I’m going to try your turkey recipe~ thanks!
I’ve heard wonderful things about Pyrenees. We have 3 dogs that do well warding off predators in the day, but they sleep in the house at night which doesn’t help much there!
I have only ever brined a turkey once when I cooked it on a charcoal grill. It was amazing! I will have to try this though- never thought about brining and using the oven.
I need to try it on the grill– yum!
That is way too funny that your kids don’t know that you can buy meat! 😀 I know many kids who don’t even know that meat has bones and have a friend who is grossed out by bones. She thinks it’s gross I make stock with them!
This article is timely! I was just talking about trying to brine my turkey too. I’ve never tried it before. Thank you!
#Tina- I was at a neighbors house a couple of years ago for Thanksgiving. Someone brought pumpkin pie, but no whipped cream. I told them I would run home and make some. They told me not to bother. I said it wouldn’t take long. I came back about 10 minutes later and their 20 something year old niece was amazed that it could be made at home. Jeez. Very disconnected.
Oh my goodness! Yes, we have become so disconnected as a society. I always love making real whipped cream and converting the Cool Whip crowd. 😉
I was just gifted a beautiful pastured turkey. Can I stuff this turkey with traditional bread stuffing? I intend to follow the rest of your recipe.
I like your brine and agree this is the best way to prepare a Turkey. So I wanted to share what I have been doing for several seasons . Its a lot of preparation but the end result is Excellent.
I smoke mine in a Big Green Egg.
Smoked Cider Brine Bacon Wrapped Turkey
For the brine
• 8 cups apple cider
• 1 lb. kosher salt (1-3/4 cups if using Morton’s; 2-3/4 cups if using Diamond Crystal)
• 1-3/4 cups packed dark brown sugar
• 1 cup apple cider vinegar
• 3/4 cup honey
• 1/4 tsp. ground cloves
• 5 dried bay leaves
• 1 12- to 14-lb. turkey (preferably fresh, and not kosher or self-basting; neck and giblets, excluding liver, reserved for the broth)
For the broth
• 1/4 cup vegetable oil
• Kosher salt
• 2 medium carrots, cut into 2-inch chunks
• 2 medium celery stalks, cut into 2-inch chunks
• 1 medium yellow onion, peeled and quartered
• 1 dried bay leaf
• 1/2 tsp. black peppercorns
For the barbecue spice rub
• 1/4 cup granulated sugar
• 2 Tbs. chili powder
• 1 Tbs. packed dark brown sugar
• 2-1/4 tsp. smoked paprika (pimentón)
• 1-1/2 tsp. kosher salt
• 3/4 tsp. freshly ground black pepper
• 1/2 tsp. cayenne
• 1/2 tsp. garlic powder
• 1/2 tsp. onion powder
• 1/2 tsp. dry mustard
• 1/8 tsp. ground cinnamon
• 1/8 tsp. ground coriander
• 1/8 tsp. ground cumin
For the turkey
• 5 Tbs. vegetable oil
• 1 medium yellow onion, peeled and quartered
• 4 oz. (1/2 cup) unsalted butter, softened, plus 2 oz. (4 Tbs.), cut into 4 slices
• 1/4 cup honey
• about 2 lb. thick-cut bacon, preferably applewood smoked, at room temperature
• 2 cups hardwood chips, preferably a combination of apple and hickory, soaked in water for at least 30 minutes and drained
• 1 cup apple juice, in a spray bottle
For the gravy
• 1-1/2 oz. (6 Tbs.) unbleached all-purpose flour
• 1/2 tsp. cider vinegar, or to taste
• Kosher salt and freshly ground black pepper
Make the brine
Combine all of the brine ingredients and 8 cups of water in an 8-quart pot; bring to a boil over high heat, stirring occasionally. Remove from the heat, cool to room temperature, and then refrigerate until cold.
Brine the turkey
Put the turkey breast side down in a pot or tub large enough to hold it and the brine. Add the brine (the turkey will float, but that’s OK) and refrigerate for at least 6 hours and up to 20 hours.
Make the broth
With a chef’s knife, cut the turkey neck into 3 or 4 pieces and chop the giblets. Heat the oil in a 4-quart pot over medium-high heat. Cook the neck and giblets with a pinch of salt, stirring often, until browned, about 8 minutes. add the carrots, celery, onion, bay leaf, peppercorns, 2 tsp. salt, and 6 cups of water.
Bring to a boil, lower the heat, skim off any foam, and simmer, covered, until flavorful, about 1 hour. Strain the broth through a fine sieve into a large bowl—you’ll have about 4 cups.
Make the spice rub
In a small bowl, mix all of the rub ingredients, breaking up any clumps of brown sugar with your fingers.
Prepare the grill
Light a charcoal or gas grill fire and set it up for indirect cooking over low heat (275°F).
If using a charcoal grill, bank the lit and ashed-over coals to one side of the grill. Cover the grill and adjust the vents as needed to reach 275°F.
If using a gas grill, cover the grill, turn off one or more of the burners, and adjust the active burner(s) to reach 275°F.
Smoke the turkey
Rinse and dry the turkey; discard the brine. Rub the inside of the body and neck cavities with 2 Tbs. of the vegetable oil, and then sprinkle each cavity with 1/2 Tbs. of the spice rub. Put the onion pieces inside the body cavity.
In a small bowl, combine the 4 oz. softened butter with 1 Tbs. of the spice rub. Carefully slide your hands under the skin of the turkey to loosen it from the breast. Using your fingers, spread the butter mixture directly on the breast meat, being careful not to tear the skin.
Tie the legs together with twine. Tuck the wing tips behind the neck, securing any loose skin over the neck cavity beneath them.
Rub the outside of the turkey with the remaining 3 Tbs. vegetable oil, then the honey, and then 3-1/2 Tbs. of the spice rub.
Put a flat wire rack inside an 11×14-inch (or similar) foil-lined roasting pan. Line the rack with enough bacon slices (touching but not overlapping) to cover the area the turkey will occupy. Put the turkey breast side up on the bacon and then lay enough bacon slices across the top of turkey to cover it, securing the slices with toothpicks. (It’s OK if the sides of the turkey aren’t entirely covered.)
For a charcoal grill, sprinkle 1/2 cup of the drained wood chips over the coals. Replace the grill grate.
For a gas grill, make 2 heavy-duty aluminum foil packets, each filled with 1 cup of the drained chips. Using a fork, poke holes all over the packets. Lifting the grill grate, set one of the packets directly over an active burner; reserve the second packet. Replace the grill grate.
Put the turkey in its pan on the unlit side of the grill and cover the grill. Smoke the turkey until the bacon is dark, rotating the pan occasionally for even cooking, 2 to 3 hours. If using a charcoal grill, add 1/2 cup of drained chips to the coals every 30 minutes until you’ve used all of the chips.
When the temperature dips to 250°F, every 1 to 1-1/2 hours, light 3 quarts of charcoal in a chimney set over bricks. When the coals are ashed over, transfer the turkey in its pan to a heatproof surface, lift the grill grate, and add the fresh coals to maintain the temperature. If the temperature gets too high, leave the lid ajar to let in cool air. For a gas grill, add the reserved packet of chips when the first packet stops smoking.
When the bacon is dark, remove it from the top of the turkey; enjoy as a cook’s treat( BLT) or discard. Generously season the turkey with all but 1 tsp. (which will be used for the gravy) of the remaining spice rub. Put the butter slices on top of the breast and thighs and continue smoking, spraying the turkey with the apple juice and rotating the pan every 30 minutes, until the temperature in the center of the breast registers 165°F, about 2 hours more. If at any time the turkey becomes too dark, loosely tent it with foil.
Remove the pan from the grill. Tilt the turkey so the juice in the cavity runs into the roasting pan. Transfer the turkey to a serving platter or cutting board and loosely tent it with foil. Let the turkey rest for at least 30 minutes.
Make the gravy
Heat the turkey broth until hot. Pour the drippings from the roasting pan into a fat separator or heatproof measuring cup. Allow the fat to rise to the top and then transfer 1/4 cup of the fat to a 12-inch skillet; discard the remaining fat and reserve the rest of the drippings.
Season the turkey broth with enough of the drippings to add flavor without making it too salty.
Heat the fat in the skillet over medium heat. Whisk in the flour and cook, whisking constantly, for 2 minutes. Add the remaining 1 tsp. spice rub and cook, whisking, 1 minute more. Gradually whisk the broth into the skillet until smooth, and then bring to a simmer. Whisk in the cider vinegar and simmer until the gravy barely coats the back of a spoon, about 5 minutes.
Season to taste with salt and pepper.
Carve the turkey and serve with the gravy.
Make Ahead Tips
The spice rub can be made up to 1 month ahead; keep in an airtight container.
The broth can be made up to 2 days ahead; refrigerate when cool.
The turkey can be brined 2 days ahead, then removed from the brine, patted dry, and refrigerated for up to 1 day, covered with plastic wrap.
If you smoke the bird at a low a temperature (like brisket or pork shoulder) the skin will be rubbery.
My mouth is WATERING! That sounds fabulous!
Made this recipie minus the essential oils for our early Thanksgiving dinner and my whole family lived it.
Yay! So glad you liked it!
Thank you for this post! I’ve always wanted to learn how to brine a turkey, and after reading your article I don’t feel so intimidated by the idea anymore.
By the way, I shared this article in my company’s newsletter because our customers are always wanting to learn things like this too. Keep up the great work!
Happy Thanksgiving!
Thanks for the share Anna! 🙂
Hi Jill,
Hope you all had a lovely Thanksgiving. We raise Bourbon Reds and I have struggled with roasting a moist and flavorful turkey…until yesterday. Your brine recipe was excellent. Less than an hour in the oven, a delightful aroma permeated the house. It cooked in the time frame you outlined (and reached the appropriate temp at the same time).
Now, I just have to master the gravy. I can make a roux and white sauce, easy peasy, but gravy!!! I suck. But it’s my next challenge. I saved all the drippings and will commence practicing tomorrow.
Thanks again,
Pam Baker
yay Pam! I’m so glad it was a success for you! If you can make a white sauce, I have full confidence you will rock the gravy!
Hi Jill,
We don’t really have a coon problem here in Vermont, the coons know we will shoot and eat them when they misbehave.
I’ve been brining and smoking turkeys for over 30 years. I can fit 4 – 15 pound turkeys under the lid of my Cajun Grill/Smoker. It’s not a good idea try to brine a turkey weighing over 15 pounds – it takes a swat with a ten pound hammer to get them submerged in the bucket.
Just so you know, I use only a 1/2 cup of sea salt and a 1/4 cup of plain sugar in a gallon of water. The turkeys seem to get a reasonable brining in as little as 2 hours and never are allowed to go over 8 hours because the cell walls could be damaged.
I keep food out of the ‘100 degree danger zone’, which is over 40 degrees F. and under 140 degrees F. In other words food must stay below 40 degrees F. before it is cooked and kept above 140 degrees F. after it is cooked. I brine and smoke turkeys mostly for the fun of it. I was trained in the food service business, where the 100 degree rule is the law!
No, I don’t eat all 4 turkeys. Three of them go to the first three of my friends who reserve them, usually by July 4th.
BTW, the turkeys are smoked at 225 degrees F. for up to 7 hours over native apple wood.
Thanks for the tips as always, Daryl! Have to admit I laughed out loud over your “swat with a ten pound hammer” comment. 😉
Just checking — you do mean apple cider, not apple cider vinegar. Right?
Yep! Apple cider. 🙂
I laughed out loud at the kids not knowing about “store bought” meat. That is so great for them!
My homestead mentor simplifies the “day of” step by having brine prepared on butchering day, and brining before freezing. We did this with our chickens in the fall, and plan on it with turkeys next year. It is a time and space saver at the holidays for sure. I will totally use your brine recipe for it next year!
Super smart about brining before freezing– I never thought of that!
Jill, we’re following your recipe this year with our local heritage turkey and I can’t WAIT to try it! Instead of cooking it the normal way, we butterflied it. (Took the backbone out and flattened it, also called spatchcock.) It cooks in just over an hour at high temperature and leaves poultry super moist, even without the brine and butter. You don’t get that Norman Rockwell picture-perfect turkey picture, but I’m willing to sacrifice it. This is seriously going to be the best turkey ever! Thanks so much for sharing your recipe. Hope your family is having a wonderful holiday!
I was researching the spatchcock method this year, but didn’t try it– sounds very appealing though!
A word of caution…Allow 20 minutes per pound. And I think it’s 180 degrees temperature for poultry. My first turkey I did 14 per pound and it was way undercooked.
My mom and sisterinlaw were horrified when hearing the calculations. 🙁
So just make sure to allow the extra cooking time you can always take it out sooner 🙂
The USDA recommended temp is 165 degrees. The cooking recommendations above are for rough guidelines. Things will always differ (ovens, climate, turkeys, etc) so always temp the bird before removing entirely from the oven.
yes I agree times will vary. But I did the math and the thermometer, which I could have done incorrectly, and showed up with my beautiful turkey and went to cutting and it was not done. Mom saved the day with pulling some frozen chicken out.
Just be on the safe side and allow more time to cook if need be. My mistake was assuming all things being equal and it would be done in that exact time frame.
I’m looking forward to trying it again but this time with a lesson learned under my belt 🙂
It sounds like your thermometer might not be calibrated correctly. That does happen, and I had an old thermometer I finally threw away when I realized how incorrect it was.
I’m still laughing out loud about “already dead turkeys”….LOLOLOL
Question here. What is the brining liquid you add to the pan at the beginning of roasting? I’ve always basted only with the juices produced during roasting…
Hi David,
Jill uses a basting broth in the roasting pan. Her recipe is listed right after her brine recipe above. Hope this helps.
Blessings,
Catherine
That’s amazing that your kids are so aware of where their food comes from. I hadn’t seen any official statistics lately, but my guess would be that less than 1% of the kids in this country have any idea about where their food comes from, let alone being aware that THAT bird on the counter didn’t come from this yard. Great job mama. Your kids will be healthier in their older years, no matter where they end up. They won’t blindly accept someone telling them that it is healthy. They will naturally know which questions to ask. “Already dead bird..” Hahahaha
Well I very rarely leave comments on recipes (maybe never?), but I just followed this to the t, never having cooked my own turkey before and it was amazing. I’ve never been crazy about Thanksgiving turkey, as it always seems dry, but I couldn’t stop eating this while putting away the leftovers! My only problem was that it reached 165 at about 11 minutes/ lb, a good hour earlier than I’d expected. Now, I’m also wondering if my oven might run hot, as my bread is also often finished before the time given on recipes. But no matter; it was amazing!
Yay!! I’m so glad it worked out well for you! And yes– ovens really vary sometimes, but sounds like you did great regardless!