Spring air smells like possibility.
Don’t you think?
There’s just something about the lengthening daylight and the scent of fragile green grass wafting through the air on a sunny spring afternoon that gives me goosebumps.
So many possibilities. So many projects. So many ideas and dreams floating through my head.
It’s the homesteading equivalent of a blank slate. It makes me feel like a brand-new homesteader with stars in my eyes all over again.
But there’s one part of spring planning that’s always bugged me a bit.
Starting seeds.
Not because I didn’t enjoy it, and not because I didn’t want to save a TON of money at the garden store not having to buy a boatload of vegetable starts… But rather because I had no where to put the things.
Back in the day, I slapped a board across our mudroom stairwell and called it good. It had the only south-facing window in the house, and considering the rest of our house was teensy tiny, it was my only option anyway.
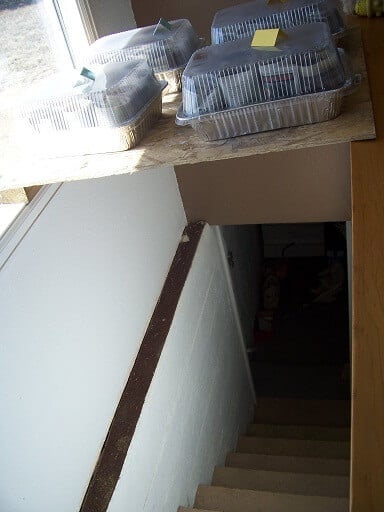
Except it didn’t really work. I had extremely limited room, and some of the seedlings really needed grow lights, not limited sunlight.
But this year is different, thanks to our crazy remodel project. I finally have a real basement and space to grow stuff. I am positively giddy.
It occurred to me last month I needed to get my act together and figure out a seed starting system. In the past, (since I’ve only been able to start a handful of plants) I used my favorite paper pots and some repurposed serving trays.
But this year I wanted to start far, far more than a dozen or so seedlings. I’m wanting to do some hardcore seed-starting, my friends… And I didn’t feel like making 200+ paper pots. Ain’t nobody got time for that.
So I drew upon the wisdom of my gardener-extraordinaire neighbor, Jana at Celtic Prairie Farm. She routinely has a huge garden, and knows exactly what works in our area. Upon her wise suggestions, here’s what we ended up doing.
Want to get a close-up visual on how we start seeds? Check out my video (below) where I show all the steps for starting seeds and also give you a closer look at our seed starting shelves:
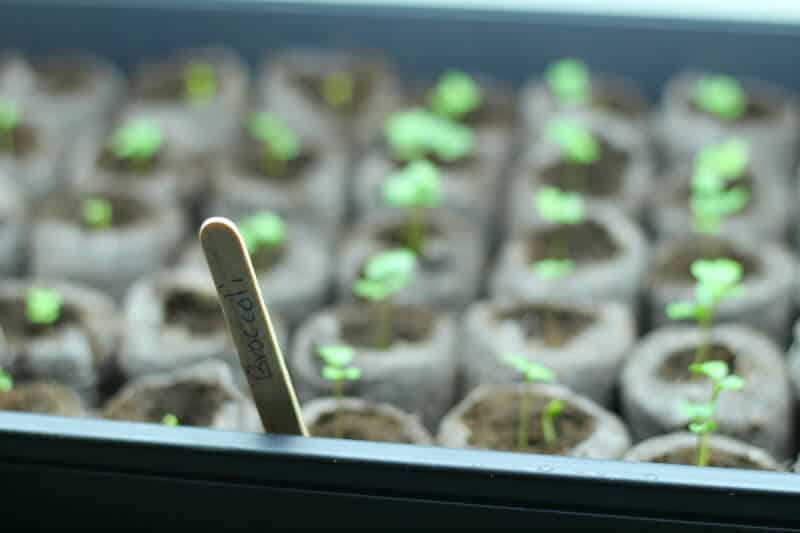
Our Simple Seed Starting System
(This post contains affiliate links)
Equipment/Supplies:
- Metal Shelving (Like these from Amazon)
- 4′ Fluorescent shop lights (We bought these from Menards)
- Small bits of light chain (may come with your shop lights)
- Jiffy peat pellets (I got this pack of 200)
- Trays (I grabbed this set of 10, but you can get creative and repurpose, too)
We looked at some table-style models (like this one), but decided to use some simple metal shelving we already had hanging around.
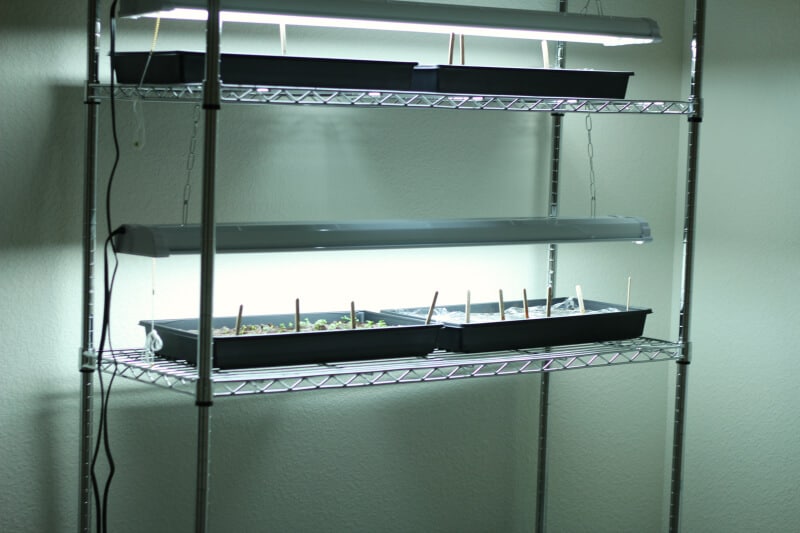
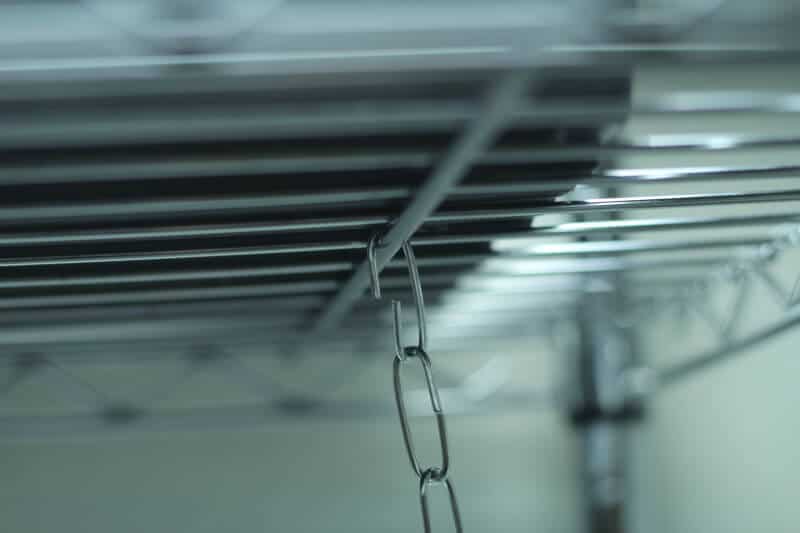
For starting large groups of seedlings, grow lights are much preferred to window light. We found these 4-foot fluorescent T8 lights at Menards and they just so happened to fit perfectly with our shelf, and they were pretty affordable too. Prairie Husband attached them to the underside of the shelves with a bit of chain.
Then I was left with the decision of which seed starting medium to use, since my paper pots weren’t gonna work.
After a whole lot of shopping around, I settled on Jiffy-7 peat pellets because they were cheap, easy to use, and didn’t take up a whole lot of space. I also grabbed some of these plastic trays from Amazon, but you could use other trays, too, depending on what you have hanging around. (I’ve used foil lasagna pans in the past and keep the clear lids on to create a mini greenhouse.)
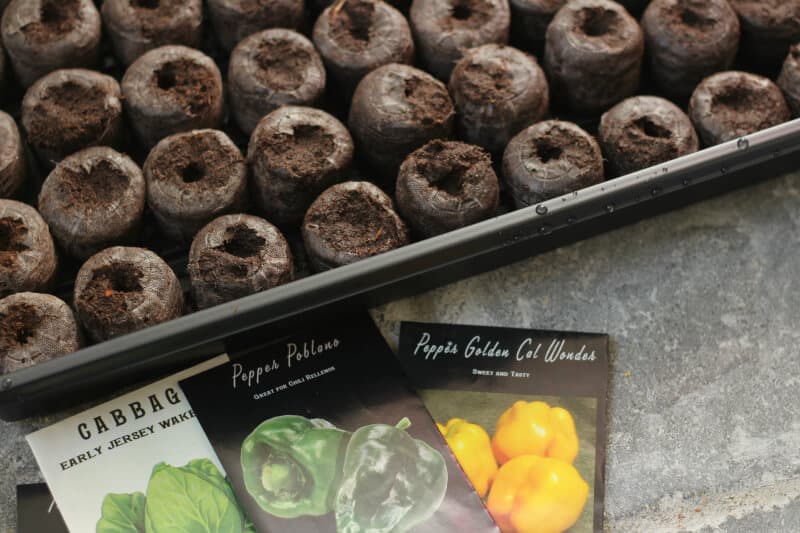
Planting the Seeds
First, check out my seed starting guide post so you know exactly when to start what.
The pellets hydrate pretty quickly– place them in your tray and add an inch or two of water in the bottom. They’ll start expanding and should be ready in about 30 minutes. (Just keep an eye on them and add more water if needed)
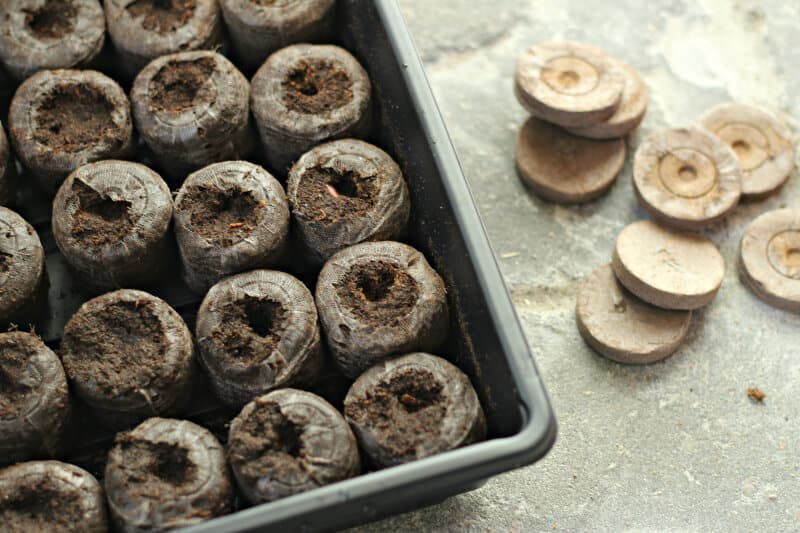
Once they are sufficiently wet, plant your seeds, cover with a bit of plastic wrap (optional, but it helps provide a bit of that greenhouse effect) and keep them in a warm place until they begin to sprout.

After that, transfer them to the grow lights and keep the lights on them for 16 hours (or so) a day. Add more water if the little pots start to dry out.
I have broccoli, tomatoes, cabbage, and various herbs popping up so far. It makes me stupidly giddy every time I go downstairs to check them. Once they get a bit bigger, I’ll likely transplant most of them into bigger pots, and then eventually into the garden come May or June.
If you are going to transplant the little pellets directly into the garden, tear the netting a bit, as sometimes it can hamper the growth of the mature plant.
Who knows… after these go into the garden, I might just starting growing some barley fodder in the basement… You never know.
Now my only problem is that I have 50+ tomato starts, and my garden is FAR too small to handle all those. But we’ll cross that bridge when we come to it. Ahem. Go forth and plant!
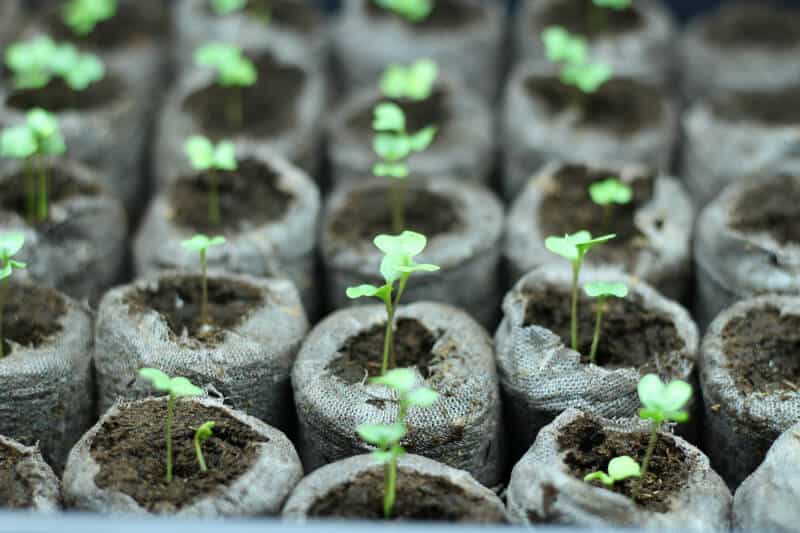

Hey, kiddo, you might want to get those lights down closer to the seedlings, but otherwise, great start! If you don’t have long enough chain you can set something under the tray to lift it up a bit.
I make plant markers out of old mini-blinds. One set of blinds makes hundreds of them. Write on them with a china marker (aka “grease pencil”) that you can get on Amazon.
Great tips Ilene– thanks!
I do the same set-up for starting seedlings. I use S-Biner Dual Carabiner clips on the chains connected to the lights. That way it makes it easier to adjust the light as the plants grow. When the seedlings first pop out of the soil, I place the lights as close as I can to the seedlings. I also install a small fan on each shelf. This acts like the wind outside and will create a sturdier plant.
I love reading your emails. Keep up the good work. It’s nice to see folks, like you, bringing back the old skills but adding the current technology to them. This makes it possible to do these skills in the fast paced world we live in.
Thank you for your support!
Too cool, I was going to suggest both (light closer to seedlings, raising them higher just as necessary, and the mini-blinds) but you beat me to it…you’ve been doing this a while 🙂 Happy planting to all!
Love this idea of seed starting. I have started seeds in previous seeds and have no problem with them sprouting. I have transplanted the seedlings into larger pots and they grow but they get awfully spindly. What am I doing wrong?
Did you use florescent lights? I find it works best if they’re about 6 inches above the seedlings! Good luck!
One of the tricks for growing less spindly seedlings is having the light closer, gradually raising them as the plants grow. The other is to hit them with a little breeze. I use a few small oscillating fans blowing on low horizontally right across the top of the soil once the seedlings are 1.5-2 inches tall. It helps the plants develop stronger, thicker stems. But don’t forget you’ll need to water more and watch they don’t dry out.
Shelley, NE Michigan
Not enough light or not close enough to light source is usually the cause of tall spindly plants.
I will add from trial and error I learned Wood sticks are bad. ? They keep moisture and even if bleached grew mold! Stupid sticks! I bought plastic but I absolutely love the old blinds idea. Thank you ? for all your hard work!
Oh wow, that’s interesting! Thanks for your support!
Frustrated. Cannot read your article or watch the video. Slow loading and blocked by pop-up ads.
Do they have to be fluorescent 6500K or can they be LED 6500K lights?
We used the jiffy peat pots growing up. The year I turned 13 my mama had 50 tomato plants and decided to plant them all, because some wouldn’t make it. (we lived on 7 acres so she had the room.) 48 plants survived and it was the perfect summer for growing tomatoes. We had bushels and bushels of tomatoes. We canned tomato juice, sauce, crushed tomatoes and whole tomatoes. Everyone was heartily sick of tomatoes by the end of the summer. 🙂 We couldn’t even give them away.
Oh yum! That’s a good problem to have, I think. 🙂
Is your basement heated? Ours is unfinished and we aren’t wasting heat on it yet. Plus it turns out our furnace will need to be bigger to heat the basement anyway….thought for another day. Anyway, I just wondered as I’m having awful luck in my basement this year. Last year I started them in the exact same way but upstairs in the living room. This year the set up is in the basement and the plants are teeny tiny. I’m wondering if they’re just too cold. Something to think about anyway.
Ours isn’t super duper warm, but it is semi-heated. I think the warmth is important when they are first sprouting, so that may be part of your problem.
We cover our stand with a sheet of plastic. The warmth generated by the lights creates a greenhouse effect for us and the plants grow really well. We have added a blanket over the unit on really cold nights.
That could very well be the problem! A friend of mind set up a mini green house in her unheated basement for seed starting. She gets great results! Her first version was a plastic tarp made into a tent covering her seed starting table. Now she has a greenhouse made out of PVC pipe she can walk into.
These peat pellets are a very good option and surely give to the seeds a good nutrition. Also a better and faster way to start your seeds if you don’t have time for making your own seed starters at home. I usually make mine from old newspapers, boxes, egg cartons, etc, and the results are quite good every year. Thank you for sharing your ideas! Happy gardening!
I would love to start my seeds but I don’t think they’ll grow in our unfinished basement and we don’t have room upstairs. Such a bummer, as I have all the supplies. Guess I’ll plant from seed in the garden and hope everything grows.
Is your unfinished basement heated at all? One other idea is to put them in a small room with a heater.
Rachel – I went to my local Nursery some years back and bought a heating mat to go under the trays which will kick off termination in a few days and then you just keep them under lights… it doesn’t have to be super warm in your basement, we do all of our seed starting in the basement as well and this works great. Putting a plastic tray over the seed starts (not plastic wrap) also both insulates them and keeps the moisture in as well in the beginning!
Why don’t you buy a small room heater…the ceramic ones are great, don’t uses much power
I use red Solo cups. I write the variety and plant date on each cup. I put (for example) 6-8 broccoli seeds in each cup. I mark dates on a calendar when each cup should be sprouted (look on the seed pkg – usually 7-10 days). If seeds haven’t sprouted by the end of the possible sprouting period, they get emptied out and I don’t waste my time waiting for seeds that will never sprout. Also, I start a new ‘cup’ of broccoli each week (for example). My goal is to have a steady supply all season. After the cup of seeds has sprouted, gently pry out the seedlings and plant into individual pots.
Many seeds are started in a cup, cups go into a tray, and trays go into a cardboard box that has one heat mat at the bottom of it (search “germination chamber”). My box has room for 2 trays in it, one above the other. I push a thermometer through the cardboard, and lay a towel over the top. I can easily keep an eye on the temperature inside, and by arranging the cover can achieve the perfect sprouting temperature. No lights needed for sprouting! I consult my calendar to see if I have anything that should have sprouted – if so, get them out of the box, put into individual pots, and under lights. I can plant all the seedlings I want, using one heat mat for a multitude of trays and in a very small footprint.
You could also get a heating mat and put the seedlings on that. I have one that I use that plugs into the wall and I can set my seedlings on it to keep them warm in my spare room that has no heat source:)
I love your set up! I won’t be starting seeds on my own this year, just buying starter plants, but you have given me yet another reason to clean out my basement. I have the perfect spot picked out for a similar set up! I might try the peat pellets too. Though I am partial to reusing/ repurposing items- growing up we always started seeds in half gallon paper milk cartons 🙂
Yes– basements are perfect for this sort of stuff!
I’m going to have to disagree with you on the use of peat pellets and plastic wrap. The harvesting of peat has long been known as incredibly bad for the environment and Saran Wrap is incredibly wasteful and neither reasonable nor recyclable. More sustainable options would be to simply reuse last year’s plant start pots, and put them all in a tray with a mixture of soil and seed starter mix from one bag, and then having a tall plastic with you can reuse every year. The extra benefit of using the pots is that you won’t have to transplant a little starts into pots as they’ll already be in there. In our basement we have grow lights we found for cheap on Amazon, atop a long folding table, and a couple of heating mats underneath the trays to kick-off germination the first few days. Works like a charm and everything gets reused each year, and the soil doesn’t contain any unsustainable materials.
Aimee, I’m glad you mentioned the peat issue. We are using it vastly more quickly than it generates, making it a virtually un-renewable resource. It’s so easy to find empty plant cells… just save any you buy and reuse, or run an ISO ad on your local buy-sell-trade, freecycle or Craigslist and you’ll probably be offered more than you can use. Fill with your own soil/compost blend and you’re in business! And yep, the lights could start lower. Check your local thrift stores for heating pads to heat your trays from underneath and that will help too.
Shelley, NE Michigan
I love all of your emails. We won’t be doing a garden this year, but years past we used everything we could find, cardboard egg cartons, small yogurt containers, the bottoms of milk and almond milk containers, ect.
As for your comment in the email about smells bringing back memories: when I was a kid, I would go with my grandparents from their home in southern Michigan to their cabin in the u.p. of Michigan and Every time we would smell skunk, my grandpa would mention how he liked the smell because it reminded him of going on hunting trips with his dad in the springtime. Now that my grandpa has pasted, I like the smell of skunk because it reminds me of him. I think there is a skunk living in our back yard, and ever once in a while I step out there and smell it. Can’t help but think of my grandpa, one of the greatest men I ever knew.
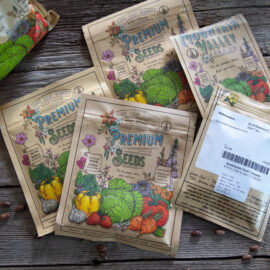
what brand of seeds do you recommend? i saw the seeds in the photo but i just could not tell where they were from!
Those are Baker Creek seeds!! Id recognize their packages anywhere. They are the best!!
yep– Baker Creek! http://www.rareseeds.com
Great set up! I have mine on an electric blanket taking up half my dining room right now ha ha! My husbands grandma taught me how to start seeds and if you poor boiling water over you jiffy pellets they pop up in just a matter of minutes and also great the soil up nicely which also speeds up seed germination! I also need to figure out what to do with my plethora of tomato starts!
*heat up the soil
Spray ungerminated seeds with very warm water in a spray bottle, helps give warmth and humidity.
I like the fancy shelf, it’s very pretty. For those of you who like the stuff lying around method, perfect “shelving” can be made from cinder blocks or milk crates as the sides, and plywood, particle board, or planks suspended in between. Little eye hooks can be screwed into the underside of each to accomodate the hooks. This is how we grew our seedlings for YEARS, a bit unsightly, but works none-the-less. Also, be sure to put one “warm” light and one “cool” light bulb in each of your shop lights and turn the trays daily. The combination of bulbs more accurately imitates natural sunlight.
Jill, I thoroughly enjoy all of your emails and you have great info, not trying to step on any toes here. Thank you.
Jill, it’s great to see your progression as a homesteader. And I love reading all the comments of like-minded people. We have been homesteading here in Eastern Oregon for 33 years and we are still learning.
I am fortunate to have been given several 38-cell starting trays several years ago and they are perfect for starting tomatoes, peppers, and eggplant. The cells are 5″ deep; I fill them about half way with a sterile mix of peat and perlite. (I sterilize it myself to ensure no damping off disease in the seedlings.) As the seedlings grow, I fill in the cells with the same mix plus sterilized compost. (I know many will question why I ruin my compost by sterilizing it, but there is too much risk in a closed environment for undesirables to attack the seedlings’ roots. There will be plenty of time in the garden for the beneficials in the compost that I add to the beds to do their thing.) After traveling to Scotland a few years ago, I, too have concerns about the decline of the peat bogs. The peat I am using now I have had for at least 10 years. When that runs out, I plan to try a mix of coir and perlite for my sterile starting medium.
I use a metal shelf system similar to yours, with industrial casters. I am lucky that the room where I start my plants has a door that leads to our deck. When it is time to harden off the seedlings, mid-April in our Eastern Oregon location, I will just roll the whole unit outside for progressively longer each day.
A note about shop lights: over the 25 years or so that I have been starting all my own plants (about 600-800 per year), I have spent so much money on fluorescent lights that did not last more than a couple of years (for the number of plants I start, I need at least 10 4′ lights, which is why I use shop lights instead of grow lights). This year, I decided to bite the bullet and invest in LED shop lights. I was skeptical at first about the light spectrum. I did notice that when the plants first emerged and went under the lights, the ones under LED did not grow as fast. But after they achieved their 2nd or 3rd true leaves, they caught up. Now that they are all about 7 or 8 weeks old, I can’t tell the difference between the ones grown under LED and the ones under fluorescent. The LEDs are more expensive at the outset, but since they have a 5-year warranty, I am counting on their lasting longer. (You can bet I am saving my receipts!)
Ah! Damping off trick… cinnamon! I tried it a few years ago and it works! Sprinkle a little bit on top of the soil after planting then water into the tray or use a fine mist sprayer so you don’t wash it all away.
Shelley, NE Michigan
We live in a tiny home right now, 9 of us in about 980 square feet. I’ve been struggling with finding a way to start my seeds here at home instead of spending so much at the farm stand. Thank you so much for this! This is going to save me a lot of time and money!
I don’t have a basement or an u used south facing windo, so, I was thinking of a cold frame. What do you think of that? I’m also saving my toilet tissue rolls, cutting them in half, cutting 4 slits, folding to make a bottom. I will buy some Miracle Grow potting soil to go in there,and plant my seeds in it. I’m looking forward to Spring and gardening.
I turned my shed into a giant grow box one year and didn’t expect the outcome. I was having so much fun planting I used every container I could find that wouldn’t collapse with watering. I had so many seedlings I couldn’t transplant them all so I ended up giving a lot away. Worked out very well using large 4ft shop lights and 4×8 sheets of plywood on saw horses. This way I could take it all down when I was done and have my shed back. It’s a great way to experiment and learn how to grow without putting a whole lot of money into it.
Last summer I tried those little pellet things, Everything I planted seed-to-ground came up – absolutely nothing that I had in those lil things came up. Not one plant.
Wow– that’s strange. I had really good luck with them last year.
That happened to me also. I bought a lot of them at the end of the season, so I will try again, but I will be redundant and use other methods, too. They were quick to mold under the plastic lid. Maybe I will apply the hints I just read and sterilize them first–maybe bake the pellets before hydrating them. And use some bleach on my reusable plastic trays. And then sprinkle with cinnamon.
Hi. I live in Arizona, so we have two planting seasons. You always have great ideas, Thank you. I’ve used the pellets and had success with them. But I didn’t like having to transplant to the next size because they outgrow so fast before I could put them into their permanent home, hehe . So I buy the bigger pots and reuse the ones I can ( some decompose so I can’t. ) I mostly have a container garden, I also have two raised beds. I love gardening. We just rent so if we were to have to move, the garden goes also, the raised beds a little more tricky. All my fruit trees are in pots, I get lots of figs and lemons. Trying for apples and nectarines now also. Keep sharing I love your posts
I agree.
Purely for your amusement, one year in Santa Barbara (the northern end, very much different from the mansion area of Montecito to the southeast that is currently under mud) I acquired a truckload of theoretically sterile solid waste from the Goleta sewage treatment plant. It was very cheap, reputed to be very good for plants.I’d never use something like that now, knowing about drug and heavy metal residues, but I was young and poor. I got about two hundred tomato volunteers, thinned to about a hundred. All were cherry tomatoes, probably because their source fruits had been hybridized commercial varieties. I had, literally, thousands of cherry tomatoes every week all the summer and fall. Fed them to goats, pigs, chickens, and they were always on our table.
You will definitely need to tear or remove the mesh covering on those peat pots. We used that brand a few years back and after 5 years of use or composting, they are still exactly like when I bought them. The poor tomatoes that grew in them the first year were almost completely root bound inside that tiny bag. The next year I used the hydrated peat pots as filler in the bottom of bigger pots. At the end of that summer, they went in the compost barrel and came out the next spring with no deterioration. Finally, I knocked the peat out of the cover which looks like a piece of nylon stocking and threw the cover away.
They are quick and easy at the start but a pain later on.
I read that peat bogs are being depleted, so I use dirt directly in plastic trays like you’re using (or egg cartons). Unless you wait to plant until all the plants/roots are growing together (which you may get with the peat pots as well), you shouldn’t have any trouble separating plants with a trowel or even a large spoon like you probably have on your stove.
Agreed. It takes peat bogs thousands of years to recover, and they’re being depleted too quickly. I encourage everyone to use ANYTHING BUT PEAT!
I’m making my own seed starting mix using coconut coir and perlite. Super easy and I can feel much better about having much less an impact on the environment.
HELP!!!!!!!!!!!!!!!!!!!!!!!!!!!!!!!!
I live in a suburb of Atlanta. I have a basement which is great for germination. HOWEVER…..When I tried to start seeds on my dining room table (best light source). The cats knocked the pastic cover ff and ate my perfectly growing seedlings.
I don’t have the capability to rug a grow light system and I’m at a loss.
How can I successfully grow from seeds this late after the last frost (April 29th) and have successful results?
HELP ME!!!!!!!!!!!!!!!!!!!!!!!!!!!!!!!!!
AT this point, I’d probably just purchase some seedlings from a local nursery and focus on the seeds you an plant directly. There should still be plenty of options for you there.
I have the same set up in my house. Mine’s in the dining room though. The basement is too cold in the winter. I used the same metal shelf that I had in the attic for the Christmas totes. Now the totes sit on the floor until the veggies are ready to go outside.
I have those same shelves for starting seeds. I love them. I don’t like buying pots every year, peat pots or otherwise, so I use whatever re-purposed food containers I have saved, from mushrooms and some other produce, yogurt, cottage cheese, tofu, or whatever looks like a good size. I punch or drill holes in the bottoms for drainage and set them all in boot trays. Unless I accidentally step on them when transplanting (born klutz), I can reuse them for several years. I put the shelves by the south windows and use whatever I have for supplemental light. Right now I will be using a row of those clamp on round flood lights with 100 watt equivalent standard LED bulbs that I bought in the local dollar store. I make my own starting mix of coir, perlite, vermiculite, and worm castings. For markers, I cut the flat sides of jugs from milk, cider, or whatever into strips and write on them with a permanent marking pen. I wrap the shelving units in clear plastic to help keep the heat in. Depending on when the snow melts, I will move at least some of the plants outside a few weeks before transplant time, under cover, with some incandescent lights for warmth. I usually end up with way more starts than I can use, and give them away to anyone who will take them.
Well, this year my husband says – let’s start the tomato seeds early. Yep, I agreed and all but 2 of the 40 Baker Creek seeds germinated. Our inside seed starting area is going to be overflowing this year. Here in East TX our last frost date is 3/26. I’m just hoping we don’t have a muddy spring again.
You people are so amazing. I’ve been studying all kinds of greenhouse gardening; trying to figure out how I could possibly afford / and where / to build one and all I need are shelves and lights in my basement! My plan is a giant herb garden to help deter deer and rabbits with my apples and greens in the center, lots of gooseberries, currants, (deer resistant) and elderberries around the borders of the garden with lots of “stinky” herbs around them too, again hopefully to deter those darned deer. My worry was how can I possibly afford hundreds of perennial sage, hyssop, oregano, etc. plants …. now I know how to do it. I’m at retirement age; now I’ll have lots of fresh herbs to sell at farmer’s markets and maybe make enough to pay the taxes every year. I’m so happy I found this website. I can see light at the end of my ‘fear of retirement’ tunnel thanks to every one of you. Thank you!
Thank you so much for your support!
Hmm, I got a 1000 watt grow light off amazon along with a grow tent. They’re made for something else, (which I don’t grow), but they work well with other seedlings. The light also has a fan that helps circulate the air inside the grow tent. Works great!
Here’s the amazon link to grow tents: https://www.amazon.com/s?k=grow+tent&ref=nb_sb_noss_1
Here’s the grow light which incidently is kind of nice working around, especially in the lonngggg winter’s we have here in the Wind River valley. https://www.amazon.com/Giixer-Double-Spectrum-Hydroponic-Flower/dp/B07HFC7HV5/ref=sr_1_10?keywords=grow+light&qid=1579733212&sr=8-10
I lived on the northern prairies of Canada for numerous years and understand the wind issue! Have you ever thought about an in-the-ground greenhouse?
Hey Jill! This is a great way for those of us in the dreary states to start seedlings. A few years ago I started looking at some grow lights and realized very quickly that it was out of my budget. I got plug-in shop lights and put daylight bulbs in them. They throw a bit of heat so I do have to water them a bit more but sooooo good having the light! And with the dyi chains you can adjust the height as they need it. I do think between playing in the dirt and having the lights on my moods have been much better too! The hardest part is waiting for the right time to start seeds…I TRY to hold out until Valentines Day but don’t always make it!
Be sure that your lights are aquarium or plant lights. If you raise the same veggies under regular and plant lights, you will see a huge advantage to the latter. The lights cost more but are worth it!
Consider building a “half- greenhouse” (the long way) on the south wall of your house if possible! The house shields it from the north winds. We made a temporary one out of 6 arched cattle panels in tension between stakes in the ground and a board halfway up the house wall, covered with greenhouse plastic, and junk windows and doors on the ends. In February it would get over a hundred degrees in there–we could get heat in the house by opening adjoining windows! And having it right by the house made it handy to go in and out–you might even have a door already in your house that could access it. You’ll use it more if it’s close!
What bulbs do you use in the 4′ Floresent lights? do they have to be anything special?
Can you just use the T8 bulbs that come in the fluorescent fixtures? Or do you need special bulbs (T5?))
Did you use the peat pellets in this video? I’m confused if I can use the pellets in those little plastic trays…new to this! Love your blog!
I may have missed it, but what power(wattage?) of bulbs for your lights do you use?
Is necessary to use the organic peet pellets if you want your garden to be organic? Or is it more like seeds where they don’t HAVE to be organic in order to grow an organic garden?
I used your links and bought all the things. The shelves weren’t wide enough to set up two trays side by side and the lights were too long for the shelves. Only found this out after setting it all up. Frustrating.
So sorry the setup wasn’t perfect for you! Fortunately, this setup can be moved around and adapted. Try purchasing a larger shelving unit from a store and that should fix everything. Measure the length of the lights and the width of the trays first so you can get an exact perfect length shelf. I hope you can find a good budget-friendly shelf option!