Cheap isn’t always better.
I’ve learned over the course of my homesteading journey that sometimes being willing to pay a little more for a higher quality item is completely and totally worth it in the end.
I’ve applied that philosophy to essential oils, cookware, and canning equipment, and it has served me well.
Going for the cheapest option, while tempting at first, can often bite you in the rear later down the road.(Says the girl who’s had to rebuild several fence lines, due to using the crappy fence posts the first time around…)
HOWEVER.
When I find something that saves me money AND still works well, I’m a happy, happy camper.
And that’s exactly the case with my improvised cheap milking equipment.
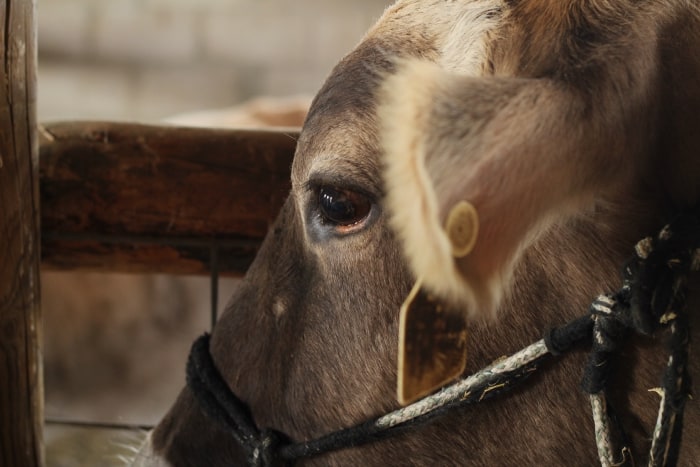
Starting with dairy goats or a milk cow is definitely an investment…. But it doesn’t stop there. Once your animal freshens and you are ready to milk, you need a specific set of equipment to make sure that precious fresh milk is the tastiest and safest it can be.
Buckets, lids, jars, filters, strainers, separators… You can spend a LOT of cash on these items if you through a dairy supply store.
Thankfully, there are some incredibly frugal and easy-to-find options you can use instead. Here’s how I have handled my fresh milk for the last 4+ years, using improvised equipment costing me just a fraction of what I would have paid at the dairy supply store. Sometimes, cheap milking equipment is totally okay and actually quite practical. —>
Cheap Milking Equipment for the Home Dairy
(this post contains affiliate links)
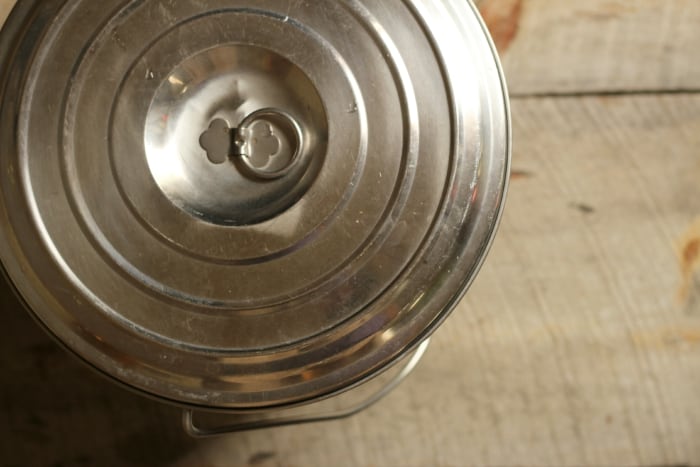
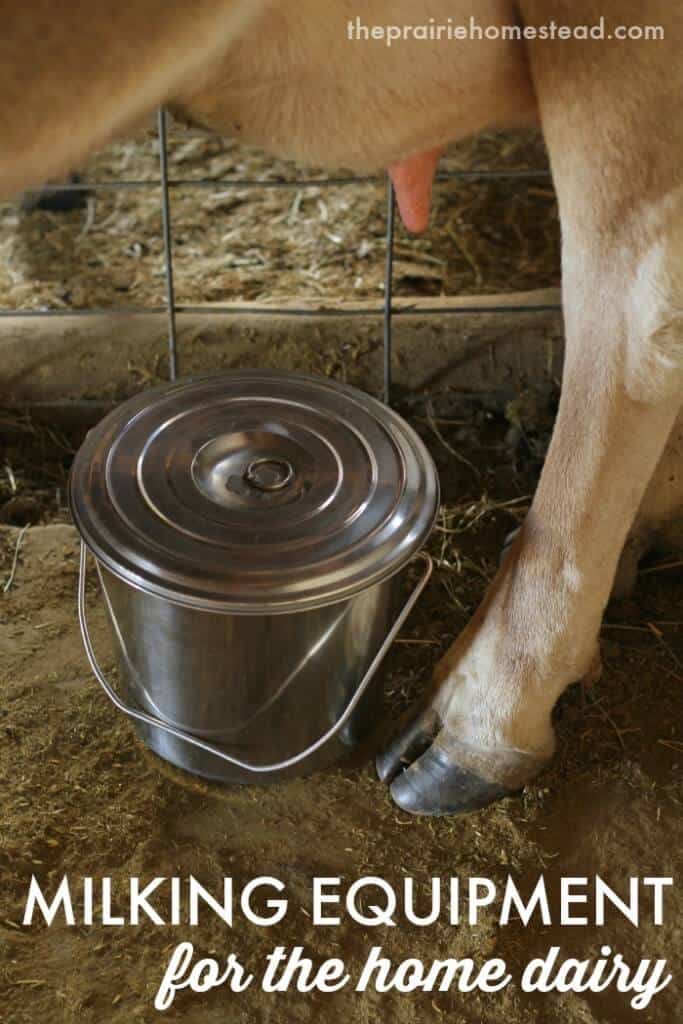
The Bucket:
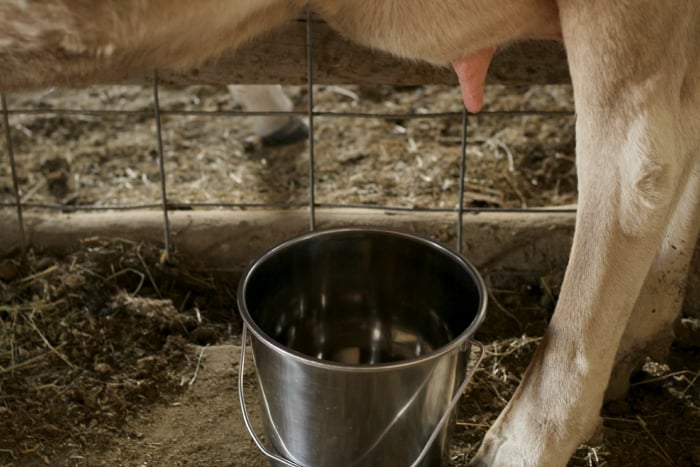
Arguably the most important part of your home dairy set-up, a good bucket is worth paying a bit more for.
There are two things to look for when shopping for a bucket:
- It MUST be stainless steel so it can be properly sanitized
- I highly, highly recommend getting a bucket with a lid
There are many stainless steel buckets WITHOUT lids available on places like Amazon, but trust me– you’re going to want to have a lid. The minute you get done milking, the universe will start conspiring to get junk in your milk. The wind will start blowing, the cow will kick up a manure dust cloud, and the cats/dogs/chickens will have their “fresh milk radar” on full alert.
You need to have a lid to slap on the bucket while you finish up in the barn. Some people use a dish towel secured on top with clothespins, but honestly? I’ve found that to be a huge hassle, and the wind will blow it off anyway. Moral of the story? GET A LID.
A 13-quart to 16-quart stainless steel bucket with lid will set you back $150-$170 at most dairy supply stores.
I personally use a 13 quart (that’s slightly over 3 gallons) bucket with lid I nabbed off eBay a loooong time ago. I think I paid around $50 for it, and it has served me well.
If you’re milking goats, sometimes you can find smaller stainless steel containers/buckets at kitchen supply stores too.
So definitely shop around before spending the big bucks on a bucket. However, if you can’t find a cheaper option, don’t feel bad about investing a little more in a good bucket or two (like this one). It’s worth it.
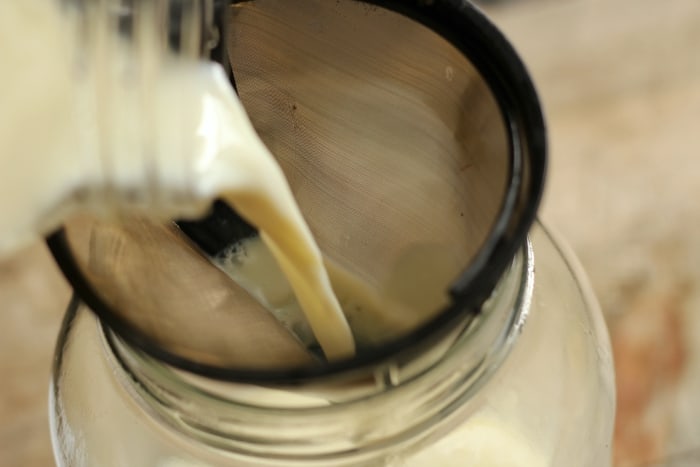
The Strainer:
Straining your fresh milk is a must. No matter how careful you are, “floats” are inevitable… And fishing a cow hair out of your mouth while drinking a big swig of fresh milk is a surefire turn-off.
An “official” milk strainer will set you back around $40, plus you’ll need to buy replacement filter disks when you run out.
My strainer/filter set-up cost me less than $10. And I never have to buy replacement disks.
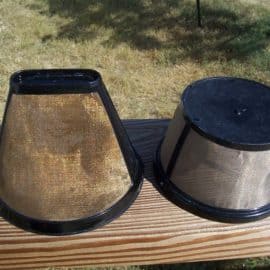
I discovered long ago these little reusable coffee filters are pure magic for straining milk.
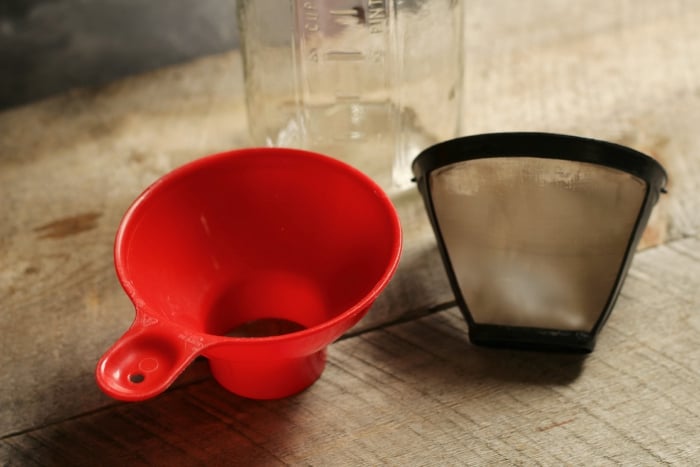
They can be popped into the dishwasher for sanitization, and in all the years I’ve used them, I’ve NEVER had a floatie get through.
Just make sure you get the cone shape, not the kind with the flat bottom, as the flat-bottom ones are much slower to drain.
I can set the coffee filter right in the mouth of my larger gallon jars, and it fits perfectly.
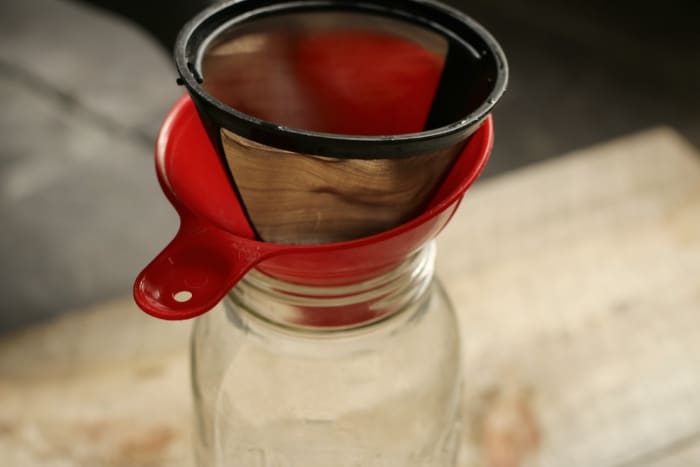
If I’m using a wide-mouth canning jar, then I pop a canning funnel in first, and set the filter inside the funnel.
Although I generally do NOT use plastic around my raw milk (due to its ability to hold in off-flavors), since the milk hardly touches the funnel at all, I do use a $6 plastic canning funnel here. Or, for a little more, you can get an awesome stainless steel one that even converts between regular and wide mouth jars (great for canning) right here.
However, if you really want to splurge, then shoot for the $8 stainless steel canning funnel instead.
BAM. I love saving money.
The Jars
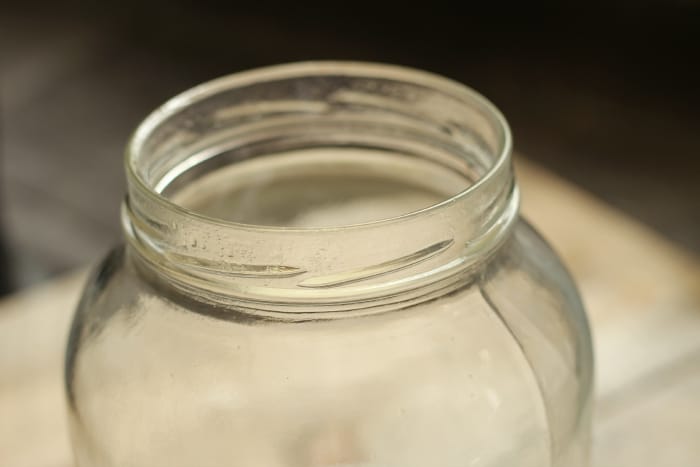
Glass is definitely my material of choice for storing milk. It won’t hold weird flavors, and is easy to sanitize. If you are milking goats, then one-quart or two-quart canning jars will probably suffice.
However, if you have a milk cow, then you’ll want to have plenty of gallon glass jars around.
I searched high and low for gallon-sized glass jars when I first started milking, and it wasn’t always easy to find them.
One very frugal option is to save back (and have your friends save back) gallon-sized pickle jars. These will work wonderfully, as long as you wash them well first. (Pickle flavor + milk = gross.) Some people have also had luck asking restaurants to save glass jars for them.
Unfortunately, I don’t have any restaurant connections, and I’d rather make my own pickles, so those options didn’t really work for me.
Individual gallon glass jars on Amazon will set you back about $12 each (yikes), but I found a much better deal through Azure Standard, where I can get gallon glass jars (with lids) for $14.80 for a set of four.
The downside? Azure Standard isn’t available in all parts of the country… So if you don’t have access to an Azure drop point, that info won’t be much help.
On the other hand, I’ve found that Lehman’s has a great selection of mason jars in general and if you’d like to use 1/2-gallon jars for your milk (which are much easier to lift and pour from, of course), Lehman’s has a set of SIX 1/2-gallon jars for a steal!
The Cream Separator
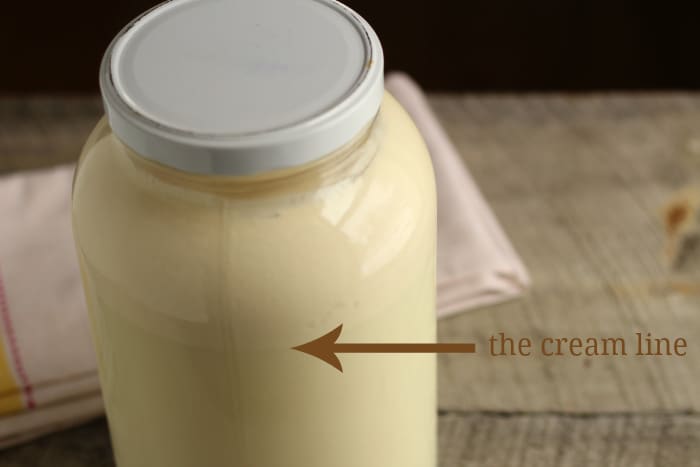
Ah yes… the cream separator debate… Should you get one, or should you skip it?
Well, the choice is entirely yours, but after four years of milking, I’ve never once felt like I needed one.
A manual (non-electric) cream separator will typically set you back around $650. This old-time cream separator, at Lehman’s, is much better priced than you’ll find others to be. But be sure to factor in the time it takes to properly clean the separator after each use. Overall, I’m just not a fan of separators in general.
So I use this instead:
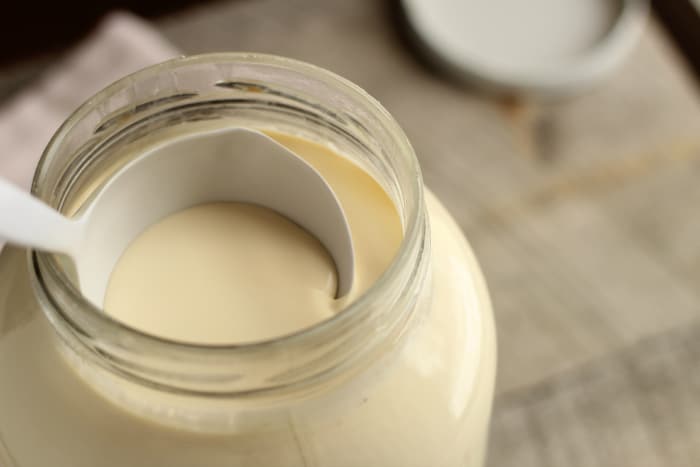
Yes… just a good ol’ fashioned ladle. I used plastic for a while, but recently upgraded to a snazzy stainless steel one.
Ok, Ok… I know it’s not exactly equivalent to a fancy separator machine, but it works beautifully for me, and clean up is a breeze.
Get the full scoop on separating cream from fresh milk in this post.
So, as you can see, home dairy equipment doesn’t have to be fancy to be functional. Get creative, scour the aisle of your local stores, and see what simple solutions you can find for cheap milking equipment.
And you may be interested in listening in on a podcast I just recorded about how we breed and calf our cows, cause, after all, that’s necessary before you need any dairy equipment…
Other Home Dairy Posts You’ll Enjoy:
- Family Milk Cow FAQs
- 10 Tricks to Stop Your Milk Cow from Kicking
- Breeding a Cow with Artificial Insemination
- Are Twin Cows Sterile?
- Why We Drink Raw Milk
- 3 Home Dairy Myths




Love it, and perfect timing for us! Thanks Jill, I’ve been super curious about what your milking pail looked like lol! I hadn’t thought about the lid issue, and that’s a great point, so I’ll definitely be looking for a deal on a lidded pail 🙂
Thanks!!
This is a good post! I bought 2 stainless steel buckets from Tractor Supply, then eventually found a lid that fit them in a resale shop. I have several bar towels (I think they are called) that I use to strain our milk through. They are cheap, and once we stop using them for straining, they go into the rag drawer for cleaning.
We are getting a Tractor Supply soon– I’ll have to check for buckets there!
I hadn’t yet found a good milk pail. I hadn’t found one I really wanted. I have the big one that my milking machine milks into, but it’s way too heavy to process milk. I have my mother-in-law’s 2 old aluminum milk cans, but I don’t use them. I actually found one at walmart. It was $15, I think. It is made to look and function like a milk can, but it has a spigot on it to dispense lemonade. I’m guessing these country-wannabe women buy them for their “rustic” outdoor events. Well, this country girl puts it to some heavy use very regularly.
For jars, I use pickle jars, and an assortment of other gallon jars I’ve dug out. I went digging in my husbands grandmother and great aunts barn and dug out some very old jars. I had to order some lids online. It took some doing to figure out where to order from, and how to measure for the size. But I thought it was cool that I was using the same glass jars to hold milk, that had held milk for 4 generations now.
For a strainer, I use a canning funnel, a colander, and a piece of fabric. I have several fabric filters that I have hemmed. I wash them in dish soap when I wash up my strainer and milk can, then let them dry on the line. I save them up till I wash clothes, and wash them all in the washing machine. This fabric is just a flat piece of fabric like a fabric handkerchief or cloth napkin, hemmed on the edges. I use mostly white or light colored fabric, though if they aren’t light colored, they’ll get that way quickly!
Thank you for the great information.
Well, I don’t have a cow to milk :-((, but in my dreams, maybe one day I will.
As far as a cream separator goes, I had a friend who used a sun tea jar with a spigot on the end, let the milk separate, then drained the milk from the bottom. I’m not sure how she cleaned the spigot though.
I do this too! It’s never hard to clean but there are rules for washing raw milk. Just the same way you wash for blood you should always rinse first with cold water. Otherwise you “cook” the milk onto the glass. Some call it “milk stone”. After the cold rinse, wash with hot soapy water.
Yes– I talked about the tea jar idea in my cream post. 🙂 I know a lot of people like that method– I don’t have room in my tiny kitchen for it, so I stick with the ladle, but a lot of people swear by the spigot jar.
You’ll get your milk cow someday!
I use two stainless buckets for milking. One, I milk into, the other, I pour the milk into and cover with a lid. I bought one at the feed store and one online. Both were around $30 each. For a lid, I had bought a set of inexpensive stock pots and one of the lids is the perfect size for my bucket. I recently milked for some friends and they had that same set of stock pots and that is what they milked into. The set was on sale for $40 at Cabelas when I bought it. Like you, I use the gold tone filter and a SS canning funnel. I used to use a small sieve lined with flour sack cloth filters that I had cut from larger towels. I still have them, put away, but after I saw that the gold filter worked for you two years ago, I switched and love it. I had been considering trying the coffee filter so I was glad when you originally posted about using it. Bottles, well I started with the gallon pickle jars, tried asking around the store delis for some but none were available, just the ones we emptied. Hated that the lids leaked all over when shaking the milk to mix in the cream, and the milk would not always run out nicely. Then I found the 1/2 gallon Ball jars, and I love them. They run around $10 for 6 of them, but they are so easy to store and pouring the milk out of them is great. Also, the smaller size is easier for kids and older folks to handle.
Thanks for posting this and all your teaching ideas. I am not so new at this, but I still learn things. The exchange of ideas is great.
Praying for you and your new baby as you come up to your due date. Blessings.
Love the idea of finding stock pot lids to fit the buckets! And I’m a big fan of the 1/2 gallon ball jars, too. 🙂
Dear Jill,
I recently signed up for your email newsletters. I want to express how much I enjoy reading the articles each time. I am a newbie at this farming stuff and want to say how much I appreciate your knowledge. I am beginning to branch out from Asian pears (very labor intensive) to animals. Thank you so much for sharing your knowledge with us.
Gary
You are very welcome Gary! I’m so glad you are enjoying the newsletters. Growing pears sounds like a blast!
For those who don’t have a dishwasher, putting the strainer in pot of boiled vinegar and water helps sanitize it. We do this every so often (in addition to daily washing of course).
I love the cheap strainer idea! Our family has had family milk cows for about four years now, but we decided to invest in a large, stainless steel milk strainer (that can 1 gallon of milk at a time!) about 1-2 years ago. The cheap strainer sounds like a great way for homesteader on a budget to get their milk clean.
One suggestion that I have… Skimming the cream off of gallons of milk each day became a real time consumer in our home. So, someone in our family came up with the brilliant idea of using a glass, 2 gallon, drink dispenser instead of jars.
Here’s a link to one similar to the ones we have (Our’s were purchased at King Soopers for about $20-30; and we don’t use the stand in the fridge!):
http://www.bedbathandbeyond.com/store/product/main-street-crystal-beverage-dispenser-in-clear-with-decorative-stand/1044566371?Keyword=glass+drink+dispenser
Using the drink dispenser instead of jars was a little bit of an investment (we have two), but we love never having to skim cream again. (And it’s still MUCH cheaper than a separator.) All the cream rises to the top, and we can easily dispense milk until only cream remains; and then we just dump the cream into 1/2 gallon canning jars. One thing that is important though, is making sure that you buy a dispenser which has a spout that is low on the body of the jar. The higher it is, the more milk that gets left beneath when you get to the cream layer.
P.S. It sounds hard to keep clean, but we just shoot hot, soapy water through both ends of the spigot and it seems to work well. You do need to stick something like rolled up paper towel in there and rub it around to pick up any milk residue though.
Jill,
Excellent post. I just watched an hour and half video (actually 2) on “vimeo” about a guy, Tim Wightman, who milks 15 cows and he was very informative on the process. I knew it was too much for a homesteader but I thought it was good info anyway. You can watch it here:
https://vimeo.com/10738103
I pinned it on Pinterest and I follow you, so you could look at my board.
I really, really, really, really…(how many should I put here??) well, I want a milk cow very badly. And I want Suffolk Punch drafts. And maybe some pigs. Then, along with a barn and the equipment that goes with each, I will be content and feel safer. I hope I get to do it in my lifetime.
I so enjoy your writing. Hope your pregnancy is going well. My best wishes and prayers to you and yours.
Pam
Jill,
great post. I grew up on a farm, but now I live in town. another place to look for stainless buckets and whatnot could be found at a farm supply store.
Hey Jill just saw your article on cheap milk stuff and you said you ladle your cream off, we did that for a while till my husband started to siphon out the milk. We use a piece of copper tubing and an old stretch hose form therapy. I sit the empty jar in a kitchen drawer and then put the milk on an upside down bowl on the counter and then put the pipe in the milk suck on the hose till the milk starts flowing and then put that down in the empty jar, you can see a line for the cream so we just watch that. makes it much easier and we get more of the cream to make butter. hope this helps and makes thing easier and less messy.
Wow- I never thought of doing that. Smart!
One thing if you get pickle of pepper jars if they still have a smell if you fill them with dirt and let sit for a day or two it will take away the smell.
Cool idea!
Thanks for the tips, Jill!
We just moved to bare land where we will be starting our homestead (and we need to build a home at some point… Hmm… Lol). I bought 4-5 varieties of garlic in hopes of planting it this fall but I may have missed the planting date. I’m near the Canadian border and we’ve hit 32 degrees a couple nights already.
Also, we discovered that we sit on river rock, filled in with dust, so it seems that we may need to work the ground a bit to get it ready for planting anything other than more rocks. Any posts on getting soil ready for planting for noobs?
I look forward to following your blog! You’ve done an excellent job with it so far.
It wouldn’t hurt to do some soil testing to see what you’re lacking specifically. And then lots of compost/manure and I would recommend the deep mulch method, too, once you get the nutrients in balance. 🙂
My Jersey had her calf 2weeks ago and I am only getting about 3/4 of a gallon of milk in the morning and about a 1/2 gallon at night. Is there anything I can do to get her to produce more milk. Any help would be helpful and appreciated.
She may be withholding her let down to save milk for the calf. Are you separating them at night?
My mother-in-law kept her cow and calf separated until milking time then she put the calf on one side and she milked on the other side. She said the cow let down her milk quickly with the calf on the other side and she always got lots of milk which she made into butter and buttermilk and then sold. She had a nice business!
Hi Jill, I’ve very much enjoyed your post. I used to milk between 14-18 goats years ago and found a trick to keeping hair, dirt etc. out of my milk bucket. I would take either cheese cloth (doubled), or mesh (used in making jelly & such), measure my bucket, cut the cloth in a circle a bit bigger than the bucket’s diameter, then either fold the edge over a small piece of rope (like you would for sweat pants) or elastic. Then before milking I would put it on my milking bucket and it was a big help keeping my milk clean. Also I used a canning funnel when straining my milk. Btw, I picked up a complete fully functional manual milk separator at an estate sale for $40.00 just a few years back. So if you want one make sure you hit the farm yard sales and auctions. Thanks again for bringing back fond memories.
Brilliant idea Michell! Thanks for sharing!
Thanks for the information. My daughter wants to milk our goats and this gives me some great information.
This is pretty cool. I love your blog and it has given me a lot of useful information. As someone trying to start producing my own dairy, this article helped a lot.
You can get a decent separator on Amazon for $150. We have one to get cream from our goat milk. I can’t have cow milk, so it was worth the money to have really good ice cream again. We have the older version of this separator: https://www.amazon.com/Separator-Manual-07-Plastic-SlavicBeauty/dp/B00NM8TVS4/ref=sr_1_3?m=A2713ZYF97RPDQ&s=merchant-items&ie=UTF8&qid=1489602369&sr=1-3
Hi, Jill!
Last fall I stumbled across your blog and have found it a huge blessing. We moved from the PNW to the Cheyenne area about a year ago, so being able to hear from a “neighbor” has helped in all the adjustments to this opposite climate. Love your recipes, too! We’ve milked a Jersey for years, and have never had a lid for our bucket. But here’s an idea for protecting the milk when you’re done milking: install a hook nearby, like hanging from a twine, and hang your bucket on it. This also makes wiping the bottom of the bucket easier.
That is awesome Charlene! I’m originally from the PNW too. Cheyenne is definitely different! Thanks for the tip, too
Just found your blog page because of Pinterest. Wow am I gonna read today!I’m going to try your mozzarella cheese. Just started to milk our first cow but have been making goat cheese for several years. When you retire, I read< it is good to have an interest so making cheese was my spark.Then came the goats for fresh milk and now I'm all about that butter sooo a cow was needed. Wala, let the trip continue. We are in Southern Ohio, so our weather is always up and down. Thanks for the ideas. Keep them coming. Vivian aka Jo
Thank you always for sharing such helpful info and experience ? I really enjoy your emails. I love this article! Do you hand milk? Do you just have one cow? I grew up with my hand milking the cow. I’ve been wanting to get one but am not sure of milking right, the time involved, etc. I’ve seen a few milking machines, have you ever used one? What would be your advice. Thank you again for all you share with us!! ?
I love my Henry Milker! As a former operating room nurse, I’m a little OC about clean and sterile. Because the dust in the barn, and everywhere else for that matter, doesn’t wait till you’re done milking to float into your pail. I have a VERY SMALL place and must keep my buck in the same barn with my does. The little guy stands 3 feet away while l milk. So, getting Bucky taste/smells in my milk was a huge concern. With this system, I have clean, delicious milk straight to my Mason jar without it ever coming in contact with the barn contaminates. It’s not expensive and you can hack the design easily if you’re a DIY-er!