Many people are of the opinion that grains are most optimally digested when they are prepared in a certain way.
Why does it matter how grains are prepared? Well, since grains and wheat are seeds, they were designed to pass through any “predators” that might consume them. Unfortunately, that can make them difficult for us humans to digest.
It is thought that by allowing the whole wheat flour to soak in an acid medium, or ferment through the process of souring, many of the substances that cause folks to have digestive upsets from whole wheat can be eliminated. There is a lot of debate and science surrounding this topic, and I suggest doing further research before jumping into any big changes for your family.
All debates aside, I know for a fact that my husband and I have much happier tummies after eating properly prepared whole wheat products. That is why I pursue traditionally prepared wheat foods.
While I prefer to use sourdough when I make whole wheat breads, muffins, cakes, tortillas, or even doughnuts, the downside of that method is that it requires planning ahead. There is no last-minute bread-baking when using sourdough. Plus, some things like cookies, lose their classic texture when they are soured or soaked.
That is why we are going to be discussing sprouted flour.
What is Sprouted Flour?
Sprouted flour is made by drying and grinding sprouted wheat berries. By sprouting wheat berries, you are reducing the anti-nutrients in the wheat, allowing it to be digested easily. Then after drying and grinding, the sprouted flour can be substituted 1:1 for regular flour in recipes.
No planning ahead is required, Plus, making it at home is much more cost-effective than buying it in the store. To make sprouted flour you do need to have a flour mill for grinding your wheat berries. If you are new to the world of grinding your own flour you can learn How to Use a Grain Mill to Make Your Own Flour From Wheat Berries here.
How to Make Sprouted Flour
What You Will Need to Make Sprouted Flour
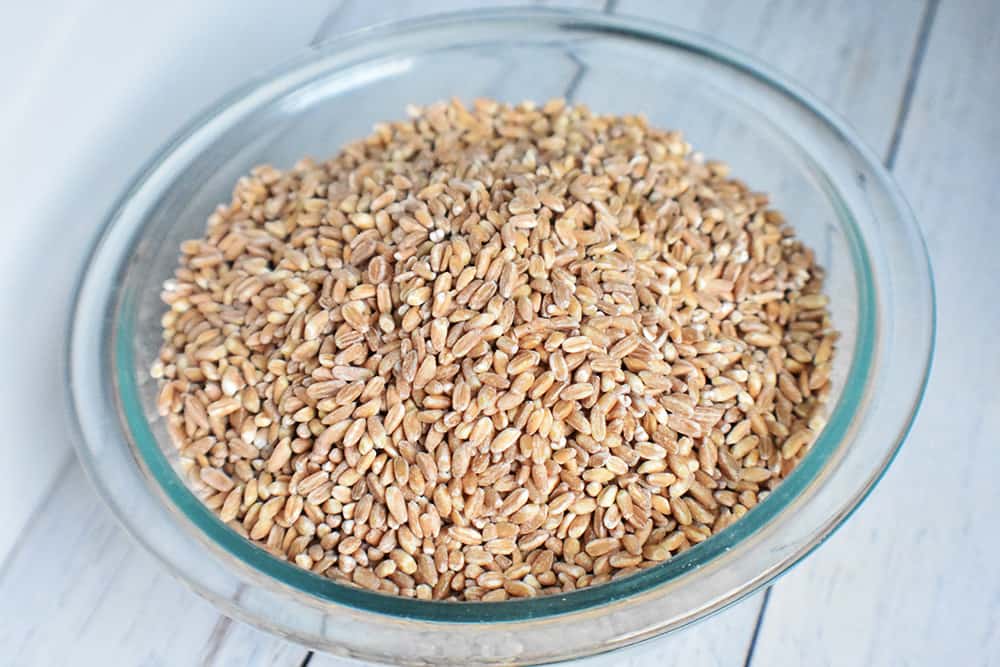
Your choice of wheat berries. I used Hard White and Montana Gold this time around–Azure Standard is a great source for affordable wheat berries.
Water
A Grain Mill (I love THIS ONE)
A Dehydrator
And some time.
Instructions to Make Sprouted Flour
Step 1: Sprout Your Grain
The process of making sprouted flour begins with sprouting wheat berries. If you are new to sprouting grains then you can get an I depth how by reading this Ultimate Guide to Growing Sprouts. When sprouting wheat berries previously I filled a few mason jars a little over half full. I would not recommend doing that for large quantities of wheat berries. By the time I soaked the berries, they were overflowing the jars. I would suggest using big bowls instead, this setup worked much better.
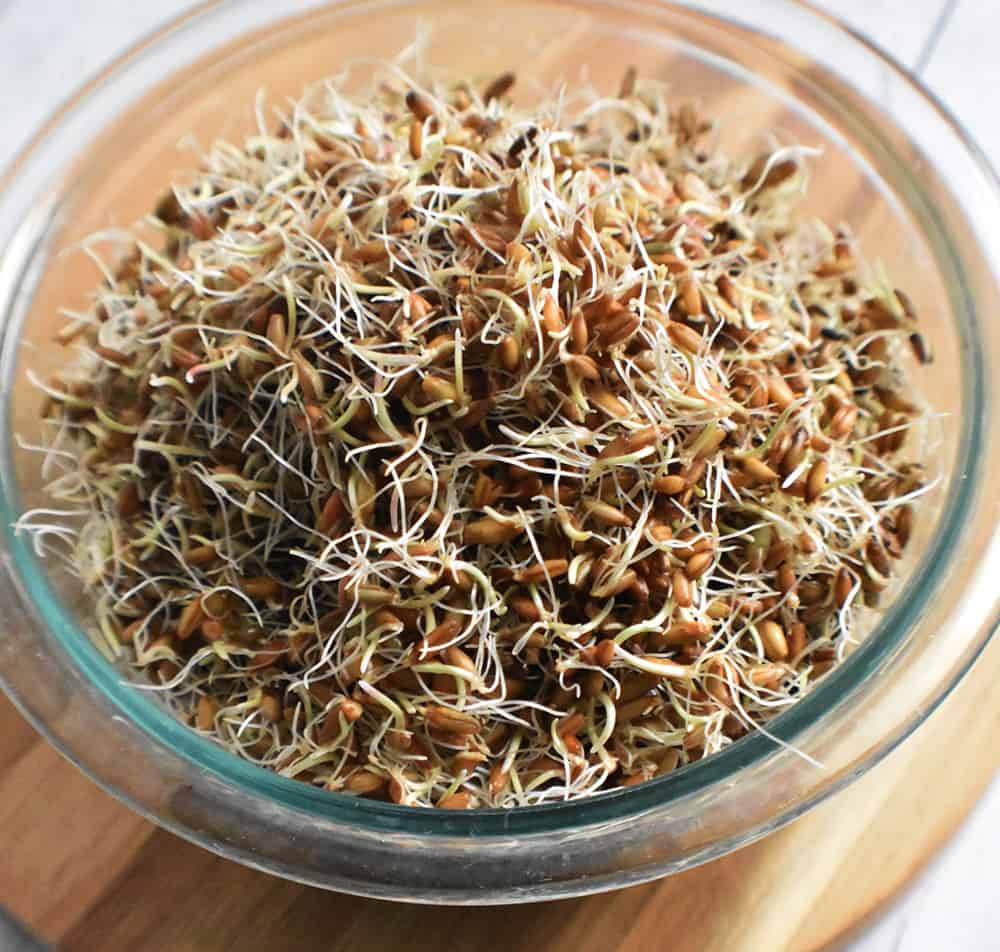
Completely cover your wheat berries with water and let them soak overnight. The next morning drain and rinse your wheat berries. Over the next few days continue to rinse 2-3 times per day. When you are rinsing your wheat berries make sure you are draining as much water as possible. If there is too much leftover they will mold. This is why a sprouting kit can be helpful–they’re designed to drain and not let the sprouts sit in water.
Step 2: Dehydrate Your Sprouted Grains
In a little over 24 hours, we had sprouts. I allowed the tails to reach about 1/4″ long, although that was probably a bit longer than I needed. It always amazes me how fast seeds actually start sprouting!
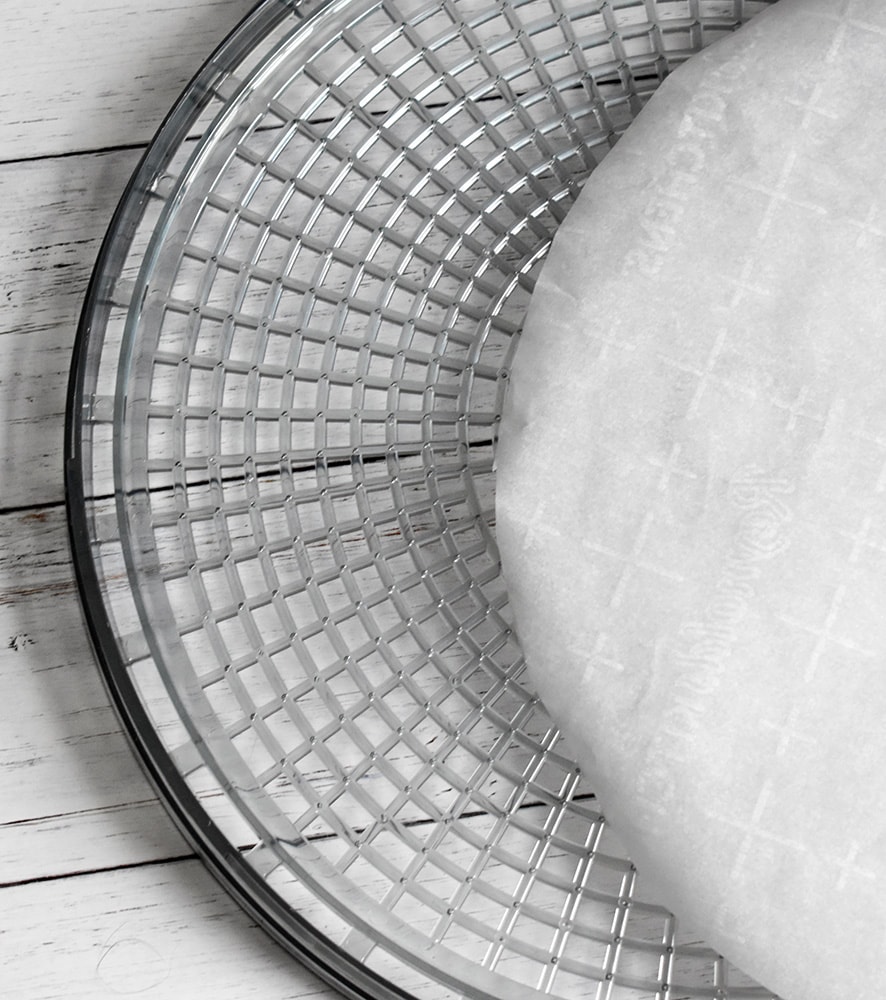
Once your grain has sprouted to the desired length it is time to dehydrate them. The trays of my dehydrator have holes that would allow the sprouted berries to fall through, so I cut pieces of parchment paper to size and lined the trays.
Spread the berries in a thin layer on the dehydrator trays. Put the dehydrator on the lowest heat setting (I set mine at 95 degrees) and allow it to run until the wheat is very dry. I found that letting it run all night seemed to work the best for us.
If you place wet wheat berries into your grain mill, you will clog it up and cause problems, so this is an important step!
Step 3: Grind Your Dry Sprouted Wheat Berries
Fill up your grain mill and let ‘er rip! I set my Nutrimill more on the coarse side, as the berries weren’t flowing all that great when the dial was on “super fine.”
Step 4: Store Your Freshly Ground Sprouted Flour
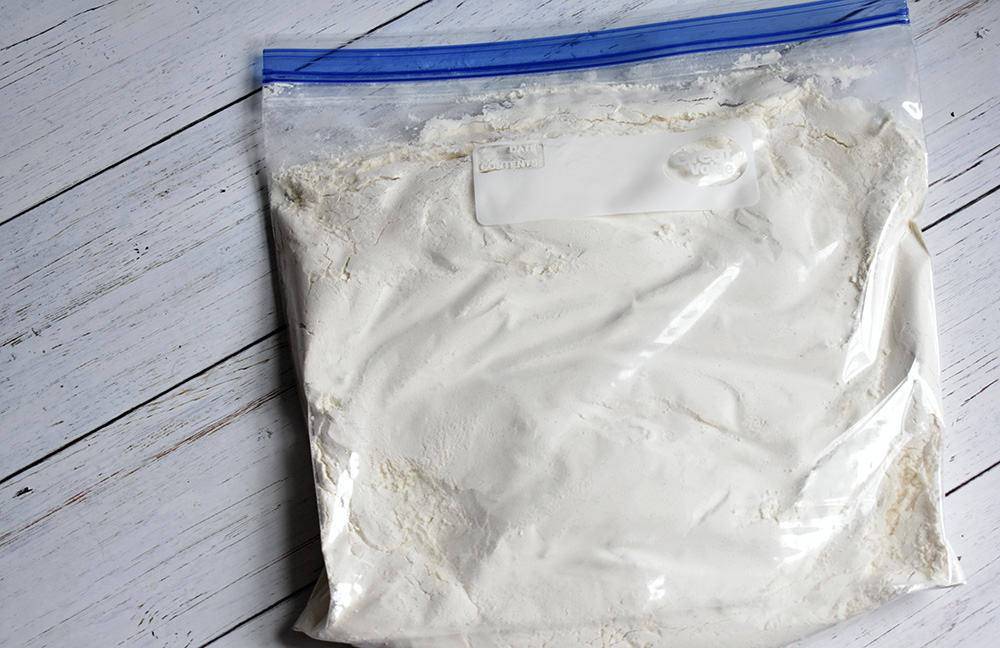
Store your sprouted flour in an airtight container in the freezer or fridge, as newly ground flour loses its freshness quickly at room temperature. You can use your freshly ground sprouted flour to replace regular flour 1:1 in your baking.
PrintMaking Sprouted Flour
- Prep Time: 15 minutes
- Total Time: 15 minutes
- Yield: Varies
- Category: Pantry
Ingredients
- Your choice of wheat berries (I used Hard White and Montana Gold)
- Water
- A Grain Mill
- A Dehydrator
- And some time
Instructions
- To sprout wheat berries I suggest using big bowls
- Completely cover wheat berries with water and soak overnight
- Rinse and drain the next morning
- Continue to rinse 2-3 times per day
- Allow sprout tails to reach about 1/4″ long
- Pull out your dehydrator and make sure the trays don’t have holes that would allow the sprouted berries to fall through (I cut pieces of parchment paper to size and lined the trays)
- Spread berries in a thin layer on the dehydrator trays
- Put dehydrator on lowest heat setting (95 degrees) and allow to run until wheat is very dry (overnight worked for us)
- Wet wheat berries will clog your grain mill, so make sure they are thoroughly dry!
- Fill grain mill and let ‘er rip! (I used the coarse setting rather than super fine because it flowed better)
- Always store sprouted flour in an airtight container in the freezer or fridge.
- This can replace regular flour 1:1 in your baking
Notes
If you’re having trouble getting your grain mill on the right setting, try turning your Harvest Mill on, turning the coarseness dial until you hear the stones touch, then backing it up just a tad. Then pour your wheat berries into the top.
Are You Ready to Start Making Sprouted Flour?
While this process is definitely not difficult, it takes a couple of days to complete the task. So, I can see why store-bought sprouted flour is so expensive. I still prefer using sourdough for the majority of my baked goods, but I think I will start incorporating this process into my weekly cooking routine, as having ready-to-use flour is worth the extra bit of effort when we are in the mood for cookies!
Maybe sprouted flour isn’t a good option for you right now but you are interested in a better-for-you flour. Read How To Use Einkorn Flour or Listen to this episode of the Old Fashioned On Purpose podcast. These will explain why this ancient grain is different and how you can use it in your daily baking routine.
More About Baking:
- My 5 Favorite Ways to Use Sourdough Discard
- How to Make Your Own Sourdough Starter
- Sprouted Flour Cookies
- Ideas for Making Bread Without Yeast
- How to Use a Grain Mill to Make Your Own Flour Out of Wheat Berries



You're so right about sprouted flour! Can't wait for the cookie recipe.
We also love sprouted flour — I do mine exactly like you, and over the months it's become less of a "thing." I just use mine for quick breads, pancakes, etc., though, since I don't like making bread with sprouted flour (this also means we don't go through a ton of it, so I only make it about once a month).
I was wondering whether I could grind the sprouted wheat in a wet stone grinder (somewhat like an electric metate) and use the dough to make tortillas, without dehydrating them. Such wet grinders are widely available in my town.
I have done sprouts Many times in the past and I want to make some sprouted flour. However I have tried oat groats, buckwheat, and millet and they have all soured in spite of frequent rinsing. What is your criteria as far as how old the grain is that you use?
Very cool. I need a grain grinder.
Very interesting, I have wondered how sprouted flour works.
-Brenda
i too have been curious about sprouted flour. my mom and i were actually just talking about it yesterday. i'll be giving this a try this spring… i'm still in the process of trying to get some pinto beans to sprout. they're taking forever!!
I love sprouted flour and ever wonder about the process. Thanks for taking the time to capture all the steps. I will be back for the cookie recipe.
Mely
I find that sprouted wheat grinds much more easily if I don't let the sprouts get too long…when they are 1/4" or so, they really hang up in my grinder. Of course, I don't always get them in the dehydrator before they are that length. You're right–they sprout so fast!
I was just thinking about starting to do this. I haven't yet made sourdough bread and I don't really like the idea of soaking the flour. I have sprouted grain and then used it in my bread recipes. I think I will start making sprouted flour. Thanks for the post 🙂
What about sprouting and then homogenized into a dough instead of dehydrating and milling? My omega juicer has an adapter for that.
Thank you for this! I've been wanting to do this forever- this is the motivation I needed!
My nutri-meal doesn't work all that well on the fine grind either. I've heard that from a friend as well.
I just left a moderate life, stopping by to say congratulations on winning your award.
We have done this for quite some time and we don't even grind until we are ready to use- we just sprout, use a dehydrator and put it in the 'sprouted' bucket….
Very good post to inform people – our modern culture has lost all touch with the traditional ways of preparing ALL grains before consumption – because grains are absolutely not ready for us to consume right off the plant. The fact is that the science IS there to show all the problems we humans have with the digestion of un-treated (soured, soaked or sprouted) grains and many a persons ills (and i am not talking only celiacs) are due to hi-carab refined UN-treated grain flours! If you would like more information, we have done quite some posts about grains and wheat over at DaiaSolgaia (http://daiasolgaia.com) and we welcome you to come by and check them out.
Please take Prairie Homestead advice here and sprout your grains before consuming!
Ravi
Disoveries for a Full Life
I can't have wheat and do this for brown rice also, works great and actually makes your baked goods a bit lighter! I have heard things lately about the phytic acid levels not being helped with the sprouting though, that soaking was much better, which kind of bummed me because I haven't had much luck with my non-wheat sourdough experiments. Have you heard that?
Grinding sprouted grains in the Nutrimill will void the warranty. It states that very clearly in the instruction manual, plus I called the company to double check.
I use the grain mill attachment on my Kitchenaid, which I can take apart if it gets sticky.
Shelley- I double checked my owner’s manual and can’t find anywhere that it states that grinding sprouted wheat will void the warranty. What page is it on?
I saw where it says not to grind wet grains, which is why I make sure my wheat berries are very dry before putting them into my Nutrimill.
Jill, Thank you for such an informative article.
I also thought that Nutrimill had a ban on sprouted grains. Your answer makes a lot of sense. Have you experienced any problems with your mill so far? I’m hoping your answer is no so that I can try your recipe.
Hi Jill, I do this with evey seed and berries and legumes I eat, the difference between sprouted and unsprouted is like eating rocks and popcorn !?!?
I have made a science out of this though, two suggestions, for sprouting, use a glass jar, or even plastic one with tiny holes in the lid, after initial overnight soaking fill out the jar and fill it out with water and turn it upside down, this way it grows even faster.
Second, instead of parchment paper, use either cheesecloth or fine screen, to line the racks of dehydrator, parchment paper will restrict the air flow, whereas screen won’t and would make it more efficient process.
How fine does it have to be to be successful? I put mine through a sifter. I don’t have a mill grinder yet so I have been using my nutrition Bullitt about cup at a time. Do you think the sifter will make it fine enough?
Great point. Thank you for mentioning the equipment part.
You honestly don’t know how excited I am to find this post! And your blog! Wow, where have you been all my life?!
I was looking at some sprouted flour the other day and wondering if I should try it.
Does it taste different, once baked? Different texture? Anything different at all?
Hi Valerie,
Since writing this post, I’ve done a little more experimenting with sprouted flour and found that it’s a little more complicated to use than I originally though (at least for me).
I tried a pizza crust with it, and it turned out pretty grainy and gross… And the cookies do work, but the dough needs to be stiff when you plop them on the cookie sheets, if it’s too “batter-like”, you’ll end up with a runny mess. The texture of the baked goods can be a little more fragile and “grainy” than typical flour. I’m assuming that’s because a lot of the gluten has been broken down in the sprouting process. The taste is pretty much the same.
So, I would recommend doing some experimentation and finding recipes that specifically call for sprouted flour. I know a lot of people use it and love it, but there is definitely a bit of a learning curve. 😉
some of that dough behaviour is common even if you simply switch from empty white flour to whole grains. It would make sense that the glutenreduction will result in a less solid baked good. maybe mixing in some traditional flour (not a lot) might even solve this issue. When I make bread I tend to mix flours…If I had a mill, I might totally try it, but as things stand, I won’t spend that money (plus anything running on electricity is not a good investment for me as we plan to return to Europe eventually)
Yes, you are definitely right about whole wheat flours acting similiar sometimes. I still plan to play around with my sprouted flour a bit. I really like the idea of it!
You do realize that you can have your sourdough in your refrigerator, yes? I am currently on a batch that is going on its second year. (started it half a year after coming over) I have one that is wheat and one that is rye (HMMMM the flavor) I am from Germany we used sourdough primarily in rye/wheat misture breads and it is delicious. YOu need to *harvest/feed* it about once a week (now that it is older, start at 4-5 days when it is still young) and then you have it always read. so you throw your dough together in the evening let the SD work its magic and then you add whateever else you need mix it in teh morning and let it proof in your form or rise freely whatever you prefer, bake it . Anything but white flour yeast breads will take that long. Bread simply requires it foor the best of flavor. also, If you presoak flaxseed (,milled or hole) your bread will stay moist for two weeks even without stupid plastic bags around iit (the best bread container remains the birchbark container…I really like your page, Jill. everything is an easy read and your *voice* is quite lovely. 😀
Thank you for your kind words Sonja! I’m so glad you are enjoying the page!
I actually have used the fridge to store my SD starter here and there. When I’m regularly baking, I like to leave it on the counter. But otherwise, I stick it in the fridge.
I’m really curious about this birchbark container. Do you have more info on this? I’ve been using the stupid plastic bags up til this point, and I hate them! Would love to find something that keeps my bread fresher!
Birchbark containers were the tupperware of the stoneage (the frozen man in switzerland even had one on him for hier provisions) and the middle ages. Aparently birchbark is naturally antifungal and antibacterial (doesn’t mean you CANNOT get mold, but makes that occurance a rarity and unlikely. Some of teh united states native american communities are still making some, but they aren’t exactly what I want. My last kitchen wasn’t big enough but I am hope for one of these http://www.ebay.com/itm/Russian-Art-Wooden-Natural-Birch-Bark-Bread-Basket-Box-ASHBERRY-/310368162053?pt=LH_DefaultDomain_0&hash=item4843625105 now that I have more space, before I used a tubous design. some as small and undecorated like this one http://www.ebay.com/itm/Russian-Handmade-Birch-Bark-Trinket-Jewerly-Box-NATURAL-/310368108213?pt=LH_DefaultDomain_0&hash=item4843617eb5 others charmigly decorated. they are a bit prices though….but since you say your husband is very crafty, If you have birchtrees on your property you might be able to make them yourself. When I got my first, we didn’t have a lot of money, so the expence hurt and I had no idea what they would do for your bread (it really keeps much longer. You will, however, loose the crusty ness of the crust. it will soften, But I don’t mind. If I want fresh crust I bake fresh bread. but the container will have it retain moisture much better. also try to soak grains, oats even nuts in a cold waterbath for up to 12 hours before baking (YOu can also take hot water, but that will render the remaining gluten in those grains useless for brigding it is MUCH faster though) and mix it in the dough. FLAXSEEDs (possibly even milled) is the best, I take half a cup and soak it well, incorporate it in my bread, and that extends the life by a good week (keeping the dough moist and soft, even if I keep the bread basically on the table – found that out by accident, as you can imagine) Flax aparently retains much more moisture than other grains but even just oat work great.
firt getting the container is an investment. but Plastic bags outside of the freezer are not necessary: for starters try placing your bread into a simple cotton tote for the supermarket. that is how my parents work and they love it. You really actually don’t want your bread to be ‘sealed’ from air, just from critters. also if you regrigerate (had to teach that to my husband) it goes stale really fast even with sourdough) until I realized just HOW expensive freezing is, I have recommended: if you know you wont finish it: freeze the slices then you can take out as many as you need they’ll thaw in two to three minues or in the toaster . I love those containers. I always wish for them (but I guess I have to claim to ‘collect’ them ) I am using them for my herbs and spices. sadly I don’t have nearly enough counterspace to display them and the people who make the containers are in russia: so asking if instead of a cutsy bear they could make work rosmary, chamomille, thyme or skullcap into their designs (very obvious for me but aparently not for the them or at least not for teh foreign market)is out of teh question. maybe if somesbody asks you what you wish for for your birthday or somthing like that you can try a smaller conatainer first ans try it out with a roll 😉
As I said aparentyl they are not pre se difficult to make yourself if you have access to birchbark. http://www.jonsbushcraft.com/birchcontainer.htm here are some native american designs http://www.nativetech.org/brchbark/barkmaka.html this is where I got my first one: http://www.birkenrinde.de/ I don’t know what else to say…they keep light away, they keep pests away they container without suffocating your stuff and allegedly in russia they are even used to contain things like creamcheese and quark… I hope that helps. (substituting plastic at least in the food supply area is surprisingly difficult in this country)
Sonja – this is great information about birch bark containers. Thanks for all the websites too.
Have you tried grinding flour then sprouting it? Does it result in the same thing?
i badly have to have a go at this i have all the tools
i am soooooo excited about your blog i love love love it!
Thanks so much for this post and all the helpful information on your site. I love it! I just made my first sprouted flour sourdough loaf! 🙂
PS – I dried mine for 6.5 hrs at 95 degrees as you suggested and the dried grain actually weighed less than pre-soaked and ground up great in my Family Grain mill. Thanks!
Jennifer, would you share your starter recipe and the bread recipe using the starter ?
There’s nothing better than a well written post!
Thank you so much for this relief, I loved every moment off the
read. Will be eagerly awaiting your next post 🙂
After you soak them overnight and rinse and drain the next morning – do you leave then dry? meaning don’t add water again? Just leave them on the counter and let them sprout? The next step is not detailed, please clarify.
Also, I’m surprised about the comments that sprouted flour doesn’t work for bread making – I was counting on this for that purpose. I have used commercial organic sprouted flour I bought at the store and my bread and pizza were great.
Sprouting at home yields a different product that can’t be used for breads?
Leslie, do you use all sprouted flour when you make the bread?
Hi Jill, I do this with evey seed and berries and legumes I eat, the difference between sprouted and unsprouted is like eating rocks and popcorn !?!?
I have made a science out of this though, two suggestions, for sprouting, use a glass jar, or even plastic one with tiny holes in the lid, after initial overnight soaking fill out the jar and fill it out with water and turn it upside down, this way it grows even faster.
Second, instead of parchment paper, use either cheesecloth or fine screen, to line the racks of dehydrator, parchment paper will restrict the air flow, whereas screen won’t and would make it more efficient process.
Try Sprouted Whole Wheat Cottage Bread recipe from Nana’s Little Kitchen. I’ve made it with store-bought sprouted wheat flour and it comes out good every time. I’m planning to make my own sprouted wheat flour using these directions, and try it again :-).
How do you know if your sprouted berries are over sprouted for breadmaking? I was told that the root should only be just emerging.
Help! I’m just learning about making sprouted wheat bread. I used the process exactly as you describe except I freeze dry instead of dehydrate the sprouted berries. I am using hard white wheat. I have had about seven or eight failed bread attempts. My finished product is always gummy. I have tried adding less water, cooking longer, adding more flour. I have tried a recipes that have the water and flour ratio weighed out to the gram. I want so badly for this to work! I am an experienced bread maker with regular whole wheat flour, but I cannot seem to get the knack of how to make good bread with a 100% sprouted wheat flour. I have not been adding wheat gluten or any other dough conditioners, and only using 100% sprouted wheat flour. I have failed at recipes that even beginners seem to be using with success. Have you encountered this and do you have any advice?
Have you tried dehydrating it instead of freeze drying? Perhaps that is the reason. Maybe try with dehydrating once and see if it makes a difference. Otherwise, you might want to check out some of the resources Jill recommends in her list here: https://bookshop.org/shop/theprairiehomestead
Breadmaking is a skill that requires lots of trial and error. Maybe try slowly working up to it…like make breads with 25% sprouted flour and 75% regular flour and once you get the knack for it, keep expanding the sprouted flour ratios. We wish you the best in your flour and baking adventures!