")
I guess you could say that I’m a bit of a pie crust snob.
I love a tender, flaky crust that is just barely brown on the edges, never burnt or crispy. And don’t even try to convince me that those pathetic, pre-made, refrigerated or frozen crusts will do. No way!
Every homesteader-chef needs to have a couple tried-and-true pie recipes in their arsenal. The methodology of a good pie crust is very similar to that of a good biscuit (they are both “pastries”, after all). Use cold fat, and do not, I repeat DO NOT, overwork the dough.
The problem with most modern day pie crust recipes is that they call for shortening. Since shortening is a hydrogenated, “fake” fat, I haven’t had it in my home for years. Thankfully, we still eat lots of pies, since it’s easy to swap out that icky fat for a healthier one like butter, coconut oil, or lard instead.
The Prairie Homestead Cookbook
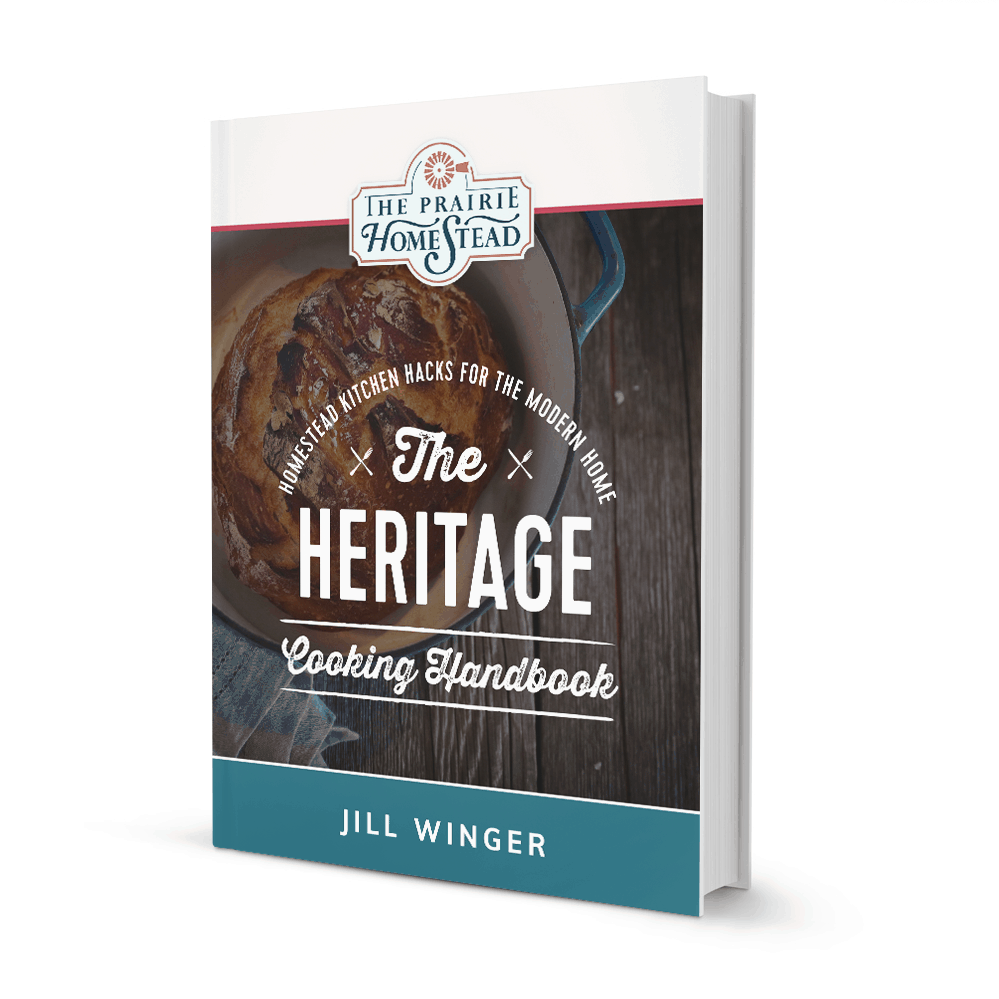
I love this pie crust recipe so much that I included it in my The Prairie Homestead Cookbook. If you love simple, heritage, old-fashioned and super delicious recipes, make sure you check out my popular cookbook!
Learn more about The Prairie Homestead Cookbook here.
Simple Pie Crust Recipe
Yield: One 9″ crust
Ingredients:
- 1 1/4 cups unbleached, all purpose flour (you can use whole wheat here, but it won’t be as tender. I don’t mind using a little white flour for this recipe)
- 1/4 teaspoon sea salt
- 1/3 cup cold butter or lard or firm coconut oil (coconut oil will make a slightly tougher crust, but still yummy)
- 4-6 Tablespoons cold water
Instructions:
In a medium bowl, mix together the flour and salt.
Cut in the fat using a pastry blender or two knives. You can use a food processor if you’d like, just be sure not to over-process.
Tip: If you are using butter, freeze it first, and then grate it with a cheese grater. The butter shreds are the perfect size for mixing into your dough.
The flour/fat mixture should resemble coarse crumbs. Little chunks of butter, coconut oil, or lard are perfectly o.k. and actually preferred– this is what will give you a flakier end result.
Carefully add the water, one tablespoon at a time. You are looking for the dough to stick together and form a rough ball, but you don’t want a sticky mess. You might use your hands to form the ball, but be careful not to overwork the dough. Err on the side of crumbly!
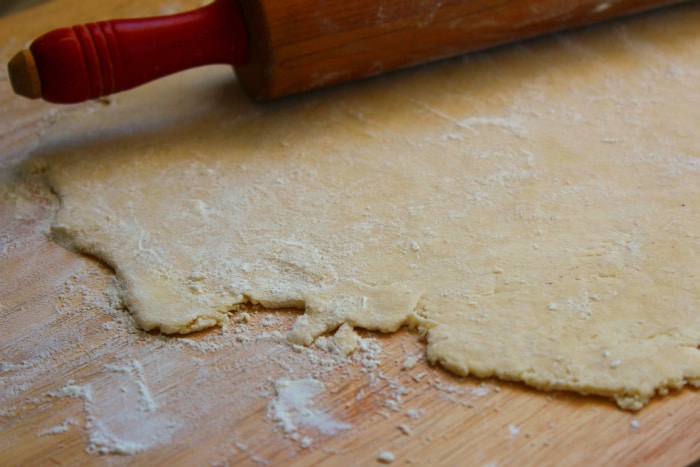
Generously flour your countertop and roll out the dough until it is several inches larger than the diameter of your 9″ pie pan. (you might need to flour the top of the dough as you roll, to prevent sticking and tearing).
Carefully fold the dough into quarters and place into your pan. Unfold.
Trim around the edges (if needed), but leave an overhang around the edges of the pan. Gently fold the excess dough under itself, then crimp the edges as desired to make it pretty.
Fill with your favorite pie filling and bake as directed in the pie recipe you’re using, or refrigerate until you need it.
(Follow these instructions if your recipe calls for a pre-baked crust.)
Be sure to cover with a pie shield or foil strips while baking (at least for the first part, anyway). Nothing worse than a crunchy, overdone crust!
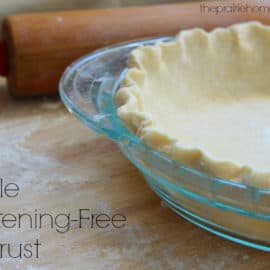
PrintEasy Shortening-Free Pie Crust
Ingredients
- 1 1/4 cups unbleached, all purpose flour (whole wheat works but is less tender)
- 1/4 t sea salt (like this)
- 1/3 cup cold butter or lard (or firm coconut oil for a slightly tougher crust)
- 4–6 T cold water
Instructions
- In a medium bowl, mix flour and salt together
- Cut in the fat using a pastry blender or two knives. You can use a food processor if you’d like, just be sure not to over-process.
- When the flour/fat mixture resemble coarse crumbs carefully add the water, one tablespoon at a time forming a rough ball (not a sticky mess!)
- Generously flour countertop and roll out the dough until it’s several inches larger than the diameter of your 9″ pie pan (you may need to flour the top of the dough as you roll, to prevent sticking and tearing)
- Carefully fold the dough into quarters and place into your pan
- Unfold
- Trim around the edges (if needed), but leave an overhang around the edges of the pan
- Gently fold excess dough under itself, then crimp edges to make pretty
- Fill with your favorite pie filling and bake as directed, or refrigerate until you need it
Notes
Be sure to cover with a pie shield or foil strips while baking (at least for the first part, anyway). Nothing worse than a crunchy, overdone crust!
Need some ideas on what to do now that you have a lovely crust?
Fill it with seasonal fruit for a stunning dessert, make my old-fashioned Cheddar Pear Pie, or grab a bag of peach pie filling from your freezer for a quick treat. The sky’s the limit!
You can also try my Honey Pumpkin Pie recipe and/or my Old-Fashioned Lemon Whey Pie recipe.
And don’t forget to check out my Prairie Homestead Cookbook!

Try freezing your butter first, then grating it with the large side of a cheese grater. The freezing makes it extra cold and the grating gets you the right sized crumbs of butter without danger of overmixing.
Ooh, thanks for reminding me about this! I’ve tried this technique in the past, and it does work- especially if you don’t have a pastry blender!
I want to make up some pie crusts to have ready for the holidays. Will this affect the pie crusts??
We use the frozen butter and grater when we make our biscuits
Thanks for this tip regarding frozen butter and a cheese grater! I don’t have a pastry blender, and this tip has made the world of difference!
I was chopping the butter into tiny cubes but that was taking forever, and it was melting on me (literally and figuratively) while I was trying to do it.
And thank you Jill for the recipe! I use it quite often. I thought pastry making was so exotic and hard (especially since I used to buy pastry) but it is actually about as easy as making mashed potatoes. ^_^
You got this, Liz! And yes, the frozen butter/cheesegrater trick is one of my favs!
Freezing the butter is a brilliant tip, and one I will be sure to use in the future. Thank you!
This was my first successful crust thanks to your magnificent recipe ! I used it for my chicken pot pie and my husband and I loved it! Thanks!
Thank you! And that sounds like a great tip from Jenny!
Thanks for such a great article! I’ve always been a snob for homemade pie crust, too, and was at a total loss as to what to do now that we don’t use shortening (I actually keep a can of the nasty stuff for the *very* rare occasions we choose to treat ourselves – I always think “poison” when I see it in my cupboard).
The coconut oil is a GREAT suggestion especially for dessert pies. Thanks!
A doctor told us to get all the Crisco out of the house! I found out how to use it for emergency lighting and bought wicks accordingly. Now butter and olive oil are the only fats besides bacon fat (got to have bacon fat to make Hot Bacon Dressing for our greens!) that I use in my baking and cooking. Lovely. And we haven’t gained weight!
will definitely be making this soon! i realized while reading this that i haven’t made a pie crust since i quit buying shortening. it’s about time that i do! thanks! 🙂
Hi Jill! I just found your blog, and I’m so glad I did! I LOVE it! We’re just starting out in homesteading, and it looks like your blog is going to be very helpful!
Welcome Amber! Glad you stumbled across us! 🙂
Bitch
You got that right, girl!
Hi Ji!!, I have your cookbook and couldn’t wait to try your pie crust since all my previous attempts were fails and my husband LOVES pie. The first time I made one my husband and the crust was tough. I tried again and this time he said it is rubbery. He told me to go back to the Pillsbury crust. Help!! What am I doing wrong? I really wanted this recipe to “be the one”!
Thanks so much for a great go to recipe!
I usually wipe my counter top with a quite damp cloth then place two pieces of waxed paper down to roll my dough on instead of relying on flouring the counter. I use one or two pieces of waxed paper on top of the dough as well. When I’ve finished rolling the dough out, I can just lift the waxed paper with the dough on top and flip it over the pie plate. I used to get too frustrated with the dough sticking to my counter even when I put loads of flour on the counter!!
This is a great tip, Jan! Sounds like it would save a lot of mess. Thanks for sharing!
I’ve also used plastic grocery bags the same way. It’s a good way to “recycle” them if you have them. 🙂
they get dirty though…they are handled by many and end up in carts and cars trunks…some have meat and other bacteria….be careful
Plastic grocery bags are dirrrrty! I only use them for cleaning out the litter box or putting in wastebaskets.
Grocery bags?? That’s disgusting Ailene. I sincerely hope you stopped doing that. Gross.
I remember my mom doing that when baking when I was a girl. I don’t think I’ve ever heard of anyone else doing that until seeing your comment!
I went to a fabric store several years ago and purchased 1 yard of thick but foldable, clear plastic that a lot of restaurants use over cloth tablecloths. It’s easy to clean, rolls up for storage and lasts forever. It can also be chilled before using if you fold it up.
I also use a marble rolling pin that I refrigerate before using. Makes it all so easy.
Great minds think alike! 😉 I got the idea to do that years ago on my own. I use plastic wrap because it does not rip. sure saves me from a big mess and frustration of the crust breaking!
I learned to do this many years ago in home economics class! I also do this when making biscuits
Jenny’s recommendation to freeze the butter first is my fave tip– I always do this when making biscuits, and then let it chill again before adding the liquid, so the fat is good and hard when you go to bake. It really does that extra something for perfectly tender flaky layers. 🙂 Thanks for the step by step!!
Yes, it’s a great biscuit tip as well!
The one thing I hate about making pie is having to use the wretched shortening. Thank you for telling us another way! I will definitely be using this recipe the next time I make a pie 🙂
Wonderful Laura! You’ll have to let me know how it goes once you try it!
I second (or third?) freezing the butter.
My other tip is something my mom taught me about how to get the rolled out crust into the pie pan. Roll it up around the rolling pin (like paper towels are rolled up around the cardboard tube) and then unroll it over the pie plate!
I render our own lard from our organic, pasture raised pork so it is full of vitamin a! If you have a friend raising pastured pork they may be willing to share or give it to you. You could ask at the butcher shop but I deffinatly would only use organic pastured pork.
My mom always freezes her butter, and I must say, I’ve never had better pie crust thanwhen she makes it!
My grandpa always used lard, and let me tell you, it made the BEST pie crust! If you can get it from a local farmer, it’s a good choice, esp for those of us following a more traditional diet.
I’ve heard that too! I just need to find a healthy source of lard now…. hopefully soon!
Hi Jill,
Have you heard if anyone has had success using gluten free flour for this crust?
Thanks!
I’m a big fan of coconut oil as well. Would I be able to grate refrigerated coc. oil just like part-frozen butter?
Thank you!
Hmmm… I’ve never tried that, but my gut instinct would have to say that I would doubt that would work. I think the coconut oil might just turn into a mess from the heat of your hands during grating. But, do let me know if you try it! I’d be curious to see what happens. 😉
I used coconut oil and found the pastry to be very oily and not flaky. I think it is a result of the low melting temperature of the coconut oil.
Has a yo e ever frozen this pie crust? Maybe in balls ready to thaw and roll?
I have been using coconut oil for my pie crust for the past several years. I have found if I melt the coconut oil then add to the flour, it mixes much easier. I then use water from the tap rather than ice water. This makes the dough easier to work with. My crust is always flaky and gets a lot of compliments. With any left over pie dough I make cinnamon/sugar pinwheel cookies, which my family loves.
Jill, this is the exact recipe I’ve been using for my crust!!! Although, lately I’ve been doing 1/2 butter and 1/2 coconut oil for the crust. I love using coconut oil, but it does have the toughness factor as if you refidgerate your pie and don’t let it warm back up to room temp before serving. The coconut oil gets ROCK HARD if refridgerated! For a more neutral flavor and less toughness, halving in some (homemade grassfed!) butter seems to do the trick. I am wondering if you have ever used lard for crust? It seems like overall that is the best stuff from what I’ve read, just hard to get your hands on quality lard. I haven’t, but I’ve been saving our (pasture raised & uncured) bacon drippings and have a link on how to render bacon fat into lard. Apparently it just has a slightly smoky flavor leftover afterward, so I was thinking it would be tasty in crusts used for savory purposes, like quiches and chicken pots pies. Would love to hear your thoughts!
Hmmm… GREAT idea on adding the butter to help soften it. I never though about the coconut oil making it tougher when it’s cold, but that’s a very good point. I haven’t used lard yet, but I would LOVE to. Hopefully we will get a couple hogs next year!
http://www.modernbeet.com/archives/244
Jill, this is the link to the site that talks about using bacon fat in savory pie crusts. I haven’t tried it yet, but it’s on my to do list this winter!
Oh. Yum. Bacon fat makes everything better!
I have just started cooking American style pies and my hubby and kids just love them. Pecan Pie is a favourite! In Australia we don’t typically make many sweet pies; caramel tart and the occasional apple pie is about as far as my family have ever gone so I am enjoying making pies we’ve never tried. Shortening is limited and most crust recipes I have come across call for it. I am glad I found this one and I’m going to use it for my next pecan pie as the dutch crust recipe I usually use is just too thick and biscuity. Thanks for posting this!
I have started substituting half the water for cheap vodka (thanks to NPR) The alcohol cooks out leaving a perfect flaky crust 🙂 I bought $3 worth of absolute and cant tell you how many pies Ive made! Awesome website!
I’ve never, ever heard this before Alisha! Fascinating– thanks for sharing! 🙂
This is exactly what my mom does and she has the flakiest pie crusts I’ve ever had!
You just can’t beat a homemade crust! 😉
There are a couple of inexpensive tools(?) that all of the women in our family wouldn’t be without for pie crusts: a pastry cloth and rolling pin cover. They can be found from kitchen supply sources for very little expense. The pastry cloth is “seasoned” by rubbing in flour over and over until the cloth has absorbed as much as it will. Then lightly sprinkled with flour with each use. The rolling pin cover resembles an open-ended sock and can also be seasoned with flour. This prevents the pastry from sticking to the cloth. I don’t know the whys behind their use, but I can testify that using them results in perfectly flaky pie crusts. When a young wife, I experimented and tried making crusts without these and regretted it immensely.
Yes, the pastry cloth is a great idea. When I am going to make a lot of pies I don’t wash it between uses. I fold it up and keep it in the butter-keeper section of the refrigerator. Then when it comes time to launder it I just shake it out really well and throw in the washer with towels.
I was reading through to see if anyone would mention a pastry cloth. What a great time and mess saver. And they can be super cheap! I have a friend that makes pastry cloths from bulk fabric. She cuts them to size and gives them as gifts to other bakers.
Melisa B
I made this for a pumpkin pie yesterday, using 1 TB margarine and the rest coconut oil for the fat and added a teaspoon of white vinegar to the ice water. My crust was a little crumbly when pressing it in the pie plate, but it worked out great! Thanks for a delicious pie crust, I’ll definitely be making this again!!!
As an avid pie-baker (and daughter of same), I can vouch for the teaspoon of white vinegar in the ice water. It makes the crust so flaky! Add one teaspoon white vinegar per cup of flour in the dough.
I was so confused with the title. Growing up we called it Oleo. Shortening was Lard or Butter. We also called margerine Oleo too. I do not use either in my cooking. Sorry about the stray from topic. I just thought I would share.
Very interesting! I’ve heard margarine called Oleo before, but I never knew that some folks called lard or butter shortening! To me, “shortening” is the nasty, hydrogenated Crisco stuff at the store. 😉
My grandparents called any non-butter item (margarine)Oleo, which at one point was either lard or vegetable fats with a butter flavor capsule you mixed in with the fat to make it yellow and you could pretend it tasted like butter.
This is the recipe I have used since my sister gave it to me 15 years ago. Minus the coconut oil. She uses butter.
Salted or unsalted butter? Thanx for the recipe
I’ve used both kinds and they work great. 🙂
If you use salted butter you may not need to add the extra salt. I would try it without extra salt the first time and see if you like it.
Lard, Coconut oil, butter can all be considered shortening.
Here is a quote from my Readers Digest: Secrets of Better Cooking (1979)
“Lard, butter, margarine or vegetable shortenings are the fats used in pastry making. These are what make the pastry “short” -that is, tender, flaky, crumbly. The fat in the mixture coats the particles of flour so water cannot reach them. This keeps the gluten strands shorter; only the particles not coated with shortening develop gluten. (Gluten, so essential for yeast breads, make pastry tough.)
Lard is the shortest of all and makes excellent pastry.”
However further down the book does state that shortening primarily does refer to vegetable oils.
Well, I definitely learned something new through this post. 🙂 I had no idea that lard, butter, or coconut oil were once called shortening. But, now I know!
I have a question about Lard you can purchase at the store. Would this be a better alternative to shortening and can you use it in place of shortening in recipes?
Most of the lard you can purchase at the store is hydrogenated, so it’s really not a healthy option and actually quite similar to shortening (which is also an icky hydrogenated fat). If you can’t get quality, non-hydrogenated lard, your best bet is to just use coconut oil or butter in your pie crusts.
What temp and how long to cook it the crust?
Many years ago (25) I attempted to make pie crust for my pecan pies for Thanksgiving. The crust was awful so for the past 25 years I’ve been buying pie crusts and just filling them. I found this recipe here yesterday and decided to be bold and give the recipe a try. OMG I am now in pie crust heaven! I made 6 crusts (3 in the freezer for later on) and made 3 pecan pies last night. This is now definitely my go to pie crust recipe. Yes! I can make great pie crust!
Marge, I’m sorry this question is 6 years after your comment ? How did freezing your crusts world for you?!
I’ve been buying frozen pie dough balls from a local 4-H club. I’m not sure of their recipe but they make hundreds of them each fall for their big fundraiser. They roll them in balls, wrap in plastic wrap, and then sell a ziploc with 8 balls in each. It takes maybe five minutes for each ball to thaw and then I roll it out. Perfect crust!
I recently purchased an organic all-vegetable non-hydrogenated shortening at the store, assuming I could use this in place of my usual shortening, but I have been afraid to give it a try because I didn’t want to put in all the effort and then have the crusts not come out well. I’m going to give this recipe a try!
Good luck! 🙂
I am going to try this recipe the next pie I make, which will be soon as Hubby loves pie.
Thanks for the recipe and for sharing.
So I tried this today for my Christmas pumpkin pie, and I am sure it’s no fault of the recipe, but my crust was not flaky at all. Not sure what went wrong, but it turned out kind of tough and chewy. Maybe too much water? Overworked dough?
Usually when mine are tough it’s b/c I overworked the dough. 🙂
You can make your own dripping by clarifying the fats left over from your roasts. It makes the best pastry ever
Been looking for a plain and simple pie crust recipe like this for ages, thank you so much!
I love old-fashioned pies with natural ingredients and have found great recipes for vintage pies but they never mention how to make simple and plain pie crusts for some reason!!! Thanks for sharing. I will be using this pie crust to make my pies in the future.
You are very welcome! Enjoy. 🙂
I just made chicken pot pie. When I made the crust with coconut oil I couldn’t get the dough to roll together so I added a eggs. It turned out just fine and I love the small of coconut. Thanks for all your healthy home made recipes.
Hey– good idea! Sounds delish. 🙂
I am wondering if I could use coconut butter instead of coconut oil, butter or lard. What do you think? I’m new to the kitchen 🙂
Hmmmm… I’m pretty sure that coconut butter is made from the flesh of the coconut, so I think the results would be quite different that coconut oil. 😉
I love the all time natural…no artifical…fats…I feel they are better all the way around…it will always taste better…real butter…mmmm
I have always made my crust very similar. With shortening until now. My other difference is 1 tablespoon vinegar 1/2 cup cold water and 1 lightly beaten egg ( mixed and put in the fridge til needed) I have been changing our diet and way of eating. My question not related, is what about people that have high cholesterol using so much butter or lard ? I use coconut oil but my husband does not really like it used in everything. I do use olive oil. But have read some negative things about that as well.
I’m really confused by this whole “shortening free” title. Look up shortening in the dictionary and it says ” butter lard and other fats” used in pastry. While I appreciate all the good hints, if you are going to post please know what you are talking about.
Maureen– it is a generational thing. Io me (and many others) Crisco is shortening. Butter, lard, etc, is something else entirely. That is why I titled the post this way. Different words mean different things to different people.
Hey Maureen, maybe don’t be a bitch.
Have you ever tried liquid oil.My great aunt used to make it for her husband with heart problems.Its a little harder to work with but turns out lite and flakey. Crisco is good but not healthy, Butter and or Coconut Oil isn’t as light . My grandma used to use lard but it has that after yuck, and I don’t eat pork..
I usually don’t use liquid oil since I like the flakiness of using solid fats. However, I have seen recipes calling for olive oil, etc.
Thank you for the recipe I made mini pumkin pies I used butter and coconut oil I would have liked to use lard but I’m allergic to pork
My crust was nice
Thanks for letting me know about the coconut
This tender, flaky pastry is perfect for so many pies but my favorite use is hand pies. It is a little sturdier than standard pastry without losing that element of fragility and it’s so easy!
….from:
http://www.epicurious.com/recipes/food/views/cream-cheese-pastry-dough-101585
Cream Cheese Pastry Dough
Ingredients
3/4 stick (6 tablespoons) cold unsalted butter, cut into bits
4 ounces cold cream cheese, cut into bits
1 cup all-purpose flour
1/2 teaspoon salt
Preparation
In a food processor blend the butter, the cream cheese, the flour, and the salt, pulsing the motor, until the dough just begins to form a ball, gather the dough into a ball, and flatten slightly. Dust the dough with flour and chill it, wrapped in plastic wrap, for 1 hour. The dough may be made 1 day in advance and kept wrapped well and chilled.
Yum!
It’s hard to overwork the dough with half vodka and half water, because the alcohol helps the flour stick together, but doesn’t ‘work’ the gluten in the flour the way water does.
The flavors of pumpkin & cornmeal pie crust goe better together than wheat crust, in my opinion. I learned this from my mother. Melt butter in your pie pan & tilt the pan around till the bottom & sides are covered. Then before the butter has a chance to harden, pour in cornmeal & tilt pan till no more cornmeal will stick to the pan. Pour off the extra cornmeal for another pie crust or project. Now just pour in the pie filling & bake as usual. The thin layer of cornmeal will absorb enough moisture to double in thickness. It makes a fine pie shell. You do not have able to make fine pastry to make this successfully.
This was the recipe that I used for my Thanksgiving Homeade Apple Pie & I was so embarrassed by the outcome. I followed the recipe word by word and everyone who bit into the pies said the crust was hard as a brick. It was so embarrassing. On the way home I kept asking myself “What did I do wrong?” and then I remembered, it was the butter. Butter does NOT work if you want a flaky crust. I made a flaky crust years ago & I used Vegetable Shortening and it turned out perfect. Vegetable Shortening and putting the pie crust in the refrigerator for 30 minutes is the key to a flaky soft crust.
Hi! I have to make 6 pie crusts can I make a big batch?
Hi there,
How do you adjust the recipe if you want to put crust on top of the pie??? Thanks!
Hi Cara! If you want to make a pie crust for the top and bottom of your pie, just double the recipe. 🙂
Ah good to know! Thank you for taking the time to respond 🙂
Thank you so much for sharing this pie crust recipe. I tried it but I have done something wrong. The crust was very hard. Any suggestions? Thank you so much.
Hello, I wonder if anyone ever try coconut /almond flour for this crust? Any tweaked recipe? My family are currently practicing Ketogenic way of life and for celebrations I would like to prepare pies, and I am keen to try your lemon whey pie.
I personally haven’t tried either of those flours in pie crust, but if you do, please come back and let us know how it comes out!
For you double this recipe for a double crust pie?
You can use a pancake flipper/spatula to get the crust up easily…first slide and wiggle it under half the crust to loosen that half. Flip that over the “stuck” half, then loosen one quarter (half of what’s left) and flip that over onto the remaining “stuck”quarter. Then you only have to loosen that last quarter to lift the whole crust, lay it in your pan, and unfold it. Hope this makes sense!
Hi Jill! Your recipe book (autographed by you at HOA :)) has become one of my favorites! The pie crust recipe comes out perfectly every time and I love using lard from our pigs we harvested this year! Everything I’ve made in the book is amazing, and our favorite is the farmhouse beef stew. I have never had beef turn out so tender in a stew before. Sorry if I’m not naming the recipe correctly, I’m at work, but it is absolutely AMAZING!