
You dig, you till, you fertilize, you plant, you water…
And then you wait. And wait.
And you scratch your head when nothing pops out of the ground…
Was it lack of water? A hungry animal? Poor soil? Bad seeds?
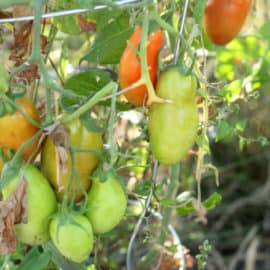
Whatever the cause, it’s always frustrating when you have to replant. Last year my bean rows had a germination rate of around 20%. It was dismal, especially considering all the big plans I had for those heirloom Golden Wax beans…
While there are lots of factors that could potentially cause your seeds to no-show, I’ll show you how to eliminate one of the variables today with this simple way to test seeds for viability
Seeds are tough little buggers, and can potentially withstand a decent amount of time in storage (especially if stored correctly). But if you come across a packet of older seeds, it’ll save you time and headache if you can test their germination rate before poking them into the ground.
This is what I’m doing with several of my packets this year, especially considering someone (aka: me) accidentally left them up in the shop attic where they proceed to get blazing hot, and then freeze in the fall before I remembered them. Whoops.
Better safe than sorry this year… I refuse to be beanless again!

How to Test Seeds for Viability
You will need:
- Old seeds in need of testing
- 1-2 paper towels
- Resealable plastic bag
- Sharpie marker (for labeling-optional)
Dampen the paper towel– it doesn’t need to be dripping wet, just nice and soggy.
Arrange the seeds on the paper towel. I like to use 10 seeds of each type, as it makes figuring the percentage easy, and ensures you’re getting a solid random sampling of the packet.
If you’re using seeds that look similar, be sure to label each area of the towel with the marker to keep them straight. Or just use separate towels.

Roll up the paper towel, or place a second paper towel over the top, to ensure the seeds is completely surrounded by dampness.
Place the damp towel/seeds in the plastic bag, seal, and set aside in a warm place.

Depending on the type of seeds you’re testing, they should begin to germinate anywhere from 2-14 days. (Seeds like peas and beans will sprout faster, while seeds like carrots or parsnips will take much longer). If your seeds are of the slow-germinating variety, you may need to spritz the paper towel with more water to keep it damp. If it dries out, the seeds will stop the germination process.
Once the seeds being to sprout, give them a day or two, and then take note as to how many sprouted vs. how many did not sprout. This will give you a germination rate. Example:
Out of 10 Tested Seeds
- 1 seed sprouts = 10% germination rate
- 5 seeds sprout = 50% germination rate
- 10 seeds sprout = 100% germination rate

Obviously, the higher the germination rate, the better. Anything over 50% is decent. Anything lower than 50% still might be usable, but you may need to plant more seeds to potentially make up for the “duds.”
My beans had around a 90% germination rate, so I’m feeling confident they’ll work it the garden this year!
Test Seeds for Viability FAQs:
Do I need to do this for ALL of my seed packets?
Nope. If the packets are new, or you are confident in how they have been stored, you shouldn’t need to do this. I’m only doing it for my older seeds that have been sitting around for a while.

What do I do with the seeds after they sprout?
If gardening season has arrived, simply plant them. If it’s not quite time to start digging outside, you can just compost them, or feed them to your chickens.
How should I store my seeds?
Seeds store best in a cool, dry place. Heat and humidity is definitely the enemy here. If you have room in your refrigerator, that’s a great place to keep them between planting seasons. If stored properly, some seeds can last for years.
Where’s a good place to buy heirloom seeds?
My favorite resource is Baker Creek Heirloom Seeds. I’ve been using them for years!
Do you test seeds for viability?
Other Gardening Tips:
- My FREE Mulch Gardening EBook (with all my best tips!)
- 7 Things Every First-Time Gardener Should Know
- Simple DIY Seed Starting System
- Seed Starting Guide
- 8 Ways to Use Chickens in the Garden
- 8 DIY Repurposed Seed-Starting Systems

Great. I have a bunch of old seeds that I’ll give this a try on.
Smart! I’m doing this today. I just found a bunch of seeds from 2008…. wish me luck!
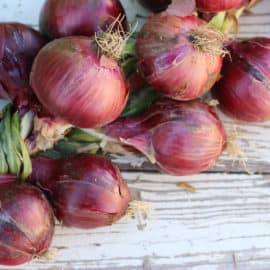
I have some of my moms seeds that were packed for ~1975 the vast majority grew just fine last year. Onion seeds seem to be the worse for longevity. Tomatoes, peppers and squash were no problem.
Two years is about the max for onion.
What about using a sprouting jar, like for bean sprouts? Will that work?
It should. That is how I did mine this year
Keep getting an error when I try to sign up for your newsletter?
I know a lot of people keep their seeds in the freezer. Is that good or bad?? What about kept at room temp and dry for several years? :/
I shall like one of the gardeners to reply to this question as well. I too have many , many seeds from many plants and vegetables that I’ve been saving for at least five years and less. And all a restored at room temperature. I guess the true testis your above moist paper towel test to measure viability.
Not all seeds will work this way. Some need sunlight without dirt to germinate. I just did this with a lot of my seeds new and old most of the ones that didn’t germinate this way where flower seeds. But for the most part excilent way to test seeds. I had 6-10year old seeds that still gave me 50% like corn, tomato, chard, and many others so yes please test seeds this way but just know it doesn’t work for all seeds.
Good information. I always have packets of left over seeds and never know if they are going to be good or not. Thanks!
This is a great idea that I always seem to forget about for some reason. Inevitably every year I have some seeds that don’t make it and I can’t remember why
Good advice. This isn’t a bad idea for new seeds as well. I have purchased packages of new seed and had some with a 10% or less germination rate. It is disappointing. I really like Baker Creek Heirloom Seeds as well.
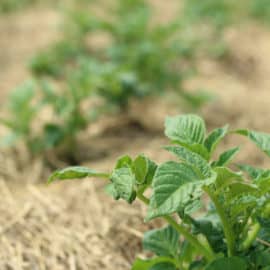
I have been doing this for years with all my seeds as it does two things: Gives me a headstart on germination and growing times by 7-10 days, and even with new seeds from the current year, there is no guarantee they will all germinate and so I avoid the patchy areas in my garden.
My husband especially likes me to do this with our pole beans as he knows he can transplant within a week of me doing this and he is sure of germination.
I do this with old and new seeds. We have seeds that are more than 5 years old and I have gotten a 75% or more rate on many of them.
Thanks for the article, I shared on my FB. This year I decided to use up all my old seed packs (I’ve been stashing them in the basement since around 2010). And other than a few peppers, everything came up! This ended up saving me about $150 in seed this year. 🙂 It’s always nice to be frugal!
Thanks so much for this post! We recently moved and our seeds went through drastic conditions (because we left them in a box). Oops!
Does this apply even to marijuana seeds? or you need to follow different methods? I am curious. Thanks!
can you use this technique for herbal seeds? for example I do have Anise-Hysssop and calendula seeds from last year stored at room temperature. Can I sue the method you described to test their viability. Also should I store them in the fridge until spring before I plant them?
Such a great idea! Thanks for sharing this!
The unfortunate fact of life is certain seeds must stratify. They must go through a cold cycle, refrigerator cold – not necessarily freezer cold, before they will germinate. Those “volunteer” plants that popped up in your spring garden were stratified seeds, having gone through the winter in the garden.
please change my e-mail address to the address below
please change my e-mail to the address below
This is the method I’ve used to start several avocado trees. 🙂 It’s worked every time! I have several packets from Baker Creek that I bought two years ago. Thanks for the idea to test them this way!
Hello Jill, I wanted to let you know that my thirteen-year-old daughter used this article as the basis for her science fair experiment this year, and she won first place in the botany division tonight! She tested seeds from 2019, 2015 and 1990. Thanks for a great article. I love reading your blog even though I don’t have a homestead!
Wow! That’s so awesome! Good for her.
My hubby does it this way every year and always has 100% germination. Just make sure the paper towel is damp and they are in a warm place,
Is there a way to test them without spouting, such as weight or moisture content?
The best way to test germination is by germinating them with this viability test. If you’re concerned about wasting seeds, you can always plant the ones that sprout.