Today I am thrilled to have Chris Wimmer of Healthy Smart Living guest posting for me today! Chris is a urban homesteader who uses hydroponics to make the best use out of his small spaces. I think you’ll enjoy learning from his post as much as I have!
This is my homestead and it provides me exactly 440 square feet of outdoor space. I truly feel blessed to have that much space as I live in downtown Chicago. However, it’s also a major downsizing from my childhood where I worked on a farm and lived on a couple acres of land.
Over the past couple of years, I’ve started using hydroponic growing techniques with some really good results.
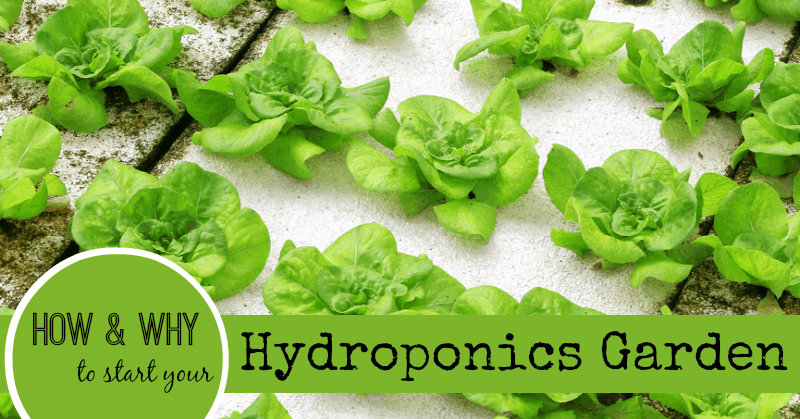
Now before I get ahead of myself let me now explain just what is hydroponics. Hydroponics in Latin literally means “working water”. The reason the water is called working is because hydroponics does not use soil to feed the plants but rather a nutrient rich solution which is continuously flowing to the plant roots. Many different types of systems have been developed but the one commonality is growing without soil.
So why use hydroponics and what are the benefits of using hydroponics over a traditional garden?
- Increased crop yield
- Faster growing cycles
- Can be done indoors
- Surprisingly cheap
- Reduced labor
- Environmentally sound
For me, there are 2 main reasons I use hydroponics for my homestead. First, I can raise bigger crops faster which is critical with limited space. Second, I can extend the short growing season in Chicago by setting up a winter garden in my spare bathtub.
So where should you start?
This can be one of the biggest challenges of trying anything new so I’m going to quickly walk you through how to get started with a simple hydroponic system. This system is simple yet effective at growing crops. You can follow this step by step or use it as a guide to create a system that is right for your situation.
The system is technically called a deep water culture system but I prefer to call it a storage tote system for reasons that will become pretty obvious.
Supply list:
- Plastic tote
- Air stone
- Air pump
- Tubing
- Air tube clips
- 2” hole saw with guide bit
- 2” net pots
- Clay pellets
- Rapid Rooter plugs (buy them here)
- pH Control Kit (I use General Hydroponic’s Ph Control Kit)
- Hydroponic nutrients (I use GH’s Floraduo A &B)
- Seeds of choice
Note about hydroponic supplies: Be creative and use what you have around your home. Aquarium supplies make great supplies for hydroponics.
Step 1: Create the planter
- Drill the 2” holes in plastic tote lid
TIP: I like to cut one addition ‘access hole’ so I can test the water and adjust during the growing season without opening the entire tote.
Step 2: Preparing the reservoir
- Fill the tote with water leaving about 2-3 inches of space. This should allow the bottom of your net pots to touch the water but not be completely submerged
- Add the nutrient solution according to the directions on the bottle
- After 30 minutes test the water’s pH and adjust according to the pH control kit directions
TIP: Most plants like a slightly acidic environment so target a pH of 6 to 7.
Step 3: Aeration system
- Drill a hole above the water line to allow the tubing to pass through
- Attach the air stone and secure the tubing inside the tote with clips
- Attach the air pump to the opposite end of the tubing outside of the tote
TIP: Plug in the air pump and ensure everything is working. It is much easier to trouble shoot before planting.
Step 4: Planting
- Moisten Rapid Rooter plugs by soaking them in water for 30 seconds
- Place net pots in pre-drilled holes
- Put one Rapid Rooter in each net pot
- Drop 3 seeds into each plug to ensure at least 1 germinates
- Fill in the extra space with clay pellets
Key Steps during the grow cycle:
- The seeds should sprout in about one week
- Maintain the water level to always touch the bottom of the net pots
- Test and add any required nutrient according to the label each week
Plant recommendations:
This system can accommodate many types of plants but herbs and lettuces are great first crops. If you want to try something that will grow a bit larger just plan to add some trellis supports much like you would for peppers or tomatoes in a traditional garden.
So that’s it! Welcome to the world of hydroponics. I hope you take the plunge and try. It’s become a fun hobby for me which also provides a cheap source of quality food.
About the Author:
Chris Wimmer is an urban hydroponic hobbyist who grew up in the Oregon country side enjoying the open spaces. Chris shares how he uses hydroponics to maximize his small Chicago urban garden space on his blog: Healthy Smart Living


My issues with this is it is not sustainable because of the use of chemicals. They are outrageously expensive too. I garden organically and I’m still waiting on someone to do more research on using various manures and compost stuff to create a nutrient for the water. I am working on a formula myself because I cant find anything out there besides compost tea..but I dont want to use bat or cow manure. I’m a small homestead..all I have is chicken and rabbit. 🙁 Guess I’ll just continue my trial and error until I get something great then post to YouTube 🙂
We have rabbits and make rabbit manure tea to water our gardens. I don’t see why you couldn’t use it for this.
Rabbit manure is supposed to be one of the very best, even better than cows, because it has the highest levels of nitrogen. Use that.
Rabbit manure is the only kind that I know of that is mild enough to use straight on your plants w/o having to age it. Also, you can make manure tea out of chicken poo and it works great. I do this b/c I also only have access to chicken poo vs the other kinds. But I agree…I can’t buy a bunch of fertilizer either.
WE USE DRY HORSE MANURE SPRINKLE IT AROUND ROSES BUSHES HANDS DOWN THE PRETTIEST ROSES YOU WILL EVER SEE. AND AS FAR AS SHEEP OR GOAT OR COW MANURE IT NEEDS TO BE COMPLETELY DRYED OUT THEN BROKEN UP AND SPRINKLED ON VEG AND GARDEN. OR TAKE A BARREL OR TOTE PLACE MANURE IN A BURLAP SACK OR SOME KIND OF COTTEN CLOTH THIS KEEPS THE GRASS OUT OF SEEDS TIE IT UP PUT IN CONTAINER COVER WITH WATER AND WEIGHT DOWN WITH A ROCK WAIT ABOUT 3 DAYS DRAIN LIQUID OF POUR ON PLANTS SAME AFFECT AS MIRACLE GROW.
Great tips! Thanks for sharing! 🙂
This is a great idea, I can’t wait to try it. I bet it would help keep lettuce going through a hot summer, too. I can never seem to keep enough water on my lettuce through the summer, but this would certainly solve that problem!
This is a wonderful resource. Last year after 4 years of almost none of my plants coming back I did a major dirt overhaul and had a master gardener friend help me pick plants. Fingers crossed that they all come back this Spring, I hadn’t looked into this option maybe I might try it for my herbs which are in containers now but not exactly flourishing…thanks for sharing the info!
That’s one of the reasons I got into hydroponics. My soil was getting stripped of it’s nutrients given it is such a small space I could really rotate crops, etc.
Good luck this spring but definitely make a little hydroponic herb garden too!
Chris
Has no one heard of aquaponics? It’s introducing a giant container of fish into the equation. You feed the fish and fish poop feeds the plants. No chemicals plus you have a second crop: fish to eat if you grow perch or tilapia.
DO NOT put animal manure in there as it will create a breeding ground for bacteria that will make you sick!
How big of a container? I’m interested but live in an apartment. How healthy is it for the fish? I don’t like tilapia but willing to try perch. Thanks for any info!
Apartment ok! This family has plans for all sizes. They are my favorite when it comes to these designs 🙂
http://www.friendlyaquaponics.com/
I would like to see more pictures. Some of the supplies and instructions just don’t make sense to me-I am unfamiliar with some of the items. I would like to try this but until I get more detail I won’t. Thanks
Mary – I did omit a few pictures on the steps as it can become a bit picture heavy. It’s always a judgement call. If you are interested in learning more about hydroponics I invite you to check out my blog. I’m not posting a more detailed how-to on this exact project as this is intended to be unique content for Prairie Homestead but if you want the extra photos, etc just shoot me an email.
Besides the chemicals used to fertilize, these plants are grown in plastic, which leaches chemicals.
Miley – I’m definitely respect your perspective. This is intended to give Jill’s readers some exposure to an alternative growing method.
If you are concerned about growing in a plastic container you can certainty use a glass aquarium or other non-plastic container.
As for the fertilizer, these are actually just a liquid form of the nutrients they would be taking from your soil. Using hydroponics, I know exactly what my plants are exposed too. I can’t really say the same for my little plot of land in downtown Chicago.