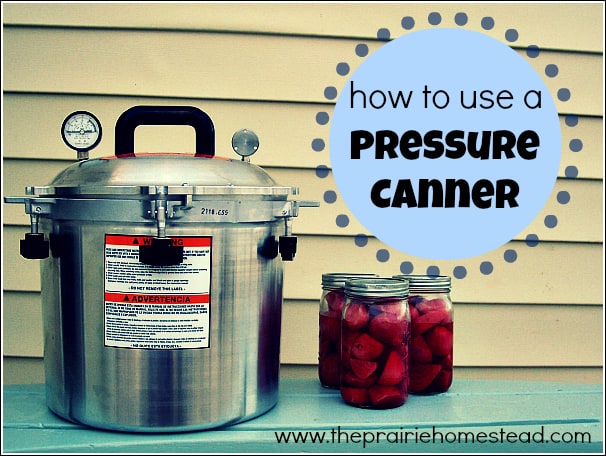
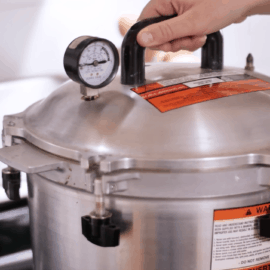
As I lifted my brand new pressure canner out of the box, it reminded me of an alien spaceship with all the gadgets on top… Not to mention the big, thick instruction book…
*Gulp*
Up until that moment, I had never even seen a pressure canner in person– let alone watch someone use one.
Thankfully, after some careful reading, I realized that the whole process wasn’t as near as intimidating as I had originally thought.
So, let’s dive right in!
Parts of Pressure Canner
This series will show you how to use a weighted gauge, All-American canner. (For more info about weighted gauge canners versus dial gauge canners, see Part One of this series.)
Of course, all manufacturers will be slightly different, so it’s very important to read the instruction manual for your particular canner. Fortunately, the majority of the parts will usually be the same.
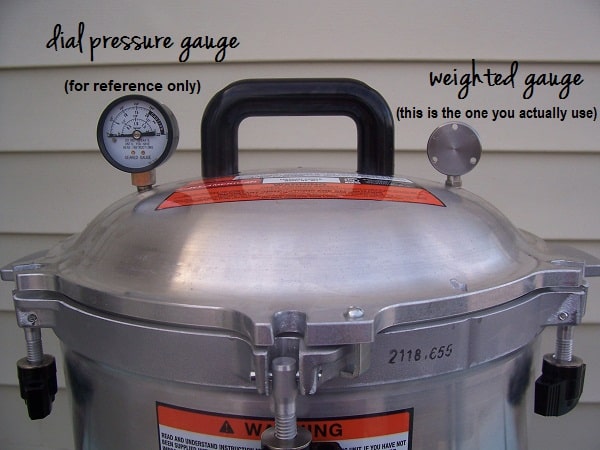
As I explained in Part One, there are 2 gauges on my canner: a dial gauge and a weighted gauge.
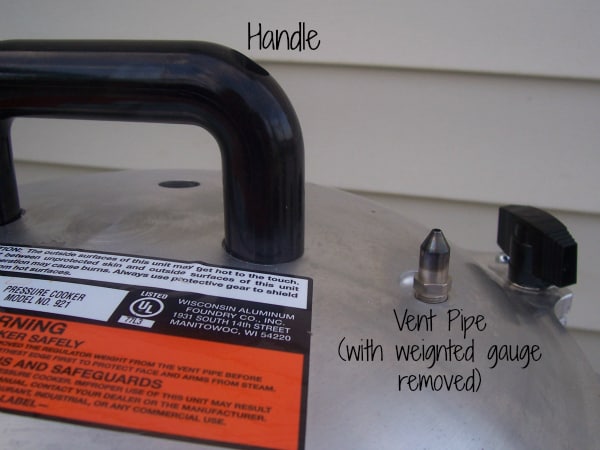
The weighted gauge sits on top of the vent pipe. Here is what the vent pipe looks like:
Many pressure canners have a rubber gasket that fits between the lid and bottom, but All-American canners like mine do not.
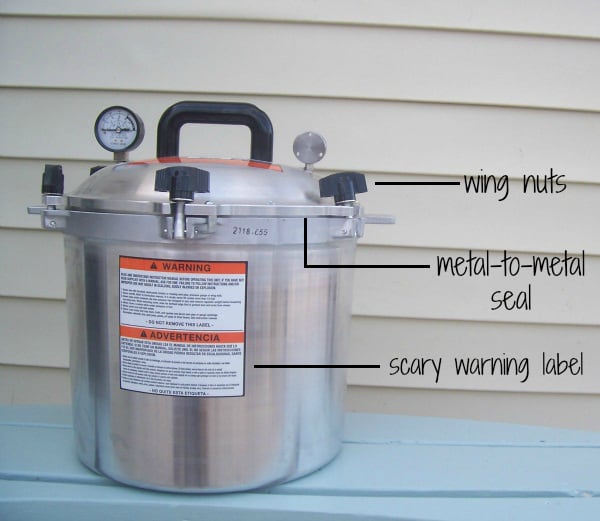
Instead, my canner has a metal-to-metal seal. I prefer this since rubber gaskets are subject to cracking and breaking and have to be replaced. The only maintenance that the metal-to-metal seal requires is a light oiling (use olive oil) every 2-3 uses.
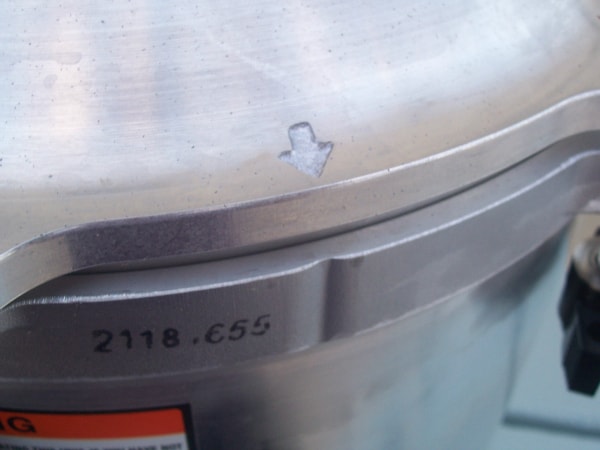
When you place the lid on the base, be sure that it is properly lined up. My model has a small arrow on the lid, and a groove on the rim of the base to show you the proper alignment. (I think some models have 2 arrows, but it doesn’t really matter.)
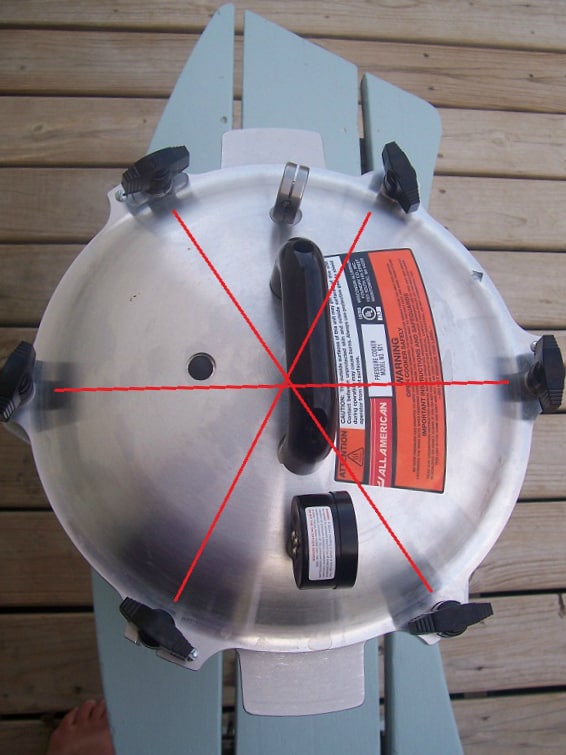
Another feature I like about my All-American is the added security of the six wing nuts that fasten the lid onto the base.
It’s very important that you tighten two opposite wing nuts at the same time when you go to attach the lid to the base. If you only tighten one at a time, the lid can become unevenly attached to the base. This can result in loss of pressure and an unsuccessful canning adventure.
I drew some diagonal lines on this photo to help illustrate the whole “diagonal tightening” concept.
Oh, and that little black rubber dot you see to the left of the handle? That’s the overpressure plug. There’s not much you need to know about that, other than it’s an added safety feature *just in case* the pressure in the canner ever becomes too high. (If that happens, it will pop out).
Just make sure it’s not worn or cracked, and clean it if it ever gets a build up of food or grease.
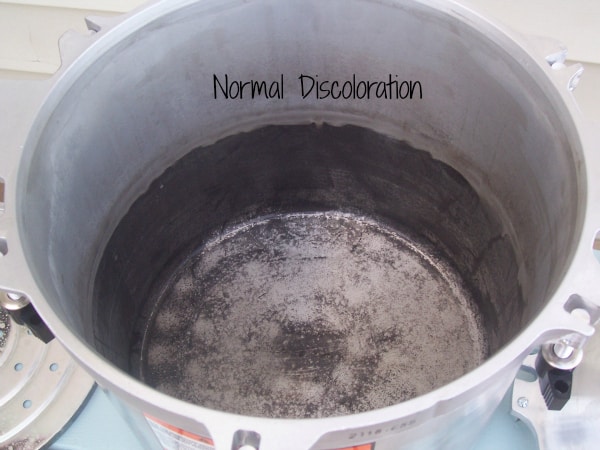
The inside of the canner is pretty boring– it’s just a big ol’ aluminum pot.
Mine discolored like this the very first time I used it, and that’s normal. (The photo makes it look crusty, but it’s not. The surface is still smooth, just “seasoned”…)
Now, the pot can become “pitted” if not probably cared for, so you do want to make sure that you thoroughly wash and dry it after every use.
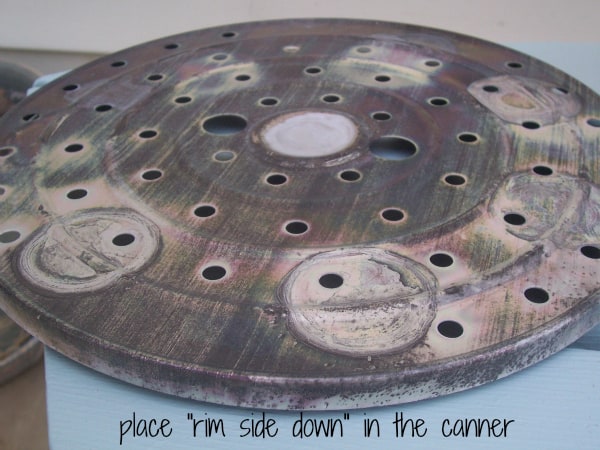
My canner came with 2 racks. One always goes on the bottom (never place jars directly on the bottom of the canner itself) and one goes in the middle if you are stacking pint jars.
Simply place the rack with the rim facing down before adding any jars to your canner.
To Sum it All Up:
- Make sure lid is properly aligned with base and always tighten two opposing wing nuts at the same time.
- It’s o.k. for the inside of the canner to become discolored with use.
- Always use a rack in the bottom of the canner, and place rim-side down.
- Always wash and thoroughly dry your canner when you are done using it.
- Occasionally check the overpressure plug to make sure it’s not cracked or gunked-up.
- If you have a canner with a metal-to-metal seal, lightly oil it every 2-3 uses. If you have a rubber gasket seal, frequently check the gasket for cracks and wear.
Click HERE to go back to Part 1 of this series.
Click HERE to read Part 3.
Questions? Confused? Have something to add? Leave me a note in the comments!
I am not affiliated with All-American Pressure Canners in any way.
This post was shared at Simple Lives Thursday



If you add some vinegar to the water in the canner, it will help with the discoloration problem. It will also help to keep the canning jars from getting “cloudy” on the outside due to minerals in your water.
Bob
Near Tulsa, Oklahoma
Great tip Bob! My jars definiteyl get cloudy sometimes– we have very hard water.
I’ve really enjoyed this tutorial. My husband bought me the same canner a few months ago and encouraged me to do one project a week to get used to it. I don’t know that I will ever be able to fully relax during the process but I have enjoyed stocking our pantry with “homemade convenience food” . We’re currently building our homestead and preparing to move in a few weeks (fingers crossed) and the canned chili has come in pretty handy on nights I haven’t had time to cook.
Good for you Jenny! 🙂 Yeah, I’m totally looking forward to canning up some chili… Hooray for healthy “fast” food!
You do a great job of explaining everything, especially pointing out the little things that others don’t that we always wonder about. I have an old timey canner but this is still helpful to me, thanks!
Thanks for the feedback Kelly! 🙂
My canned meatloaf and canned spaghetti sauce have a very strong metallic, vinegary taste.
Any suggestions what I did wrong and why they have that taste?
I did everything properly, and the jars sealed.
Plus, are the contents safe to eat?
Thanks for helping me out with this.
Hi Kathy- I am stumped! Not sure why it would taste like that. I’ll post this question to The Prairie Homestead Facebook wall and see what folks have to say.
Thanks.
ive been eating my canned food, but it doesnt have flavors i expectd.
Thanks for your help. I really enjoy your site.
I also have the same issue, the one thing that may led to this is Salt. I suspect is may be the salt i used in my cooking while canning. I used Himalayan Salt for all my cooking. In the next few weeks, i will be trying another batch without any salt, hopefully this will fix the problem.
Oh this is a wonderful series!!! I bought the exact canner last year after using my moms for years but it was a different brand so I’m relearning all th quirks of a new canner 🙂 I have a quick question about oiling the seal. In the guide I wasn’t sure of where exactly you should oil it. Could you possibly take a picture to show me exactly where I should oil it. I know that might be silly sounding but whatever I did last year didn’t work and each time I used it the canner became pressure locked and I had to pry it open so I definitely did it wrong or wasn’t generous enough with the oil. Can I use any oil to? Or something specific? Thank you so much 🙂
If you have the same manual that I do, there is a small diagram on the bottom of page 6. You’ll want to apply the oil in a very thin film to the top lip of the base, not the lid. The top 1/2″ or so of the base tapers out a bit– that is where the oil goes (hope that makes sense!)
I’ve heard olive oil is the best- with vaseline coming in second. I read somewhere that you should avoid other oils as they have a tendency to gum up. Hope that helps!
I just got this same canner in the mail today. I’m anxiously awaiting your part 3 post!
Part 3 went up this morning! Happy canning Erica!
Thank you so much for the tutorial. I have a pressure canner with the “bobble thing”
As we call it and have only used it once. I love to do the boiling water bath but for green
Beans, it takes 4 hours!! Lots of propane. But would love to become comfortable
Using my pressure canner. My problem is I was taught by my wonderful mom that
I need to get the thing bobbling and then count the bobbles per minute (bobble-stop-bobble-stop)
and keep the fire at the a height so the Bobble-stop rate is the same for the full time it’s
Supposed to be pressurized for each item. Do you see my problem?!
There has to be an easier way to do it! 20 minutes uses a whole lot less
Propane than 4 hours!! Thank you!! Btw I’m sure that is all in part 3, but
That wont load for me so I couldn’t see it. Thanks for your help
Whoops! Just realized that link was missing– here it is: https://www.theprairiehomestead.com/2012/09/how-to-use-a-pressure-canner-part-3.html
That should help answer you questions hopefully. 🙂
I was planning on surprising my wife with an All-American.
Do you know of anyone who also uses theirs as a pressure-cooker?
Hmmm… I don’t- but I know you definitely can use it for both purposes. I think there are directions in the owner’s manual.
Mine is brand new! Exactly like yours. But there’s no manual in the box!
You give great information and I found your blog very interesting, even though I have a different pressure canner! Mine has the gasket and the bobblehead and is a ‘National’ brand. I know it is old, but I have had it checked in the past, and replaced the gasket, and it seems to work fine. I do still get a little nervous when I vent the steam on it! My grama used to can a lot, and she told me the story about someone she knew who had a pressure canner explode, and how the person sustained severe burns. I’m not sure how that would even happen, unless it wasn’t sealed properly?… do you know why canners explode? Thanks for you posts, I enjoy them and you have given me renewed motivation to can more!
Canners explode when the vent/release becomes plugged– when no steam can escape, it basically can become a bomb. As long as the vent is clear and functioning properly, you should be OK.
Hi Jill,
Directions for my pressure cooker/canner say to add a tablespoon of vinegar to the water in the canner to prevent discoloration of the pot and rack. Seems to work. Great information on your site. Going to can some pinto beans today!
Bonnie
Thanks for sharing
So my canner discoloration is the opposite…darker on the top and silver on the bottom half. We have well water and the discoloration happened after my first time using this canner to water bath (i’m new to canning this year and use it for dual purposes). What specifically can i use to remove the top half dark discoloration? Thank you!