I owe y’all an apology.
Several years ago, I wrote a post in which I claimed to have found the ultimate pizza dough recipe.
I lied.
This past summer I stumbled upon a technique that has since blown every homemade pizza crust I’ve ever made out of the water.
I’ve waited to share this no knead pizza crust recipe with you because I wanted to absolutely perfect it first. And after making it many, many times over the last 8 months, I can finally say it’s ready.
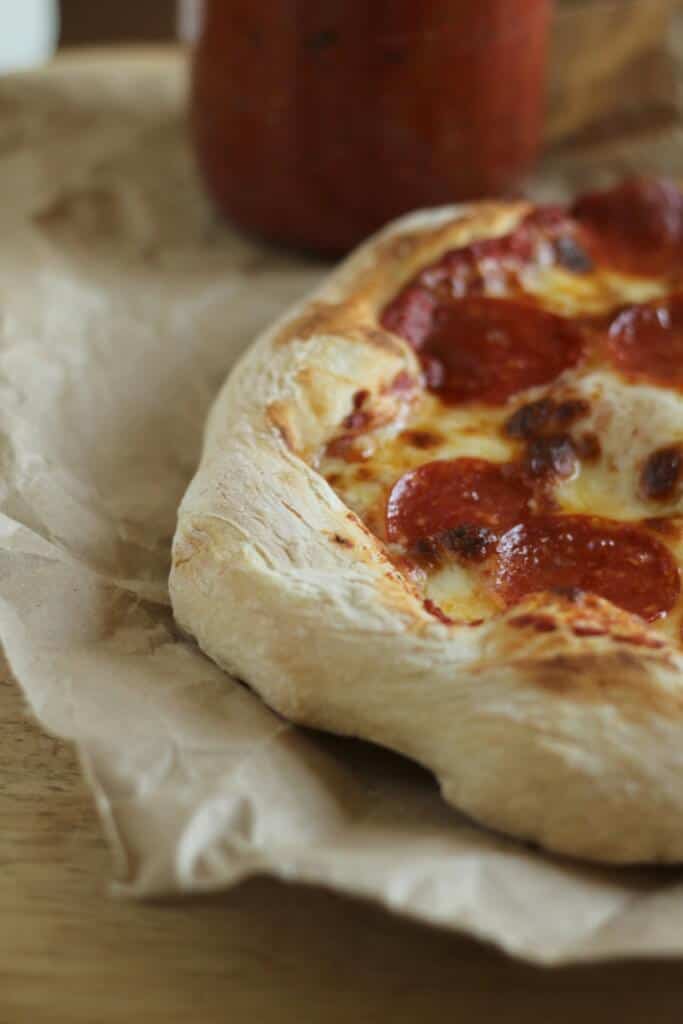
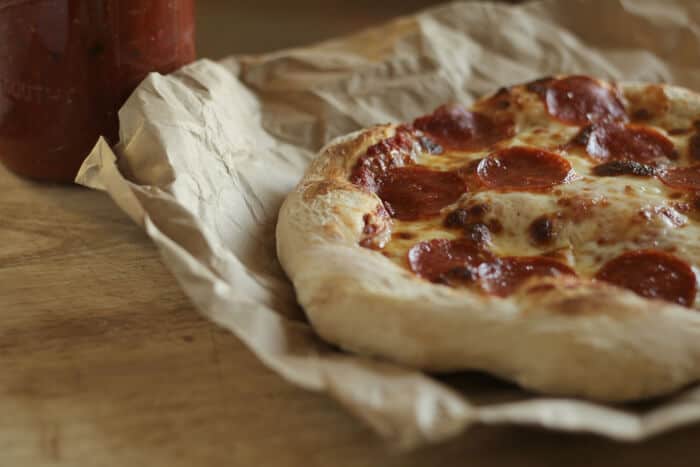
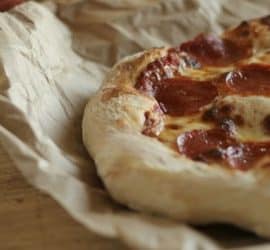
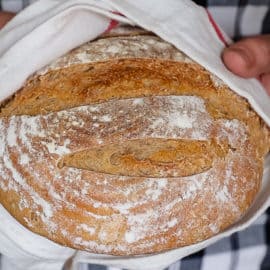
It’s delightfully chewy, perfectly irregular, and has a depth of flavor you won’t find in your run-of-the-mill crust recipes.
Prairie Husband has officially banned all other pizza recipes from our home… It requires a few more steps than my old recipe, but that doesn’t matter. Once you taste you, you won’t care if you have to climb Mt. Everest to make it. Just try it. Seriously.
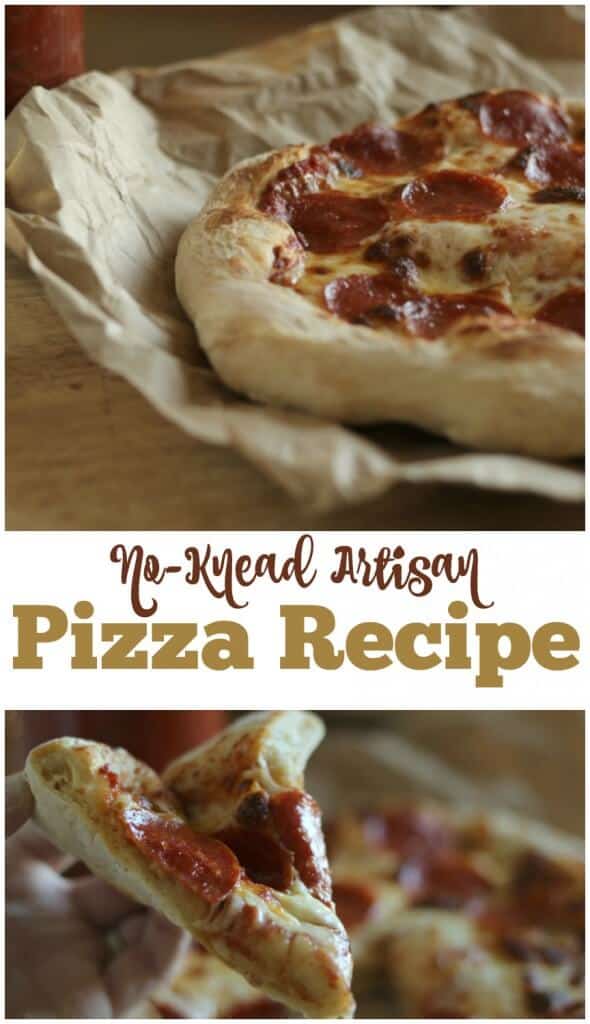
No Knead Pizza Crust
- 3 1/2 cups warm water
- 7 1/2 cups unbleached, all-purpose flour (where to purchase)
- 1 tablespoon active dry yeast
- 1 tablespoon salt* (I use and love this one)
- Your choice of pizza toppings (I like to keep mine simple to allow the beauty of the crust to shine through. I usually choose a simple fresh tomato sauce, fresh basil leaves, sliced mozzarella, and a dab of pepperoni, and maybe a sprinkle of garlic salt…)
Recommended Tools:
(This post contains affiliate links)
- Pizza peel (this one from Lehman’s looks really nice)
- Large plastic bucket for dough (I got this one on Amazon— be sure to get the lid, too)
- Pizza stone (I have one like this— have used it for years! This cast iron pizza pan works really well, too!)
*Think the ingredients sound pretty basic? You’re right. They are. The magic of this recipe comes not in the ingredients, but rather in the technique.
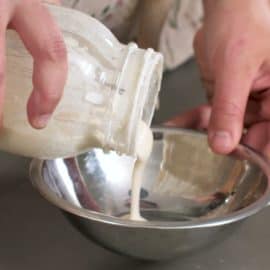
In a large container (with a lid) mix the yeast and water together, then stir in the salt and flour.
You don’t need to knead the dough, simply use a wooden spoon to incorporate the ingredients. It will look like a sloppy mess, and that’s exactly what we want.
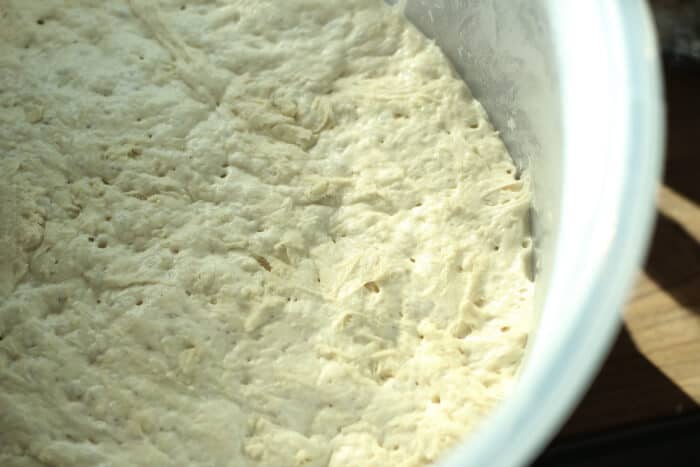
Loosely cover with the lid (you don’t want it airtight) and set aside to rise for 2-3 hours.
Once the dough has risen, you can use it immediately or refrigerate it. I generally mix up my dough the day before I need it, refrigerate it overnight, and use it the following day. Chilled dough is easier to handle, and the longer the dough ages, the better the flavor.
To Make the Pizza:
Prepare your sauce, cheese, and other toppings ahead of time. You’ll need to work efficiently in an assembly-line process.
Using the highest possible temp your oven will allow (this will usually be 550-600 degrees Fahrenheit), preheat your oven and pizza stone for at least 30-45 minutes before you start cooking pizzas. It’s tempting to skip this part, but don’t. It makes all the difference.
Measure a 13 oz ball of dough from your bucket. I use my kitchen scale for this to make sure I’m semi-accurate., but it doesn’t have to be perfect. I usually get 4-5 pizzas from this recipe. They are smaller than your average pizza, but that’s preferred as they are easier to shape and transfer that way.
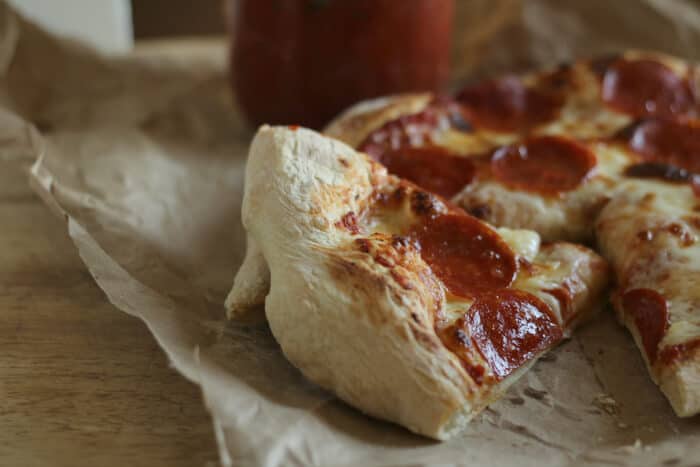
Place the dough on a very well-floured surface and punch it down. Use your fists/knuckles to stretch the dough (gravity will help, too. Here’s a video if you need a visual.). We’re trying to preserve the air pockets in the dough, so avoid smashing it as much as possible. Place it on your well-floured pizza peel and continue to gently shape into a circle (ish), just avoid flattening the edges too much, as we want them to stay puffy and chewy.
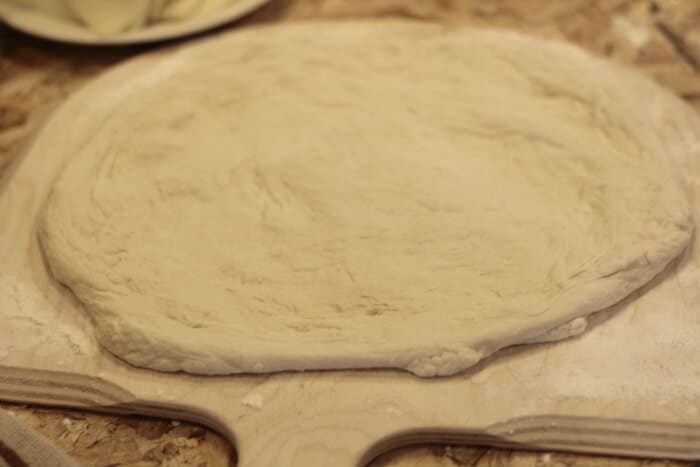
If the dough tears as you work it, no worries. Just patch it together and keep going. And if you’re anything like me, it’ll probably end up in a slightly irregular shape, but don’t sweat it. It just adds to the artisan charm.
Add your sauce and toppings to the dough, then slide onto the very hot pizza stone in the oven. This takes a bit of practice. My best advice is to make sure you have lots of flour on your pizza peel to prevent sticking. If the dough won’t budge, sometimes I’ll put it back on the counter, gently lift up the edge of the dough, and toss a bit more flour underneath. You can also try building your pizza on parchment paper, then sliding it into the oven with your peel.
Bake the pizza for 5 minutes at 550+ degrees, then switch to the broil setting and broil for 1-2 minutes. It’s done when the crust is golden brown and the cheese is completely melted.
Remove from the oven (I usually grab it with tongs and slide it onto a large cutting board so I don’t have to move the hot stone), and repeat with your remaining dough.
If you only wish to make one pizza at a time, simply refrigerate the rest of the dough until you’re ready.

Pizza Crust Notes:
- A super hot oven and pizza stone is what makes this recipe magical. Don’t skip that part!
- If the crust gets a few dark, almost charred spots on it during the broil process, that’s OK. It makes it even better.
- This pizza is best with minimal toppings. Keep it simple.
- I have no clue how to convert this recipe to gluten-free, sorry. And I’ve only ever made it with unbleached, all-purpose flour. I have not tried whole wheat flours.
- I usually use all the dough at once and make 4-5 pizzas as they work wonderfully for leftovers the following day. However, if you only want to make 1-2 pizzas at a time, no problem. Just use the dough you need, and store the rest in the fridge for up to one week.
- Wanna make your own mozzarella for a truly artisan pizza experience? Here’s my homemade mozzarella tutorial.
- And this post contains my favorite recipe for simple, fresh tomato sauce that pairs beautifully in this recipe.
Recipe adapted from Mother Earth News and Flour, Water, Salt, Yeast by Ken Forkish.
PrintNo Knead Pizza Crust Recipe
- Yield: 4-5 small pizzas 1x
- Category: Main Dish
- Cuisine: Italian
Ingredients
- 3 1/2 cups warm water
- 7 1/2 cups unbleached, all-purpose flour (where to purchase)
- 1 tablespoon active dry yeast
- 1 tablespoon sea salt (I love this one)
- Your choice of pizza toppings (I like to keep mine simple to allow the beauty of the crust to shine through. I usually choose a simple fresh tomato sauce, fresh basil leaves, sliced mozzarella, and a dab of pepperoni, and maybe a sprinkle of garlic salt…)
Instructions
- In a large container (with a lid) mix the yeast and water together, then stir in the salt and flour.
- You don’t need to knead the dough, simply use a wooden spoon to incorporate the ingredients. It will look like a sloppy mess, and that’s exactly what we want.
- Loosely cover with the lid (you don’t want it airtight) and set aside to rise for 2-3 hours.
- Once the dough has risen, you can use it immediately or refrigerate it. I generally mix up my dough the day before I need it, refrigerate it overnight, and use it the following day. Chilled dough is easier to handle, and the longer the dough ages, the better the flavor.
- To Make the Pizza:
- Prepare your sauce, cheese, and other toppings ahead of time. You’ll need to work efficiently in an assembly-line process.
- Using the highest possible temp your oven will allow (this will usually be 550-600 degrees Fahrenheit), preheat your oven and pizza stone for at least 30-45 minutes before you start cooking pizzas. It’s tempting to skip this part, but don’t. It makes all the difference.
- Measure a 13 oz ball of dough from your bucket. I use my kitchen scale for this to make sure I’m semi-accurate, but it doesn’t have to be perfect. I usually get 4-5 pizzas from this recipe. They are smaller than your average pizza, but that’s preferred as they are easier to shape and transfer that way.
- Place the dough on a very well-floured surface and punch it down. Use your fists/knuckles to stretch the dough. We’re trying to preserve the air pockets in the dough, so avoid smashing it as much as possible. Place it on your well-floured pizza peel and continue to gently shape into a circle (ish), just avoid flattening the edges too much, as we want them to stay puffy and chewy.
- If the dough tears as you work it, no worries. Just patch it together and keep going.
- Add your sauce and toppings to the dough, then slide onto the very hot pizza stone in the oven.
- Bake the pizza for 5 minutes at 550+ degrees, then switch to the broil setting and broil for 1-2 minutes. It’s done when the crust is golden brown and the cheese is completely melted.
- Remove from the oven and repeat with your remaining dough.
- If you only wish to make one pizza at a time, simply refrigerate the rest of the dough until you’re ready.

That seems like a lot of flour, if I just wanted to make one large pizza could I cut this recipe in half? Looks delicious!
Yes– you can definitely cut the recipe in half if you need to
Came out of the oven wonderfully. Thank you
This is the best pizza crust and so easy! I love how it raises so beautifully in the oven.
I often make the full batch and freeze half. The dough typically freezes great and the next pie is that much easier – you just have to remember to take it out to give it time to thaw 🙂
Do you shape then freeze or is it frozen in ball form?
I freeze in ball form: I put it into a glass container, then take it out the morning of (loosen the lid because it will expand!)
You can cut the recipe in half, but if you make the pizzas much larger than this, they become hard to handle in the shaping/transferring process.
What’s a “pizza peel” ?
A pizza peel is the large, usually wooden, spatula used to slide your pizza in or out of the (deck) oven. Any restaurant supply house will have “pro” models. You will want a shorter handle for home use. Keep it dusted with flour. BTW, don’t buy that aluminum version some places sell.
This didn’t work for me unfortunately. The dough was way to dry and it wouldn’t stretch to form into a pizza. I had to add more water and then let it sit at room temperature for an hour before trying to form it.
I think this would be wonderful for our large family. I can’t wait to try it!
I’m definetly going to give this a try, but was wondering if you have a go-to recipe for sourdough pizza dough?
Wow, this looks delicious! I was planning on making pizza tonight and am kind of tired of our regular crust recipe so I’m totally trying this one! Perfect timing! 🙂
I have been using the no-knead method for awhile and it really has rocked my world, my friend showed me how and I haven’t looked back. This is a great recipe, my husband feels the same way 🙂 Love the pictures, Jill!
No-knead applies to all sorts of artisan bread products. For a real treat, try ‘stretch and fold’ with your doughs, and slow rise in the fridge to make them all super delicious. The stretch and fold is the real key – it builds the elasticity of the flour – but you must rest the dough at least 5 minutes between each set or the dough becomes too resistant to shaping. Stretch & fold isn’t at all like kneading. Simply press dough ball into a flatter round shape on your work surface (gently), lift the top down to the middle, the bottom up to the new top, repeat for the sides, and let it rest. 4 repeats and you should have a wonderful, elastic dough, ready to do a slow rise in the fridge.
Do you think I could omit the salt and still get a good result?
You probably could omit it– would just lack a little flavor.
Could you use pizza dough flour. The 00 type??? Looks delish cant wait to try it.my family is CRAZY about pizza
Salt is an essential part of the chemistry that happens in making bread because it regulates the yeast. Please don’t leave it out. You will lose far more than taste. The amount of salt in properly constructed dough should have no effect on anyone. If it does bother you bread is probably not what you ought to be eating either.
I can’t wait to try this!! Thanks for sharing your recipe.
This looks amazing… however, I do not have a pizza peel. Do you have any suggestions for bypassing this? Thanks so much!
When I make pizza I roll the dough on parchment. When it’s ready to go in the oven I slide a flat cookie sheet under it and put the dough and parchment on the stone….works especially well when cooking for my large family… The stone stays in the oven and the pizzas come and go.
Try a piece of parchment paper instead.
This looks lovely… however, I don’t have a pizza peel. Is there any way to bypass that? Thanks 🙂
Use the above suggestion from Heather. She’s using the parchment as the peel. Prepare your dough on the parchment, slide parchment and dough off the cookie sheet onto the pizza stone. I tried it and it works beautifully. But I’m buying a peel just because.
Is there a way to freeze leftover dough? This sounds like the recipe my mom used in the ’60’s but without a stone or high heat.
I was wondering about freezing, too. Do you think it would be better to freeze the dough or bake the crust and then freeze that?
Looks delicious!Have u ever tried a crust with chickpeas flour?
Thank you…. is this from the Artisan Bread in 5 minutes a Day book? If you haven’t read it or checked it out on Pinterest, you should. Also, try cornmeal instead of flour for under the crust. It’s really tasty. I even used Couscous once when i didn’t have my reading glasses on. It was pretty tasty, as well!
Would this recipe work on the grill? Don’t use my oven in the summer here in AZ.
I’m not sure. Never tried the grill.
I have friends that used to cook pizzas on a tiny BBQ grill while camping.
It should!
This looks delicious! Can’t wait to try it with my pizza loving group. 🙂 Have you ever made it using fresh ground wheat? Just wondered if it would be worth trying or a complete flop. Thanks for posting!
Thanks for posting to Pinterest for me! Not sure where you find the time, but, thank you 🙂
Awesome pizza dough! Thank you for sharing. I made 3 pizzas and another one for dessert with cinnamon, brown sugar and some butter?
OH.. I LOVE the dessert pizza idea!
Where do you put the pizzas as they come out, since this makes 4? I don’t have 4 round cookie sheets (actually none ??).
We just throw them on big cutting boards or bread boards. That way you can slice them on there, as well.
you are right….It’s a keeper!!!!
Tried it last night. It was delicious. But the dough is so sticky at first and then really stretchy once it’s rolled out that I had a hard time getting it to slide from the peel onto the stone (instead of rolling up like and omelet which is what it wanted to do). Any tips?
You could try cornmeal on parchment instead of flour. Just past or roll dough right on top of a sheet of parchment, once you have a good sized circle invert onto another cornmeal strewn sheet, add toppings (or not) and carefully slide the pizza onto the stone.
I parbake my crusts. Haven’t tried this no knead recipe but love the original bread recipe with a few tweaks..
I’m giving it 4 stars since I haven’t tried it, but have an eye for good ones.?
Hope this helps!
Thanks! Parchment is a great idea to try. I guess I felt that when I bought the pizza peel it would prevent the need for that…but my technique must not be that good!
When this happens to me, I shove more flour underneath (lift up one side at a time) or you can also use parchment paper. It takes a little practice. 🙂
On which oven rack should the pizza stone sit?
Mine is usually just in the middle.
A deck oven, the professional pizza oven proudly made here in VT by Blodgett, has the “stone” surface right on the bottom. Try the stone down fairly low, leaving some space under it, and then decide which cooks better.
I do not have a peel. Any suggestions on how to transfer pizza to the stone without a peel?
Parchment paper will work!
Flip a cookie sheet upside down and put a little flour on it. It’s appealing!
Oh Daryle… haha! 🙂
Well Jill, it will be VERY hard to top your old recipe, I’ve been using it since you posted it! I’ve also passed it along several times, everyone LOVES it. I also make the batch two or three times, divide each batch in half and make smaller pizzas for just my husband and myself. You can bake the crust about 10 minutes until it is set, then remove from oven, cool, and freeze in ziploc bags. FROZEN HOMEADE pizza, I just thaw, put toppings on and finish baking and they are great!!! But I am willing to try this, hope it is as tasty.
I know that you said to not seal the lid while allowing it to rise. When you are storing the leftover dough, do you seal the lid or leave it unsealed?
I pop 3 sides of the lid shut when I store it in the fridge, and just leave one side slightly open.
I cook mine in a preheated cast iron skillet!!
I use a cast iron skillet too!
YUM! I made it tonight, but used it for breadsticks. Rolled it out then spread mixed, softened butter and garlic, drizzled a little olive oil, sprinkled a little salt and baked/broiled as directed. I cut it into strips before baking. Family loved it! Can’t wait to use it for pizza (probably this weekend) 🙂 I was almost out of white flour, so I did make it with half white flour and half whole wheat flour and it worked very well.
Oooh… breadsticks sound yummy!
I made this tonight altho I couldn’t wait three hours to let it sit. I recently got my first pizza stone and have only baked frozen pizza on it. I formed my crust on a flat cookie sheet, well floured and slid it on to my preheated stone. The crust rose so quickly. I had the stone in the center of the oven and had it preheated to 550 and I used the convection setting. I was amazed as I watched it through the glass. It rose and all the toppings and cheeses were melting and bubbling and browning in about seven minutes. It was beautiful, so crunchy and chewy. I had sauce, mozzarella, onions. Peppers, mushrooms and parm. A generous amount of toppings and still the crust was crisp on the bottom. With the long counter time, is this considered a sourdough?
Sigh…. I’m in love!
It is beautiful isn’t it? 🙂 It’s not technically a sourdough, but most high-quality artisan doughs have a long counter time, as it greatly improves the flavor of the dough.
Thanks for this recipe! I’m looking forward to trying it! We love sourdough, so I’m wondering if I could leave it out overnight, instead of refrigerating it. What are your thoughts?
Seriously the BEST pizza dough EVER!! Thank you thank you!!!!! <3
You are very welcome Jennifer!!
First time making homemade pizza dough….need to practice the knuckle part! Nice to know the recipe could be cut in half…I made it all, and have two pizzas for lunch this week.
So sadly I have none of these supplies. But what I do have is a 10-12″ deep dish stone pan given to me. Now that I know I could cut this in half and ways to get around the pizza pile. Do you think I could try this in a deep dish pan? I hope so cause a pizza stone just can’t fit in my budget ?
If you construct your pizza on parchment, making sure the dough is the right size and the parchment is big enough to act as handles, preheat your pan with the oven, and carefully lift the parchment with the pizza into the hot stoneware, it should work just fine. But wear heavy oven mitts or you could risk serious burns with the super hot oven.
Great pizza!!! My family loved this recipe. It will definetly be going into our meal rotation! Thanks for sharing.
I’m so glad it was a hit!
I made pizza this weekend and it was great! Thank you so much for sharing this recipe and the technique. I watched the you tube video on how to stretch the dough and did it the way he instructed. It was the best pizza I have ever made. Thank you!!!!
I’m so glad! Yes, it the stretching took me a while to figure out, too, but those YT videos are awesome.
Thank you!!!! Best pizza I have ever made.
Hooray!!
Love this recipe. I used whey instead of water and was amazing. Used 3 of the balls for pizza, and the last ball for cinnamon rolls. Thank you for this real treat!
Yum! Whey would be a great option here!
I have been waiting for such recipe to come into my life! It truly is the best pizza crust EVER. I even did half fresh ground whole wheat and it made a wonderful crust. My husband has requested I keep the dough on hand at ALL times.
Thank you for sharing your recipe and going through the trial and error for all of us.
Wahoo! I love comments like this. Glad it was a hit!
I tried this and it is simply the best! Too bad my hubby doesn’t like pizza, right? 🙂 One problem I had though was when I preheated the pizza stone it would draw out grease from previous uses (it was clean when I put it in the oven) and scorch it – all our smoke alarms were going off! What am I doing wrong?
That happens to me sometimes too– especially since the oven is heated so hot. I wish I had a solution for that.. I just have to run the fan!
I use parchment paper to roll my pizza out on, then slide a flat baking sheet under it to transfer to the oven and onto the pizza stone (the parchment makes the pizza slide super easy). Maybe this would help with this issue??
Yum! and Wow! I have been too busy..lazy..take your pick..to try to make pizza dough on my own. With this recipe I think I just may try it- this Saturday is looking like a Pizza night. The kids love to “make” their own pizza, aka putting their own toppings on- now they can REALLY make their own pizzas. Thank you for sharing.
You’re gonna love it Rachael– it’s worth the little bit of extra work!
I made this two nights ago with the following results…followed the recipe exactly as Jill describes. It was a very, very wet dough. The first night, I let it rise for 3 hours, tried to measure out the 13 oz. (which is not easy, given how wet it is) and form into a “pizza”. I ended up using a ton of extra flour just to get it off my fingers, and upon trying to get it off the peel onto the stone, ended up turning it into stromboli. A disaster to say the least. Left the rest in the fridge to try again the second night. Had much, much better results after letting it alone for a day. It was still pretty wet, and I had to use A TON of flour to get it form properly and get it to slide off the peel, but it was easier to handle cold. It has a great flavor, I’ll give it that. Just not the easiest to work with. Made enough for five, 12″-15″ size pies total. Anyone have luck freezing this dough? I think next time I’ll try cutting it in half and making small “individual” sizes that are easier to work with. I will try it again, just because the flavor was there.
Kathy– if it is that wet when you try to pick it up, I would definitely add more flour to it as you do the initial mixing. Climates and flours differ so much, it can require more or less, depending on the situation.
Looks like a great recipe to try, I don’t like store bought pizza. Will reply when I try it.
Fantastic dough! I recently started cooking and decided to attempt my first from-scratch pizza (used your tomato sauce recipe as well) while my immediate family was home for the holiday. Pops liked it, but he likes most everything edible; mom raved, especially about the crust; and my sister–who’s not prone to giving me high praise, which is all good, we’ve always had that sibling rivalry–was impressed. Figured I’d have to try two or three recipes before I found the perfect crust… not so, thanks for sharing!
Woot woot! So happy you are loving it as much as we do! 🙂
Will this work with a grain-free flour or (more likely) a less strict gluten-fee flour?
I don’t have any experience with GF flour– sorry!
This recipe sounds so good and so easy. My question for you is I already have a cast iron pizza pan. May I use this instead of buying a pizza stone?
Yep, that should work!
A docker also comes in handy, this leaves small holes in the crust allowing even cooking. A docker can be used for pie crusts too.
We LOVE this recipe! We make 4 crusts out of it, but at this time our family can only eat two. So, I rolled out the other two, put them on parchment, stuck them in 1.5 gallon zip-top bags, and froze. They came out of the freezer beautifully, and prep was that much quicker the second time!
Glad to know freezing works for this recipe!:)
Love this recipe! You shared it (via your email) at the perfect time for me, as I was planning pizza for yesterday but really couldn’t be bothered with the effort of making a pizza dough. My husband loved it and is quite happy that I plan to keep it on hand for lazy dinners1
Hooray– glad you liked it!
We absolutely love your blog and find a lot of your post’s
to be just what I’m looking for. Do you offer guest writers to write content for you personally?
I wouldn’t mind creating a post or elaborating on a lot of the subjects you
write related to here. Again, awesome weblog!
Can I prebake the crust? If so how long and and what temp?
I don’t have a pizza stone will a regular pizza pan work?
It will– it just likely not be as crispy.
Here is my recipe for 20 min. Pizza – 475 degrees for 12 – 15 mins.
1 tsp. quick rise dry yeast
1/2 c. Lukewarm water
1 tbsp vegetable oil
1/2 tsp honey
1 1/4 c wholewheat flour
1/4 tsp garlic powder
1/4 tsp onion powder
Mix ingredients together and let dough rest for 5 mins. Place dough on lightly oiled pan. Spread sauce on then other toppings, and sprinkle shredded mozzarella cheese on and bake.
It’s really a nice pizza recipe. It’s very easy to cook. I will surely try this recipe. Thanks for your idea.
How big of a plastic container do you mean?
I have been looking for a really good pizza crust recipe for years. Not only is this one delicious, it’s easy too. Thank you so much!
Jim Leahy been doing this forever…he more than likely pefected this method at his Sullivan Street bakery in NY City…he is the king …glad to see your spreading this method around for it’s the best…TKS to Jim we don’t order pizza out any longer…u b u
Hiya, do you know the calories in this amazing dough?
I’ve started dieting but me and the kids both want pizza ? thanks. Love the recipe ?
I would like to get your new book but if uses a lot of gluten I’m not sure. What if someone can’t eat that?
Can you use “00” flour in place of the All-Purpose? If so, would it be the same measurement?
Thanks.
Looks wonderful! Is there any way to substitute sourdough starter for the yeast? #newbiebaker?
Jill – I just wanted to pop in and say that I’ve been using this recipe for about 6 months and OH MY GOSH it is sooooo good!!! My family loves it and I love that it is so easy. Cannot thank you enough. I’ve tried about one hundred different pizza dough recipes and this one far exceeds any other. Thank you, thank you, thank you!
So glad you love it! It’s a good one, for sure! 🙂
Can i use instant yeast? Thats all i use for my breads ect
I was keen to try a new version of pizza crust, especially during this time of isolating at home with the family. We have pizza every Friday night, and your pizza pics look delicious so I was drawn in. I REALLY wish I would have read through more of the comments before starting. Without a pizza peel, I struggled to get the pizza onto the hot stone. I might have sworn to never make pizza like this again. BUT it turned out SO delicious. My one son said it was like pizza from a restaurant. lol Next time I will try it with parchment paper. Such a simple solution! Thanks for sharing this recipe!!
Sorry about your struggles, but I’m so glad the pizza redeemed itself. Using parchment can be a real game changer.
Could this recipe be adjusted to use sourdough starter? I’ve been looking for a perfect sourdough pizza dough recipe!