How is it that I always forget…
…just how much work it is to wrap up the garden at the end of the year?
For some reason, once the garden is in full-swing mid-summer, I tend to have the attitude that I’m “home free.”
WRONG.
Even though it’s October and a lot my plants are past their prime, there is still an amazing amount of food out there.
And I gotta get it out before a) the first frost comes, and b) before this baby comes.
So yeah, I’m feeling a bit of urgency right now.
The catch?
I usually store my harvested veggies in our small unfinished basement space. However, thanks to our massive house remodel project, the basement is sorta difficult to access at the moment, and not super conducive to hauling pounds of produce in and out.
I don’t have a root cellar yet (I know– some of you suggested we build one onto the new house, but we weren’t quite ready to deal with the logistics/code issues that arise from having a exposed earth room attached to a finished basement…), so I decided to research root cellar alternatives this year.
Turns out, there are plenty of ways to store your lovely garden harvest without a root cellar. Here’s a list to get your wheels turning—>
13 Root Cellar Alternatives
1. Trash Can Root Cellar
- Materials: metal trash can (with a lid), waterproof cover (like a tarp), straw, shovel
- Estimated Cost: Cheap
- Difficulty Level: Easy
- Description: Perfect for storing root vegetables, the Trash Can Root Cellar is simply dug into the earth, filled with your root veggies, covered with straw, and topped with both the tarp and the lid. Easy to upkeep and cheap to make!
- READ: How to Make a Trash Can Root Cellar
2. Bucket Root Cellar
- Materials: 5 gallon bucket (with a lid), drill, shovel, straw (optional)
- Estimated Cost: Very Cheap
- Difficulty Level: Easy
- Description: Potatoes, onions, and root vegetables work well with this very simple and easy Bucket Root Cellar. Dig the bucket into the earth, add the lid, and for extra protection, feel free to top it with a bale of straw.
- READ: How to Make a Bucket Root Cellar
3. Bury an Old Freezer (or Refrigerator)
- Materials: old chest freezer/fridge, PVC pipe, tarp, shovel
- Estimated Cost: Average
- Difficulty Level: Somewhat Difficult
- Description: As long as you are simply recycling an old chest freezer, this option is still pretty cheap. It can be a bit tricky if your freezer still contains freon (see post for more details), however, besides the freon issue, it’s not too hard to bury an old freezer for holding your potatoes or root vegetables.
- READ: How to Bury an Old Freezer

4. Pallet Root Cellar
- Materials: 6 pallets, tarp, shovel, assorted tools for cutting pallets
- Estimated Cost: Cheap (if you can get free/cheap pallets)
- Difficulty Level: Medium
- Description: If you can get your hands on some pallets, you can make a mini root cellar under the earth for your dried goods and root vegetables.
- READ: How to Make a Pallet Root Cellar
5. Make a Cold Storage Room in Your Basement
- Materials: vents, insulation, assorted wood, assorted tools
- Estimated Cost: Average – Expensive (depending on what supplies you already own)
- Difficulty Level: Medium-Difficult
- Description: If you have the space in your basement for a cold storage room, this might be the best solution for you. It does take some careful research to understand how to circulate the air in your new cold storage room and how to manage the temperature and humidity levels.
- READ: How to Make a Cold Storage Room in Your Basement
6. Make a Zeer Pot
- Materials: 1 small clay pot with a lid, 1 large clay pot, sand, duct tape
- Estimated Cost: Cheap
- Difficulty Level: Easy
- Description: Zeer pots are pretty fascinating. They can keep your food cool due to water evaporation from the combo of a large clay pot, sand, and small clay pot. It’s easy to make and could be a fun way to teach science to your kids.
- READ: How to Make a Zeer Pot
7. Build a Spring House
- Materials: small creek or stream on your property, assorted tools, assorted lumber
- Estimated Cost: Expensive
- Difficulty Level: Difficult
- Description: If you are fortunate to have fresh running water on your property, you might be able to make a spring house. These beautiful buildings are a very traditional way of storing your food. The cool water keeps the spring house at steady temperatures for food storage.
- READ: How to Make a Spring House
8. Make a Storage Clamp
- Materials: straw, shovel
- Estimated Cost: Cheap
- Difficulty Level: Easy
- Description: A Storage Clamp is a very old way of storing potatoes and root vegetables. It is incredibly easy: find some level ground, cover with straw, top with your vegetables, and then add more straw. Easy.
- READ: How to Make a Storage Clamp
9. Using Your Garage/Outbuilding
- Materials: assorted tools, lumber, insulation
- Estimated Cost: Cheap-Average (depending on the condition of your garage/outbuilding)
- Difficulty Level: Easy-Medium
- Description: If you live somewhere with cold winters, you can often use your garage or outbuilding as a “seasonal cellar” for your root vegetables. Even if your garage/outbuilding is insulated, it’s not a bad idea to add another layer of insulation to keep the temperatures stable. Place your veggies in old coolers or cardboard boxes and put in a dark and cool place.
10. Use Your Attic
- Materials: assorted tools, lumber, insulation
- Estimated Cost: Cheap-Average (depending on the condition of your attic)
- Difficulty Level: Easy-Medium
- Description: If you have an attic and you live somewhere with cold winters, you can often use your attic as a “seasonal cellar” for your produce. Just like with your garage/outbuilding, it’s always best to double up on the insulation for stable temperatures and keep your produce in cardboard boxes or old coolers.
11. Make a Food Storage Shelf
- Materials: assorted tools, lumber, etc.
- Estimated Cost: Average
- Difficulty Level: Medium
- Description: Even a spare bedroom or your pantry can hold fruits and vegetables for long storage, as long as the shelves keep your produce dark and cool. There are plenty of ways to make shelves for this, but here is my favorite DIY plans:
- READ: How to Make Food Storage Shelves
12. Store Vegetables in Cardboard Boxes
- Materials: cardboard boxes, straw/peat moss/sand/newspaper/filling
- Estimated Cost: Cheap
- Difficulty Level: Easy
- Description: If you have a cool place available (even under a bed!), you can simply use cardboard boxes and whatever filler you have available to store your root vegetables.
- READ: How to Store Root Vegetables in Cardboard Boxes
13. Store Root Vegetables in Sand
- Materials: sand, containers
- Estimated Cost: Cheap
- Difficulty Level: Easy
- Description: Use whatever boxes/old coolers/storage containers you have handy, and fill them with the fine sand you use in children sandboxes. This is one of the easiest and cheapest ways to store your produce.
- READ: How to Store Root Crops in Sand
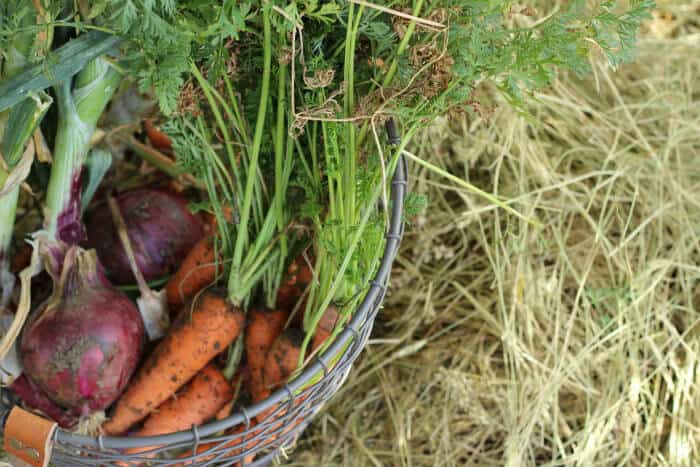
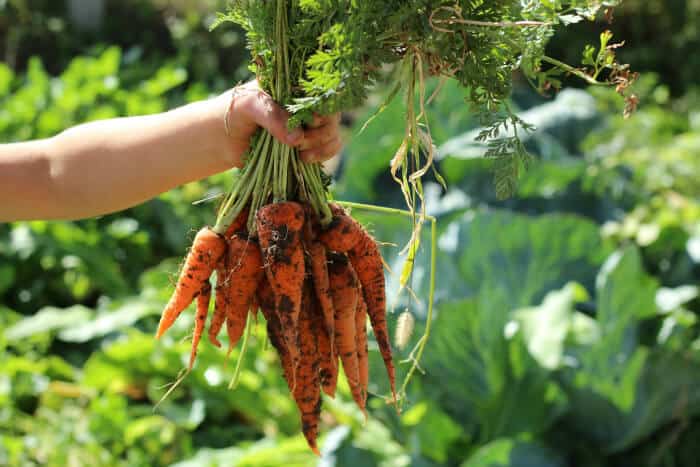


I am loving your carrots! I have not yet mastered the carrot-challenge. I’m not sure if it’s the hot FL weather or what…but ours were very small last year and this year’s seeds didn’t even germinate (yeah, I’m pretty sure it was too hot). Still searching for our secret to perfect & plentiful carrots!
What variety do you plant?
Hi Jess,
I live in Georgia – it is often rather hot for cool weather veggies. This fall I’m trying a variety called Atlas. It is supposed to be an early variety (about 2 months to harvest). Plus the roots are fairly small so they can grow in less than ideal soils or even containers (that’s what I’m using). Hopefully that helps you. 🙂
Thanks April! I will look into that variety. We have tried several that are “supposed” to be good for warm weather. Our soil is very sandy…great for sweet potatoes, but not so much for carrots.
What about a storm shelter?
This was a really useful post. We don’t have a basement or a root cellar and we live on the Maine coast where there is a lot of ledge, in other words, it’s incredibly difficult to dig deep enough to bury something like a bucket or a trash can.
And we have a lot of wild animals in the area so using our barn isn’t always a good idea. I may try the sand method.
Live in Washington state my family would leave root crops inth the ground cover with thick layer of straw and tarp we expose and dig them as needed stayed fresh and firm in spring just work staw into ground
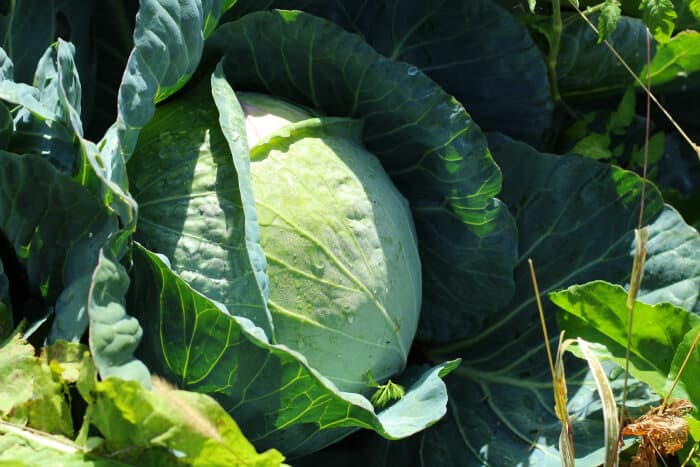
Cabbage would pull up roots and dont trim just hang upside down in cool basement the head will draw moisture from the leaves have kept all winter even in spring perl off few layer of leaf have firm head for eating
So with potatos just leave in ground and cover with straw and tarp and dig what I want for that day.
I’m a beginner in gardening need all the advice in how to do this
I tried sand-storage with some carrots as an experiment, but found them completely dehydrated and useless in about 1 1/2 months. I guess it’s because they should have been watered occasionally, but found no reference to this in your article. Do you have any suggestions?
I would definitely suggest starting with damp/moist sand (that’s what I’m doing this year) and then checking periodically to make sure the moisture content is adequate. I would think that would help with the drying out.
What a helpful post. I have winter squash and potatoes to deal with. I’ll use one of these for sure.
Please expand a little on the use of an unheated outbuilding for veg storage. I have a lightly insulated storage space in a steel building in zone 3. The insulated area warms up a little due to direct eastern sun in the morning and the narrow end of it gets direct southern sun mid-morning to mid-afternoon all winter, and we get a lot of sunny days. I can understand how extra insulation would protect the veggies from warming, but what would keep them from going below 30F if our air temperatures are in the -25 to -35 range occasionally??? Would an uninsulated concrete floor remain at ground heat, which here would be about 31F, due to the extra insulation? If this is possible, I too would be ecstatic to take digging a root cellar of my checklist! Thanks for the excellent suggestions.
We lived on an acreage in AB, Canada (zone 3) and had a little insulated storage area inside of another storage area in our unheated garage. It had shelves (for air circulation) and a door on it. We put a light bulb inside there (not the best for potatoes as they can turn green if not in total darkness) and never had any problems with things freezing. Of course, the challenge with an insulated space for a root cellar, is keeping it cool in the warm months but I guess that’s when you should have eaten everything up.
Thanks for the feedback, Heather. My husband is a major potato fan. Our potatoes are gone pretty quick, though I may try the buried trash can option for those. I am encouraged to give our storage building a try with the modest amount we have this year. If it works, I’ll be able to plant quite a bit more than in the past.
By the way, I know Alberta is a very large province, but I thought you might be tickled to know that I have a cousin who lives near Caroline, and she gardens, too. I’ll share the alternate root cellar ideas with her, and pass along your comments.
Hi Sandy,
This is an interesting forum thread all about storing veggies in an unheated garage: http://forums.gardenweb.com/discussions/1970873/can-i-store-my-root-vegetables-in-an-uninsulated-garage
I live in zone 3 also and tried one year to keep carrots in one of those styro-foam coolers. I layered them in between sand and kept the cooler up against the inside wall, but when it got really cold they froze solid. I guess I’ll have to figure out a way to insulate them better. The best I’ve done to keep carrots so far is to put them in plastic freezer bags with holes poked all over and put them in our extra refrigerator. I’d really like to try the buried garbage can method if I can find it in the deep snow.
What baby? How did I miss that.
It’s a recycled post from 2015. ?
Great ideas here, if only I’d seen this last week when trying to figure out what to do with my bumper crop of carrots! I ended up layering them in a big bucket filled with peat moss. We’ll see how long they last ?
Great work on the carrots!
I have tried and tried to grow them. I even added bags of sand to one of my raised beds to make my carrots happy.
Nope. I don’t think carrots like Kentucky.
Bummer! I usually have decent luck with them here in WY. Sometimes the don’t germinate as much as I’d like, but usually I get at least some.
I also missed the baby info! Unless that meant your “crop” for the year needing harvested…….
I love the one of re-using the freezer. Superb! We currently seem to eat our veg as it comes into being, so nothing as yet to need a root cellar for (just excess beans – which I froze). Thanks for the post. Extremely helpful! Re-posting…
Glad you enjoyed the post Alycea!
What a great list! Thanks for linking to your other articles about preserving carrots and ripening green tomatoes, too. 🙂 I actually didn’t realize you could store root vegetables (carrots) instead of preserving them in the freezer or by canning. And we just harvested a ton of green cherry tomatoes! They’re currently sitting on my kitchen counter, but I’m intrigued by your green tomato recipes…
Question for you, Jill: Where do you keep your boxes of green tomatoes? And root vegetables that don’t make it to the freezer / canner? What are you leaning towards for your root cellar alternative?
I usually keep my boxes of green tomatoes in our cool, unfinished basement, or if they are threatening to ripen quickly, I’ll tuck them away in our dining room (it’s usually cooler, too).
My root vegetables also go into our cool basement in boxes. Not as ideal as a true root cellar with the right amount of dampness, but it still works.
I live in Florida, no basement or attic. Rarely gets cold here. How do we store veggies?
We live in Florida as well and have success in storing potatoes using an Amish friend’s advice. After they are dug, I place them on newspaper on the shaded side of ths porch for a couple of days until the dirt has dried and then brush it off. I layer them in milk crates with newspaper – beginning and finishing with newspaper. I then stack the crates in my pantry. We usually harvest potatoes in May. This year, I filled 4 crates with the larger potatoes whilenI canned the smaller ones. We are using the last crate of potatoes now. I have only had 3 rotten ones and they are just now sprouting.
I have tried the trash can and the bucket ideas in the past. however living in the south, I get fire ants and other insects that invade and ruin the crop. I can everything now to save my harvest.
For carrots, beets and parsnips, leave them in the ground (I live in zone 6B-which is really more like zone 5). I have these root vegetables in raised beds. I mulch with about 6 inches of straw or chips or whatever I have when it starts to get really cold in the fall (freezing nightly), then I fill big black garbage bags with dry leaves or straw and pile them all around the bed and on top. This keeps everything from freezing and you can dig the roots whenever you want. It works much better than digging them and trying to store them….I’ve tried many different alternatives and this one works the best for me. You may have to fight the voles, so traps or mouse poison may be necessary.
I like the idea of leaving them in the ground!
Be aware that in some areas (mine) voles can be a problem with ground storage (without metal container). I did that one year and the voles feasted…we did not.
When I was young we had a small wooden structure ( about the side of today’s storage sheds) that my dad built over a cold spring that ran through our property in very rural Montana. It had shelves on both sides and hooks in the roof. All this was for keeping food cool in the hot summer days. We called it a spring house. I am at a loss to find plans for something like this for my place. Anybody know about spring houses, where to find photos, plans?
Ask an Amish farmer. They know all these forgotten skills.
Great post. FYI, the link for Storage Clamp doesn’t seem to be working.
We live in Florida as well and have success in storing potatoes using an Amish friend’s advice. After they are dug, I place them on newspaper on the shaded side of ths porch for a couple of days until the dirt has dried and then brush it off. I layer them in milk crates with newspaper – beginning and finishing with newspaper. I then stack the crates in my pantry. We usually harvest potatoes in May. This year, I filled 4 crates with the larger potatoes whilenI canned the smaller ones. We are using the last crate of potatoes now. I have only had 3 rotten ones and they are just now sprouting.
Wow! Thanks for sharing your tips! 🙂
Stopped by to say your google’s #1 ranking post for garbage can cellar, but the link you give above (section 1 of your blog) is dead. Thanks!
Hi ! In one of your posts you mentioned you were going to make a root cellar! I’m curious if you did and howitzer turned out!!!