There are some aspects of homesteading that make me feel extra pioneer-ish…
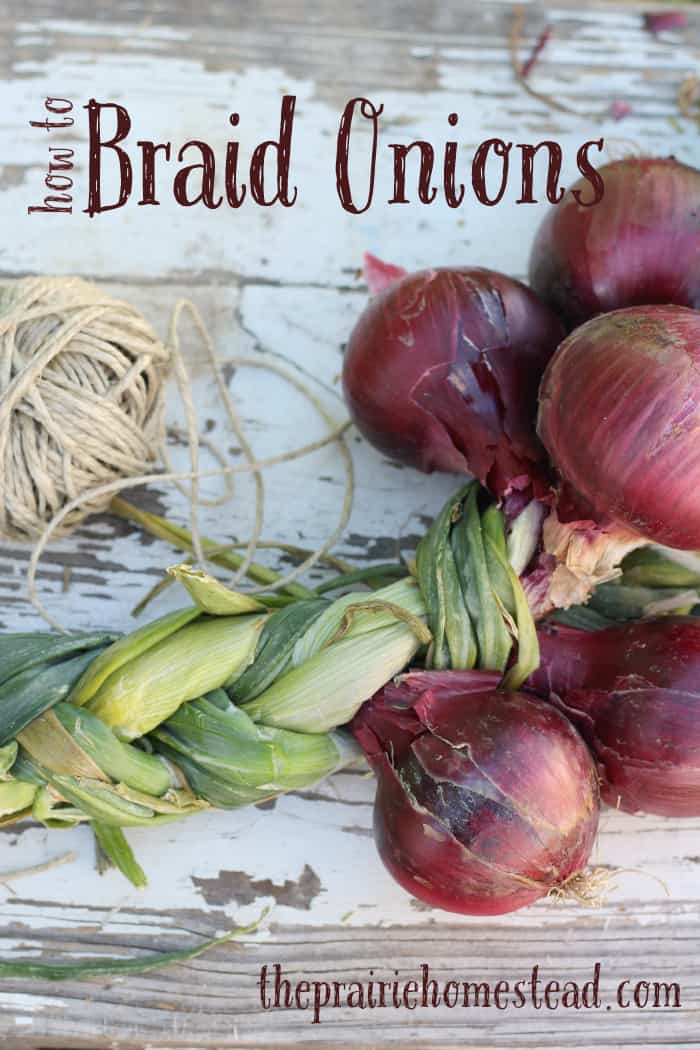
And braiding onions definitely fits into that category.
Last year I was robbed of my beautiful onion harvest because this guy—>
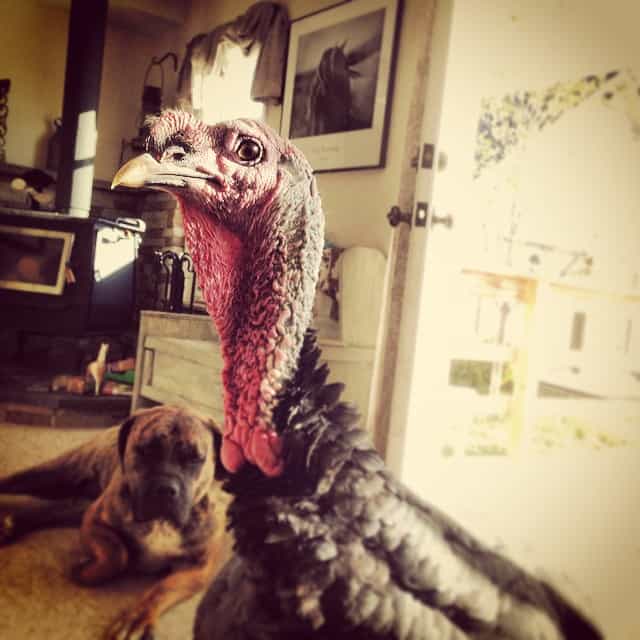
After *someone* left the garden gate open, he proceeded to help himself to three beautiful rows of homegrown, heirloom onions, leaving me with nothing but a few papery skins blowing in the wind.
Not gonna lie– I was bitter.
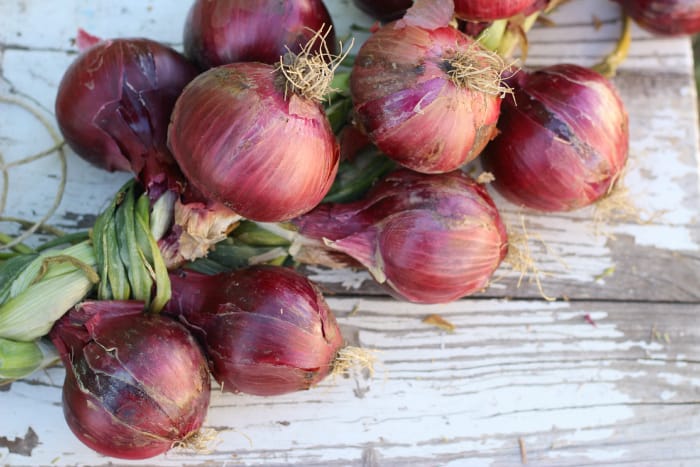
This year, I learned my lesson and fervently barricaded the garden gate as my onions matured. My efforts were rewarded with a gorgeous crop, and I could hardly wait for them to cure so the braiding could begin.
Braided onions not only look dang cool, but they also allow the onions to last longer thanks to better air circulation. But first, let’s talk about how to get your onions ready for braiding:
Harvesting and Curing Onions
Some varieties of onions are better suited for storage than others. As a general rule, sweet onions have the shortest shelf life, so if you are wanting to braid and keep your onions throughout the winter, plan on using your strongest, most pungent varieties.
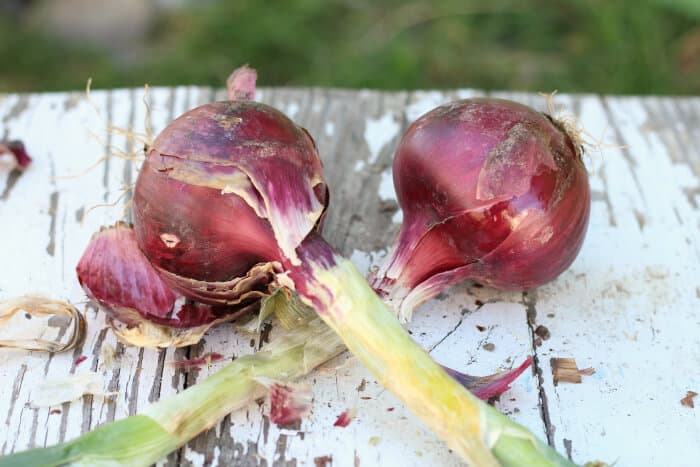
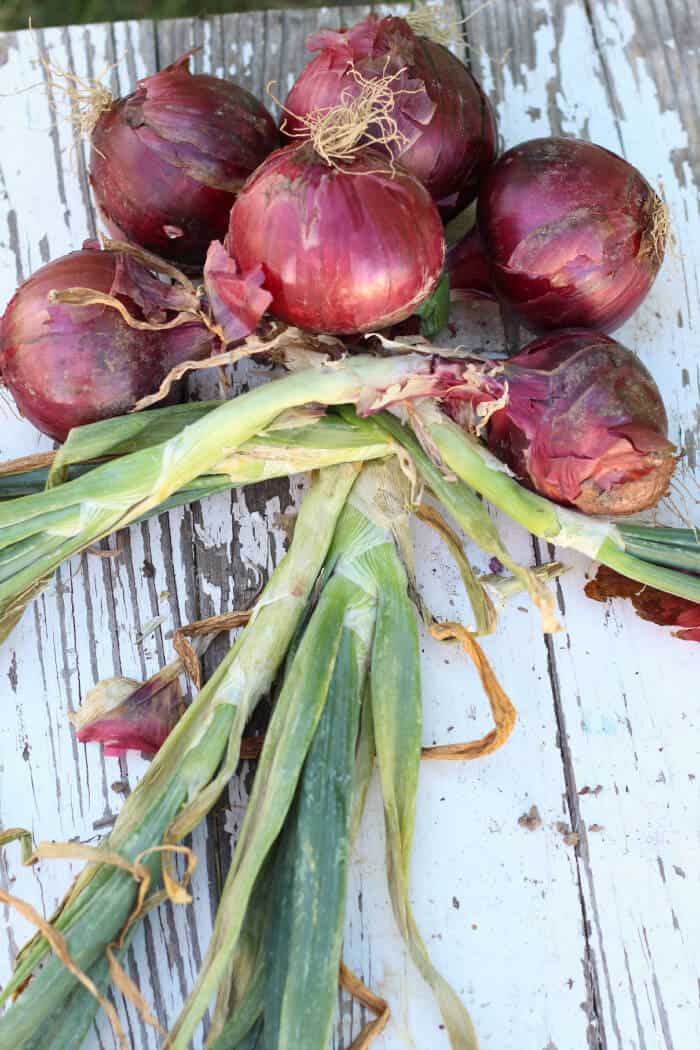
You can harvest your onions any time through out the summer, but if you’re wanting to keep some for storage, leave them in the ground until the tops begin to fall over. Once this happens, you know they’ll be ready to harvest soon. (Sometimes at the end of the season, I’ll even help them out a bit and bend the tops over for them… I’m kinda impatient like that.)
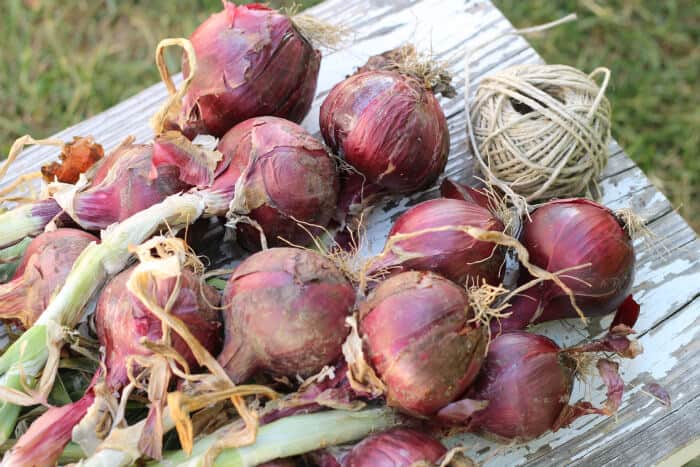
Pull the onions from the ground on a warm, dry day. Before we do anything else with them, we’ll want to let them cure, or dry, for a bit. You can cure your onions out in the garden, on top of the ground you pulled them from, but I usually prefer to spread them out in our shop in a single layer for 7-10 days. (Because the less time they have to get attacked by the turkey, the better…) The length of the curing period will depend on how dry the tops are already. If you plan to braid your harvest, the tops need to still be a bit pliable and not completely brittle.
I had some onions with extremely thick stalks this year, so I gave them a little extra time to dry– otherwise braiding them would have been difficult.
Braiding Onions (video)
How to Braid Onions (tutorial)
You will need:
- The best onions from your crop, with pliable tops attached
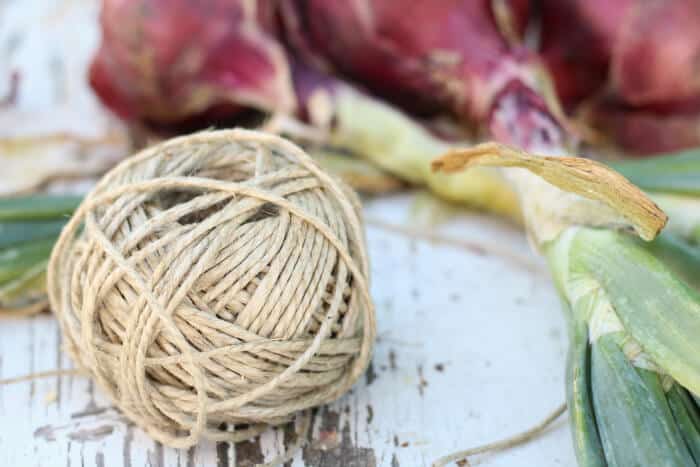
- String
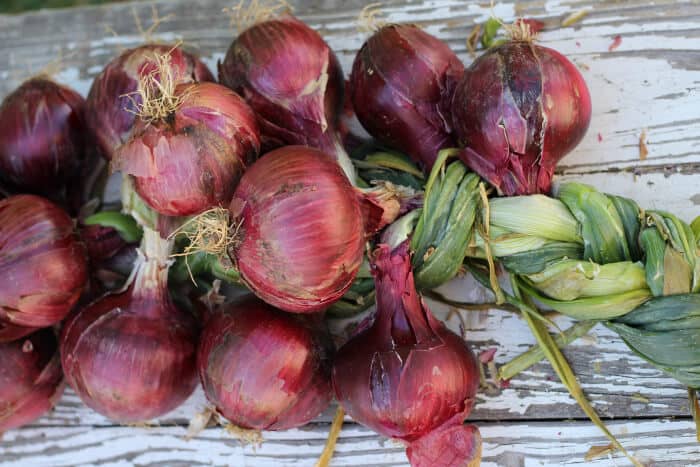
Use your nicest, most uniform onions for your braids. If you have some odd-balls, or ones with extra-brittle tops, set them aside in a bin and plan on eating them first.
Select the biggest, most solid onions for the bottom layer. Criss-cross two of them, then lay a third in the middle.
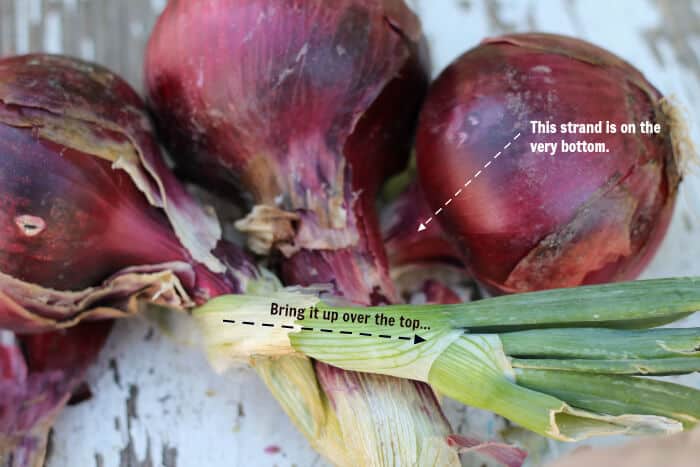
We’re going to do a quick wrap with the onion whose stalk was on the very bottom. This will keep this base layer in place. Bring the bottom stalk up over the top of all three onion stalks…
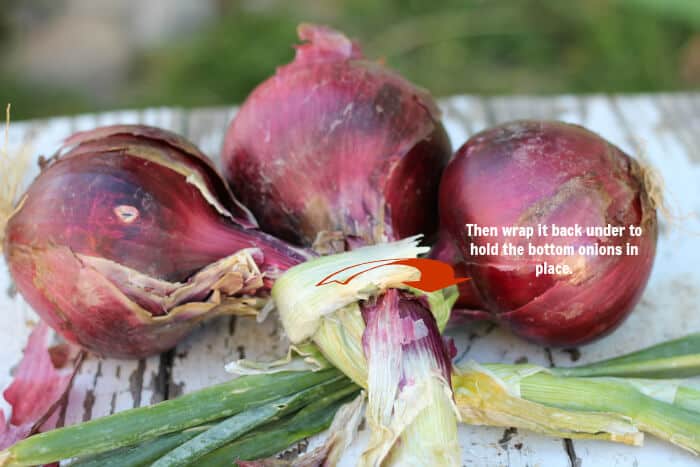
…Then wrap it back underneath and allow the tail to stick out on the side like it did before.
Now you have your three “strands” for braiding.
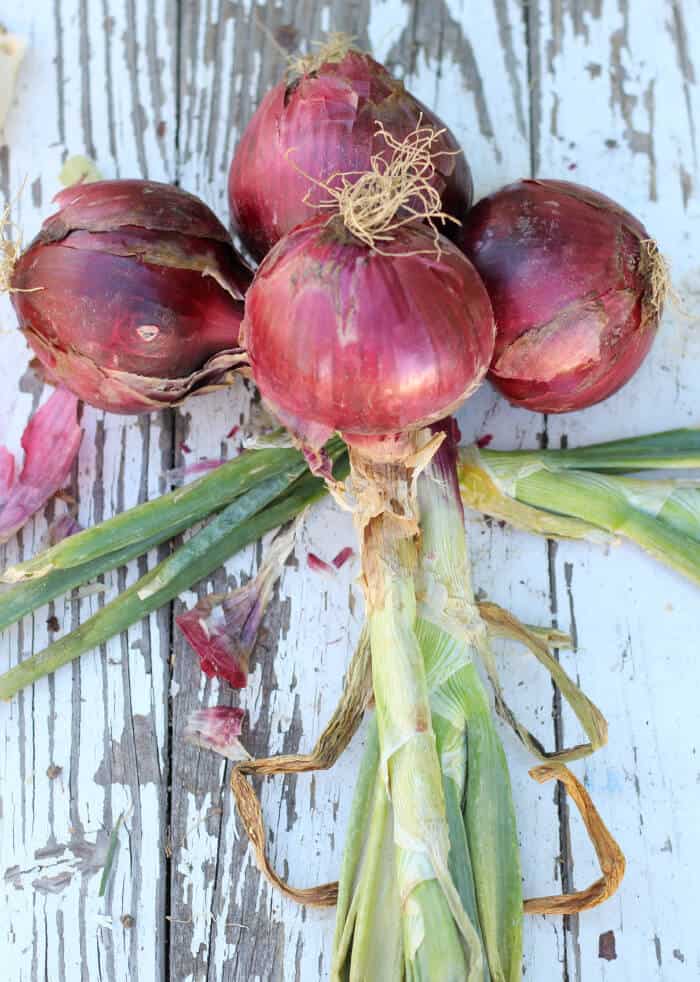
(Alternatively, you can tie a length of twine around these three base onions, and then braid the twine into the rest of your braid. Either way will work.)
Now that your initial layer is secure, we can start adding more onions to the braid.
Place one onion right in the middle of the first three, making sure its stalk lines up with the other middle stalk.
Now braid it three times, just like hair.
Bring two more onions into your braid. However, this time, instead of putting one onion in the middle, we’ll lay two onions on the sides, one on the left, one on the right. Make sure their stalks line up with the other left and right stalks, then braid three times.
Repeat with a single onion in the middle, then two more onions on the sides, braiding between each addition. It’s kinda like French-braiding hair where you bring in new strands throughout the braiding process.
Keep repeating this pattern until you’ve added all the onions you’d like into your braid. (I was able to fit 13 medium/large onions into mine.) You’ll want to finish with a single onion in the middle.
Finish braiding the tops all the way to the end (just simple braiding here), then tightly tie off with a bit of string.
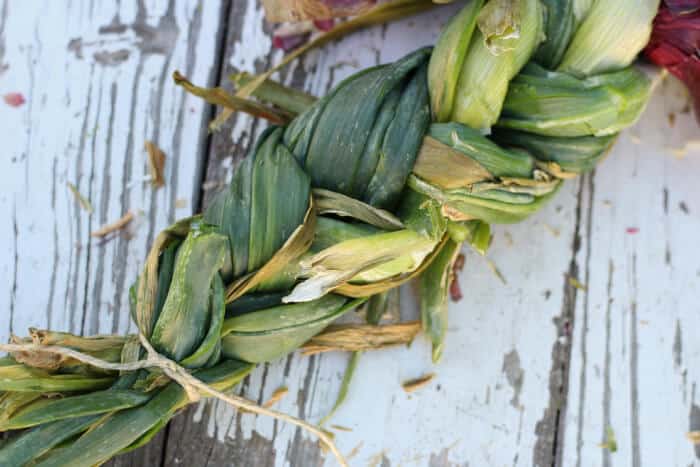
If you like, you can loop the end of the braid back over itself and tie it to form a loop for hanging.
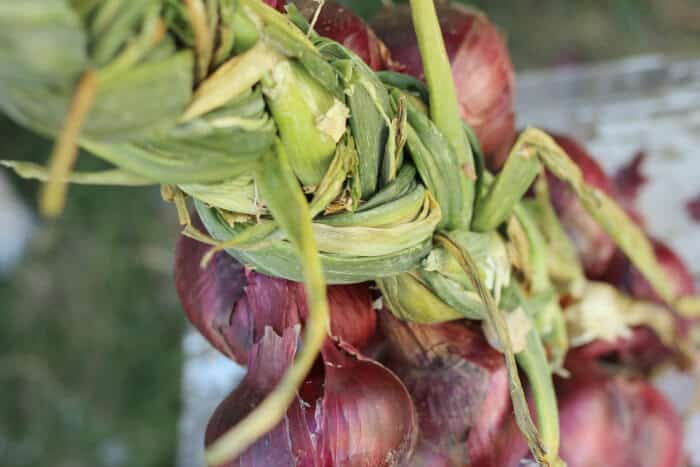
Hang in a cool, dry place and cut off an onion when you need it.
Onion Braiding Notes:
- If you have lots of braids, keep them in a cool, dark place, and just bring out one braid at a time to hang in your kitchen. (Because onion braids in your kitchen look extremely awesome).
- If stored properly, braided onions should last 6-12 months.
- You can use this method for braiding garlic too.
- Your onion braid will continue to dry as it hangs, so you might need to adjust the tightness of the string to prevent slippage.
- If your first few braids are wonky, don’t sweat it. The more you braid, the quicker you’ll improve. And as long as the onions manage to stay hanging on the wall, who cares if the braid is perfect? 😉


Great tutorial! Thanks!!
Did you notice turkey has a crown on his head from the light coming through your window and your curtains make it a crown shape lol pretty much how it goes when we have turkeys! Lol
haha– yes! Someone pointed that out last year when I first posted the pic. I hadn’t noticed it before!
This is great!
Love it!!! So pretty!
thanks for the great tutorial! I grew onions to dry for the 1st time this year, just using loose cheesecloth bags (for boiled suppers) and hung from my pantry door jam. Next season will attempt the braid! BTW – love your website!
Yes– cheesecloth can work too. Glad you’re enjoying the blog!
I’ve tried this in the past and the stalks just broke off from the onions :/
I think my mistake was not letting them dry out? I just plucked them from the ground, took them inside and started braiding… I’ll have to try again with onions next year and this time I’ll let them cure!!! Lol
Find me at: RedheadedOwl.com
Yes, sounds like they might have dried a bit too much!
If you happen to notice an onion “going bad” be sure to eat it quick & get it off the braid. They are not kidding when they say, “one bad apple spoils the whole bunch.”
I lost several onions last year because I didn’t notice a bad one in the mix.
🙂
This is perfect timing! We just dug our onions up last week and I was just staring at our (small) pile and wondering what to do with them. I can’t wait to try this and of course take a picture to show how “Prairie” I am becoming 😉
Yes– braiding onions is extremely Prairie Wife Approved. 😉
I’ve always wondered how this was done! I have a ceramic set of braided onions, because I love the way they look. Now I need to try braiding our onions when I pull them this weekend. Thanks for the tutorial!
Have fun Katie!
I’m amazed that all the explanations of onion braiding I see say to do it “just like you would hair”. I don’t know how to braid hair! I need more than that.
2 years later here’s you answer.
Start with three strands. If the ends are not attached to something, like an onion or a persons head, then tie a knot in the end.
Ok so now you have a left strand, a middle strand and a right strand.
Take the left strand and bring it to the middle.
Take the right strand and bring it to the middle.
Repeat this over and over.
Pull the strands a little bit outwards to make the braid tight, but not too tight or it won’t look pretty.
That’s it. Tie off the end or put on a rubberband.
Which onions do you use first? I would guess at the top of the braid so the braid stays in place. I think red pepper strings are pretty also. Thank you so much for helping all of us ladies to learn so much
Hi…..so interesting. Now I understand why I see onions hanging like that. I truly thought it was just for advertising or something…lol.
Couple questions tho….how exactly are they hung in the kitchen? It’s ok if they touch the wall? They won’t stain the wall? Thanks…
https://www.youtube.com/watch?v=rLBRK5Tf1I4 Look about at 8:15 for the old method of doing onions.
I experience browse through large amount of blogs together with been through many websites,but your work is really fantastic.Hats off to your own commitment . in addition to loyalty.Do maintain all of us educated in future also.
Please keep sharing :http://www.eximfile.com/list-of-dry-days-in-2018-dry-day-in-delhi-mumbai-up-noida-haryana/
What do you recommend if you don’t have a cool dry place to keep the onion braid? We have a basement, but it tends to stay very damp.
Thank you!
Liked you Onion Braiding video. It kept me from making many mistakes. Thanks
We’re so glad that you enjoyed the video and that it was helpful for you! Sometime it is much easier to see someone do something in a video and replicate that, then to read about it. Thanks for letting us know! 🙂
Are you able to braid scallions with this method? First time growing scallions and I have lots and want to keep them but not sure
how to store them.
Thanks for the tutorial! I braided onions for the first time but I noticed mold on the braided parts. The onions seem fine but I’m worried this will spread. I kept the braid in the basement – maybe it is too damp?
Thanks
Olivia