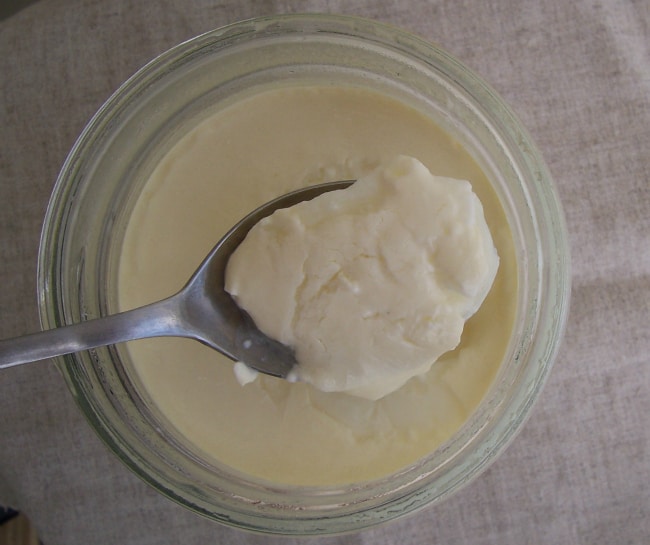
There are lots of reasons to make your own yogurt. But the most important?
It’ll make you feel like a homesteading rockstar.
Oh yeah.
Okay… so maybe that isn’t the *most* important reason, but it sure is fun.
And besides the rockstar-thing, homemade yogurt is super nutritious (hello probiotic-goodness without all the flavorings and additives…) and pretty darn frugal, too.
There are a million-and-one ways to make yogurt, and everyone seems to have their favorite method–Crockpot, yogurt maker, etc
I’ve tried a bunch of different methods, but I’ve settled on the one I’m sharing today. It’s the simplest yogurt method I’ve found (in my opinion), and I like that I don’t have to wash out my big ol’ stockpot or slow cooker when I’m done.
I like to make a gallon of yogurt (4 quarts) at a time since it stores for a long, long time without going bad. If you don’t want to make quite that much, this yogurt recipe can easily be halved or quartered.
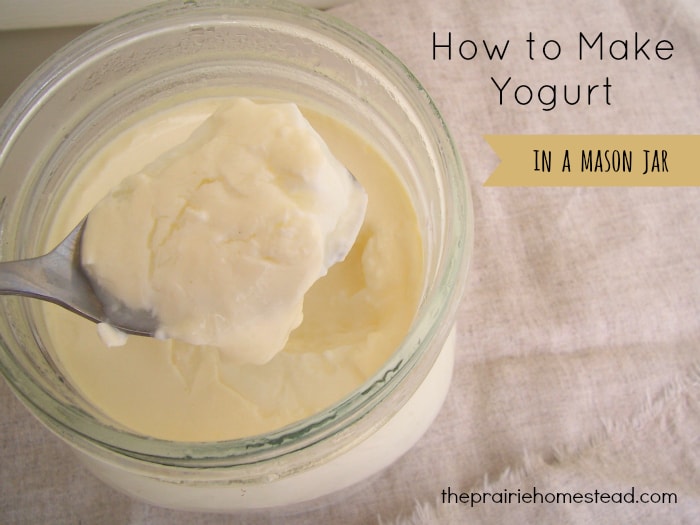
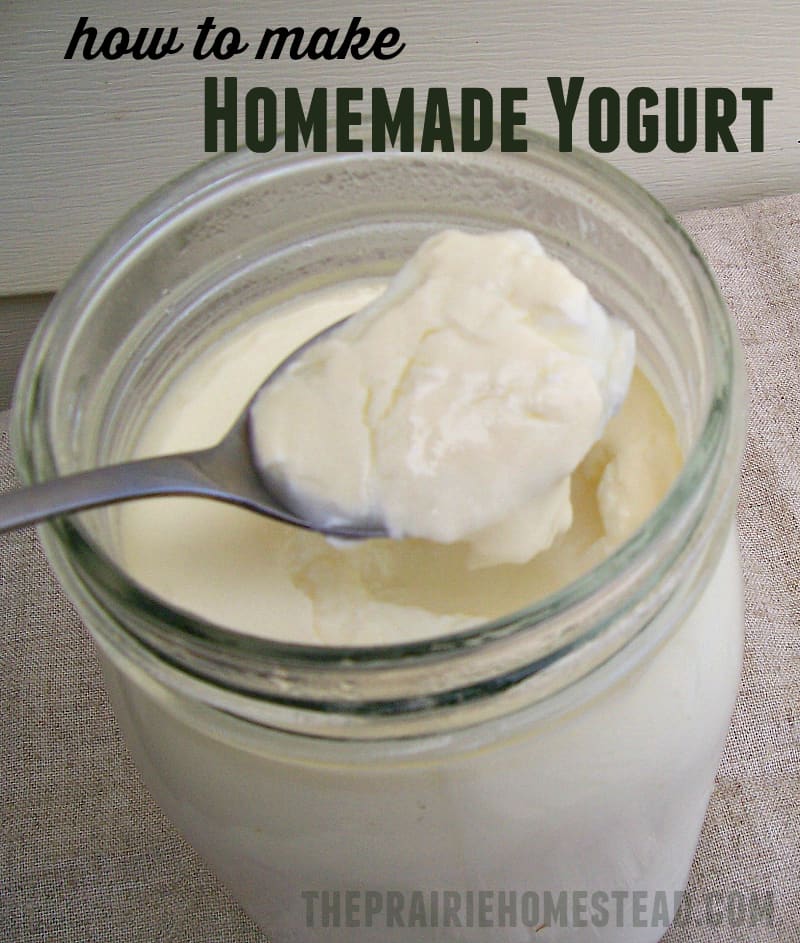
How to Make Yogurt
Supplies:
- Large stockpot
- Four quart-sized glass canning jars with lids (like these)
- A thermometer (optional- see note below)
- A small cooler
Ingredients:
- 1 gallon milk* (see note below)
- 8 Tablespoons of plain yogurt containing live, active cultures
Instructions:
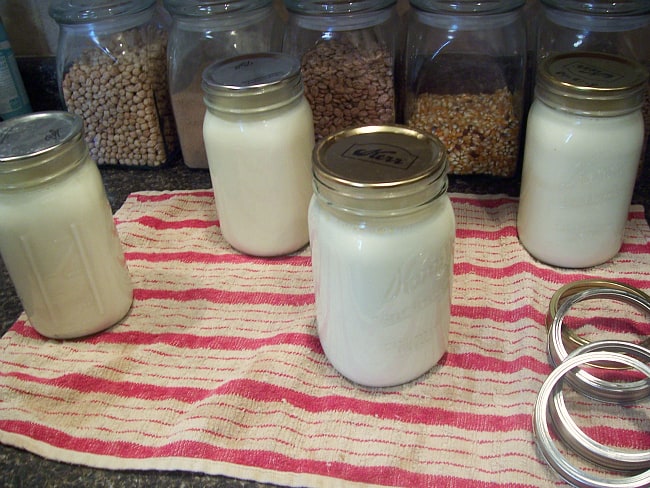
Fill all four jars with milk, leaving a little room at the top– (around 2 inches). If you don’t have canning jars, you can use other repurposed glass jars instead. (It has to be glass- no plastic allowed!)
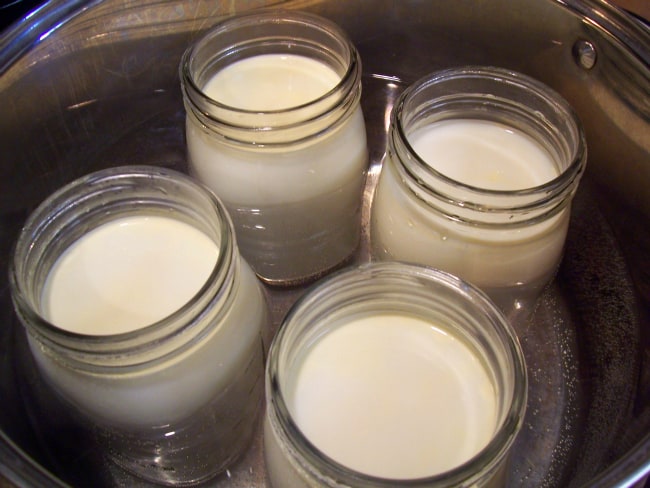
Place all four jars in the stockpot, and fill the pot with water. I usually shut it off when the water is about 3/4 of the way up the sides of the jars. If you are concerned about the jars rattling and breaking, you can place a small dishrag in the bottom of the pot before you set the jars inside.
Set the pot on the stove and bring the water to a boil. Allow the pots to simmer until the milk in the jars has reached 180-185 degrees F. (If you don’t have a thermometer, just look for a “skin” to develop on the top of the milk.) If the milk goes beyond 180 degrees, don’t worry- it’s not the end of the world.
Carefully remove the jars from the pot (HOT!) and allow them to cool down to 110-120 degrees F. Now there are several ways to accomplish this. Some folks advise sticking them a sink filled with cool water, but I’ve found that leads to a lot of broken jars… So instead, I take the lazy way and just allow them to sit on the counter until they have cooled. I loosely cover the jars with a lid and let them sit for 30-60 minutes (I want the heat to be able to escape, but I don’t want dust/dirt/bugs getting inside.)
Check them periodically with your thermometer and give the milk a stir to mix up any hot spots.
If you don’t have a thermometer– just feel the outside of the jars. You want them to be warm, but not too hot to touch. You are going to innoculate the milk with a live bacteria, and the bacteria likes warmth. However, too much heat will kill it– so anything that is too hot for your hand is probably too hot for the yogurt bacteria as well.
Once the milk has cooled sufficiently, gently stir 2 Tablespoons of yogurt into each jar and cap the jars (I never really measure– I just eyeball it…). Now, the incubation process begins.
There are a lot of different ways to keep your yogurt warm. Some folks like to stick it in their oven and leave the light on, but that is a recipe for disaster at my house. (I can be scatterbrained sometimes…) Therefore, I prefer the cooler method.
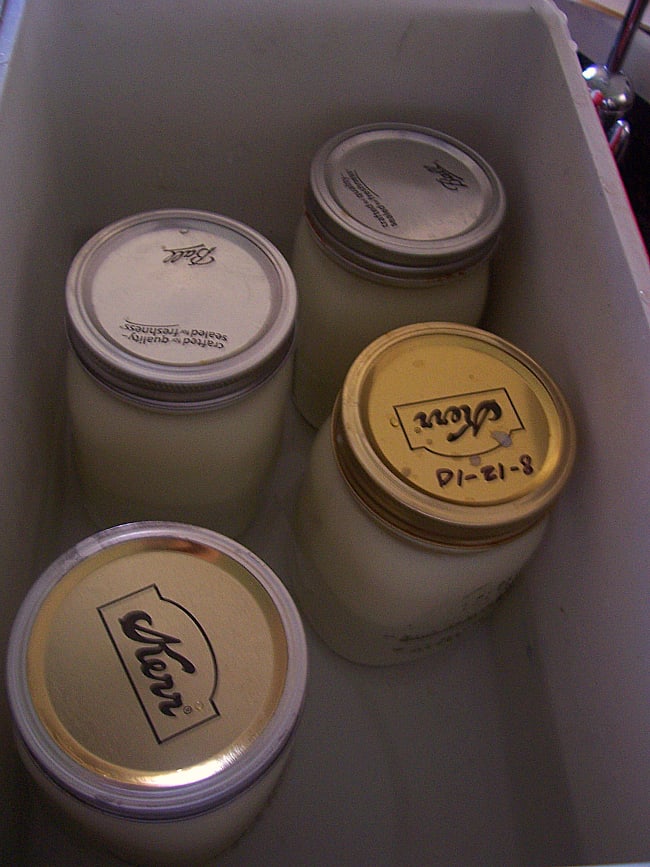
You’ll need to keep the yogurt at 110-120 degrees while it incubates, and the easiest way I’ve found to do this is to place the jars in a small cooler, and then fill the cooler with warm water. You might need to replenish/reheat the water once or twice throughout the process, but for the most part, it works pretty darn good. Just make sure to keep the cooler in an out-of-the-way place and don’t bump or move it.
Allow the yogurt to incubate for a minimum of 8-12 hours (I generally start my yogurt around 9 am, and then remove it from the cooler right before I head to bed). You can leave it longer if you like, but the longer it sits, the tangier it will get. Once the incubation process is complete, remove the jars and place them in the fridge. Allow the yogurt to cool completely before eating (it will thicken a bit as it cools).
Eat plain or flavor it to your liking. Our favorite toppings are fresh fruit, maple syrup, raw honey, homemade jam, or nuts.
Homemade yogurt is also splendid in smoothies, or use my soft-cheese recipe to make yogurt cheese and whey (and we all know there are LOTS of uses for whey!).
Kitchen Notes:
- Use the highest-quality milk you can for this recipe– however– it does not have to be raw, since you are “cooking” the milk at the beginning anyway. Raw yogurt is a tricky topic, as it tends to be pretty runny. My family prefers thicker yogurt, and since the bacteria that is added to the milk gives it a probiotic-punch, I don’t feel bad “cooking” it in this one application.
- Goat milk can be used for this recipe– but be forewarned– goat yogurt is peculiarly runny as well. You can add a variety of thickeners to goat yogurt, or try straining through cheesecloth to remove some of the whey. Or, just drink it if you don’t mind it being a tad on the liquid-side.
- Some yogurt methods say to sterilize all equipment before starting the process, but I usually don’t… Maybe I’m really living on the edge, but I figure the boiling process is good-enough for my already-clean jars. If you are nervous, then feel free to sterilize first.
- You can purchase specific cultures for making homemade yogurt, and those work fine as well. I prefer using high-quality yogurt from the store as my starter culture, since it’s easier to obtain. Just make sure the carton specifies LIVE ACTIVE CULTURES. Some of the more processed brands do not contain live bacteria and they won’t work for this recipe. A big carton will make many batches of homemade yogurt, and you can freeze the rest in ice cube trays to keep for later.
How to Make Yogurt in a Mason Jar
Ingredients
- Large stockpot
- Four quart-sized glass canning jars with lids (like this) (or repurposed glass jars)
- A thermometer (optional- see note below)
- A small cooler
- 1 gallon milk
- 8 Tablespoons of plain yogurt containing live, active cultures
Instructions
- Fill jars with milk, leaving 2 inches room at top
- Optional: To prevent jars rattling, place small dishrag in bottom of pot before you set the jars inside
- Set jars in stockpot and fill pot with water 3/4 of the way up the sides of jars
- Bring water to a boil and simmer until milk in jars have reached 180-185 degrees F or until a “skin” forms on top of milk
- Carefully remove HOT jars from pot and allow to cool to 110-120 degrees F (I loosely cover jars with lid and leave 30-60 minute)
- Check periodically with thermometer (or feel outside of jars) and stir (warm is good but too would kill your active cultures)
- Once cooled, gently stir about 2 Tablespoons yogurt into each jar and cap jars
- To keep yogurt at 110-120 degrees while it incubates place jars in a small cooler
- Then fill cooler with warm water
- You might need to replenish/reheat water once or twice throughout the process
- Allow the yogurt to incubate a minimum of 8-12 hours (the longer it sits, the tangier it gets)
- When done, remove from cooler and put jars in fridge where it will continue to thicken
- Cool completely before eating
- Eat plain or flavor to your liking- our favorite toppings are fresh fruit, maple syrup, raw honey, homemade jam, or nuts!


We use the microwave for an incubator. There is a light bulb beneath the microwave that, when it’s on, heats up the microwave to a temperature that is perfect for turning milk into yogurt. We set a cooling rack (the kind used to cool baked cookies on) inside the microwave to set the milk mixture on, because the putting the containers directly on the microwave bottom is too hot causing the yogurt to turn out soupy. So to summarize, turn on the light bulb below the microwave, put in the cooling rack, place yogurt containers on top the cooling rack, and leave overnight. We also put a red potholder on the handle outside the microwave so that no one turns on the microwave accidentally. Sort of a “Do Not Distrub” sign for the yogurt!!!
Yes, a “do not disturb” sign is good! 😉
Thank you so much ..so glad I happened to just look this up and found your page ..
Can I use the whey I strained from my whole milk yogurt in place of the tablespoons of yogurt?
Yes. I use the whey all the time. 1/4 cup per gallon works fine. I would usually use a crock pot bowl filled with a gallon of cold milk. Microwave it for 23 minutes, then cool in a sink full of water. Heating the milk in jars is much faster. I didnt think about the jars breaking when placed in cool water, I guess I got lucky this time. They did cool quickly though. 4 one quart jars of milk was heated and cooled in 20 minutes. Im going to try taking the whole pot of hot water to the sink. Run cool tap water into the hot water slowly, eventually displacing the hot water while gradually cooling the jars, to avoid them breaking. Should wortk and help speed up the process.
I did feel like a rockstar last weekend! My yogurt turned out delicious and I’ve had it for breakfast each morning this week at work. I used live yogurt cultures from a cheese making company.
Yes!! So glad to hear that! You are a rockstar! 🙂
Hello Jill,
I just bought your cookbook…i love it! Y husband and I are doing all kinds of research and taking small steps to become homesteaders. I made your mason jar yogurt last night. Question for you….can you add sugar or extracts to milk ?
Thanks,
Mel
We warm up the milk in a dutch oven to the desired temperature of 125 and then pour into sterilized jars, place a spoonfull of plain yogurt with active cultures, stir in and then put in an oven that we have previously heated to 150 degrees and turned off and leave overnight. Works every time. We make a batch every week.
what do you do if you want to flavor it with strawberries or sweeten
That’s just how I make my yogurt! 🙂
I use my big oval crock pot to warm the milk. A gallon and a half of milk fits perfectly and I have it on low over ignt and it’s 175-180 degrees by morning. I love this method since I don’t have to “babysit” the milk. Then for incubating I put the jars in a cooler with a jar of hot water and bath towel over it all and leave it for 12 hrs. Works great!!
Hey Melissa, thanks for the tip. However, I assume your crockpot has a temperature setting? I just tried this last night….I use half & half for my yogurt….and, looks like I made some toasty cheese overnight (smells delicious!). Can you please clarify how you do your low setting? I REALLY want to streamline my batch process and the heating of the milk is the hardest part…I want this to work! :-). The mason jars with my sous vide have made MUCH better and thicker yogurt than my yogurt maker, so a BIG THANK YOU to the author, Jill for suggesting this method!
“. . . , but I don’t want dust/dirt/bugs getting inside.) ” Jill, Jill, Jill! Are you making yogurt in a kitchen or barn? hahaha Just kidding. The mental image made me giggle this morning and I couldn’t resist 🙂 Actually, when I was filling my cup, I looked around my own kitchen and realized, ” Hmmmm, Jill’s really got a good point there! ” 😛 Seriously, thanks for the article and keep having fun doing it.
I used your recipe and it worked pretty well! I think my yogurt Is but on the runny side though…I left it for 9 hours. Does that mean it needs longer? Or maybe it didn’t stay warm enough?
Does this work for Greek yogurt?
YES! My flatmates and I make yogurt using this method every other week. After you complete the steps above, line a strainer with cheesecloth and put the mason jar upside down onto the strainer. Come back a couple of hours later and you have Greek yogurt. We have a nice tupperware container that has a plastic strainer built into it, so the whey just gathers into the bottom container, which is far easier to fit in the refrigerator. Then we just put it on the floor and the cats get a nice, calcium-rich treat.
I don’t have my own milking animal (yet), so one of the reasons I’ve gone to all the expense and bother of sourcing fresh-from-the-animal raw clean pastured (NOT pasteurized) milk is so I can make my own RAW milk products (never heated above 108 degrees), such as yogurt, kefir, butter, cheeses, etc. We CAN not (health reasons) and will not consume pasteurized dairy. So much of the nutrition is destroyed and the product can cause many problems such as allergies and mucus and arthritis. For more info and about the safety of clean raw milk, go to sites like realmilk.com and realmilk.org and westonaprice.org
I DO like the idea of making it in jars in a pot of water!
It is illegal in Ohio to sell raw milk so it is would have to be shipped in from a state that allows commerce in raw milk. Any ideas for those of us in Ohio?
Herd shares are legal in Ohio. Go to http://real-milk.com/where.html and scroll down to find locations in your area of Ohio. We have family there that belongs to a herd share and are very pleased.
Thanks so much! I’ll get in touch with the Liberty Market folks.
The farmers (of all kinds) have been rather kind to supply me with raw milk when my pets are sick. ; )
The farmers can sell milk for your kittens!
Just get to know a local goat keeper and keep it on the lowdown
If you purchase raw (unpasteurized ) milk stating it is for your pets, then a farm can sell it to you.
They are not allowed to sell it for human consumption.. At least that is how it is in my state of NC
Can’t wait to try it. How long does the yogurt keep in the fridge unopened? How long will one that has been opened keep?
The yogurt will keep for weeks in your fridge. 🙂
Jill, what yogurt brand do you use for your starter culture? And how many times can you re-use it (propagate from previous batch) before you need a fresh storebought yogurt?
Also, have you ever used the greek yogurt cultures from Cultures for Health? I have seen online that Stonyfield is a good brand, but it is not available here in Idaho, so I am trying to figure out the best way to a) start my yogurt journey, and b) perpetually (or at least frequently) repropagate current batch for next one.
Oh, also finally found a raw milk source 🙂
We eat LOTS of yogurt, so any help would be appreciated! 🙂
Instead of yogurt to start my yogurt, I use acidophilus capsules. I get the Solaray brand and 3 billion units and empty 2 capsules per quart of milk into the warm milk and stir it in gently. You can put some milk into a measuring cup, stir in the acidophilus, then pour the mixture into your milk in the jars. We like the flavor more than the yogurt started with store bought yogurt. YUMMY!
I like that idea! Sounds even simpler!
Awesome! Can’t wait to try this. I’ve attempted yogurt several times with dismal failure. I can make my own raw milk whipped cream, butter, and moz cheese, but its embarrassing that I totally suck at yogurt. I have high hopes I’ll get it to work with your recipe, however. Thanks a bunch!
yeah– yogurt can be a little tricky sometimes– I’ve had batches that turn out great, and then the next time I make it, it’s totally different. I think it has a lot to do with the little bacteria guys. 🙂
That used to happen to my mother until I realized the milk was still too warm when she added the starter. Better to err on the cooler side. Leave incubating for a longer time for thicker and a more tart flavor.
I have been making a batch a week. Cleaned my good thermometor and the numbers washed off (its about 10 years old) preped milk the same. Got up this AM and have….milk. Is their anything i can do to save it??? Love the whey pie! Will try using lime for the next 3.
Thanks!… it might not have turned out due to heavy firework vibration! … glasses moved around on counter some.
You can always try culturing it again– bring up to 110, then add more culture and try incubating once more. Or you can always just use it in recipes instead of throwing it away. 🙂
I bought the Dash Greek Yogurt Maker… saw it on America’s Test Kitchen.. greatest $40 investment I ever made. I used to successfully make yogurt the “warm cooler method”… but my Dash is my new best friend!
I love this idea I do have 2 small yogurt makers but I like the larger version too. I eat yogurt every day sometimes more than once. We go through a lot too as my husband and granddaughters love it. I can fruit from our farm and can add to the yogurt . Thanks for sharing!
Yes– we go through a lot too… My 3-year old can eat half a quart at a time! 😉
Sounds just like my 3 year old granddaughter. She would eat it all if she could reach it lol!
Jill, just wanted to say that I absolutely love reading your blog everyday and you have made me consider getting a milking cow. I never thought I would want to do the work required but after doing some research I have decided that it is WELL worth it! So, THANK YOU so much for encouraging me! I cannot wait to try my hand at these ideas you’ve given!
You are SO very welcome shanan! I am so happy you are enjoying the blog. 🙂
Thank you for the recipe I have been wanting to try making yogurt for a long time, I have a question about the starter once you make your first batch of yogurt from the store bought starter could you just use your homemade yogurt as the starter for the next batches? Thanks for your help!
Hi Amy,
You can use your homemade yogurt as a starter for your next batch. However, after a while, it will start to lose it’s effectiveness, so it’s best to buy a new carton every once and a while.
Yea, the yogurt post!!!! Thank you for sharing:) This is my favorite new method for yogurt….I’ve done it twice in the past week, and had excellent results.
If you use raw milk, do you skim the cream off first? I want to make butter AND yogurt! I’ve been collecting and freezing my cream until I have enough for butter (I’m not sure how much that should be, I’m guessing I need at least a half gallon of cream) but should I make yogurt with the full cream milk?
Yup- you can totally skim first if you like. 🙂
I make butter once a month. I buy two quarts of heavy whipping cream and put it in my ice cream maker. I add a splash of buttermilk, and turn on. It makes approx. 4 cups of butter. You then need to squeeze the milk out of the butter to keep it from going rancid. I just grab a handful and squeeze it over the buttermilk still in the IC maker. Next hold it under a cold tap water flow to wash off the outside of the butter. Put it in small tupperware style containers. I leave one on the counter so it will be soft for easy use and put the others in the fridge. I get about a quart of buttermilk left over and save it for biscuits. It’s very easy and you get better butter than you can buy.
Hey, I’ve never thought about making butter in my ice cream maker before–cool idea!
A quart of cream makes about a pound of butter.
Thanks Carnie, good to know! I assumed it would take a lot more cream. Guess I can start sooner than I thought!
Hi there, thanks so much for this fantastic tutorial! Making ‘gurt is one of my goals, but the whole temperature thing scared me off. I love your easy to use reference – super helpful and easy! Cant wait to try.
You can do it Kat! 🙂
Hello Jill,
Wonder can I get whole milk from store to make yogurt? Cuz I can’t get raw milk here. Help?
Thanks.
Yep! that will work. 🙂
Can this also be made non-dairy? Goat milk is the ONLY dairy with any value and unless it’s made with goat or non-dairy milk there’s no point in it because it has been found out that with real dairy lactic acid is produced which kills the live cultures before they can implant in your colon plus the cholesterol is not good for you and casein is constipating (it’s what they make elmer’s glue from) and acidifies you the way all animal protein does which robs you (esp women) of your calcium.
Well, I tend to disagree that goat milk is the only dairy with any value, however, you can make this recipe using it. Like I mentioned above, it will be runny, but there are ways to get around it. I steer steer clear of highly processed non-dairy milks, so I’m not sure if they would work or not.
Well if you disagree that cow dairy has any value (and I feel that goat milk only marginally does if you have nothing else to work with but at least it’s low-zero in casein protein) I’m curious to hear what value it does have. Talk about processed milks, commercial dairy is pasteurized, very GMO, full of antibiotics and other substances that are not good for you, etc. But if you want to see if they (non-dairy milks) would work or not go to Whole Foods and try some Whole Soy brand non-dairy yogurt. The flavored ones are better than real dairy…cheery, vanilla, mixed berry, lemon, etc.
Except Soy has actually been found to not be very good for you after all and it is a #1 GMO made plant. So unless you’re buying organic soy, you’re better off with buying organic yogurt or making your own with organic milk, or try coconut milk. Coconut milk is non-dairy and has a lot of nutritional benefits.
Soy is NOT good for you! It is an endocrine inhibitor, Just research soy and hormones! Only fermented soy is acceptable, and at that, only in very small amounts.
Soy marketing has hoodwinked us all for decades!
Whole Soy yogurt contains lactic acid (from vegetable source). http://www.wholesoyco.com/our-products/soy-yogurt/ingredients
It’s beside the point because though butter and yogurt and the least harmful of dairy products, animal fat and casein are not good for human health. Read the book The China Study By T. Colin Campbell.
Several of your concerns are some of the reasons why I make raw milk yogurt–I never heat the milk past 100 degrees for yogurt.
Raw is better but unless you milk the animal yourself there’s always going to be a bit of puss in it and heated or not it will still have some cholesterol which is bad and casein dairy protein which you don’t want at all though using goat or non-dairy will get rid of that problem.
Nick, read “Nutrition and Physical Degeneration” by Weston Price. I’m sorry, but we like fat and cholesterol here because we believe in the way of eating promoted by the Weston Price Foundation. You can also read “Nourishing Traditions” by Sally Fallon.
The funny thing is that I was just having a good talk with a dear and knowledgeable friend of mine about the man Weston Price himself and Weston Price did NOT advocate the amount of animal products that The Weston Price Foundation recommends. His diet was a lot of mostly grains, beans, fruits and vegetables with SOME dairy and fish. But you guys sre dietarily between the Zone Diet and The Atkins Diet when it comes to animal products (both are stupid diets by the way) which is NOT what Weston Price taught at all. What is it with Americans who cherry-pick, tweak, and distort things to suit themselves? The China Study is an epidemeological study of the most comprehensive study of nutrition ever conducted. You guys can’t back-up your books with anything close to that. Send me an email and I will send you a bunch of referenceable, backed-up links to prove that what you believe in is hogwash.
P.S. Hey I believe in fat too. There’s nothing wrong with eating fat as long as it isn’t hydrogenated, rancid, or from an animal. If you don’t eat animal fat your LDLs go down and your HDLs go up but when you eat cholesterol/animal fat your good cholesterol goes (HDLs) goes down and your bad (LDLs) go up. I love tons of Avocadoes, organic unfiltered extra virgin olive oil, and solvent free cold-pressed grape seed oil but eating animal fat is so backward you might as well eat redneck food and then go get a pacemaker. And please don’t tell me you guys also believe in Lierre Kieth who wrote that stupid book The Vegetarian Myth and who also has nothing to back up her stuff and has been totally debunked.
Nick-
My family only consumes raw milk from our personal family milk cow. I don’t purchase the processed store milk. I also avoid processed soy products for many of the reasons referenced in this article: http://mixwellness.com/tips/the-ugly-truth-about-this-health-food/
Soy milk is just too processed for my tastes.
However, I know the topic of milk/dairy is a very hotly debated one, so to each their own.
Nick, since this is Jill’s blog, I will only post this one last time. Your concerns were ours 20 years ago when my husband was bedridden with a devastating arthritis of the spine. He is now totaly pain free AND drug free, back to work full-time and romps with the grandkids and our great-granddaughter. How? By diet change and juicing. We initially went vegan and raw food, and read The China Study. We believed it all and lived it. We did well…for a time. Then things began to go downhill… We have since learned the HUGE difference to ones health when consuming factory-farmed animal products, as are in the stores today, compared to meat, eggs, and dairy from pastured animals. My husband COULD NOT consume pasteurized dairy, even organic pastured, without his arthritis flaring up. We have now been on the raw pastured milk for 3 years and he does great with it.
Also, though in our 60’s, we are both totally drug-free (not even an aspirin) with good healthy blood pressure, cholesterol, and so on. Cholesterol in food is NOT dangerous for us–OXIDIZED cholesterol IS! The food manufactureres don’t want us to know that because they want us to eat their manufactured fats and proteins.
My husband also cannot tolerate caseine–except in the raw milk and raw milk products I make. Especially if it is first predigested by lacto-fermentation with its own good bacteria that was not killed by heating.
Please go to westonaprice.org to read about the very valid science that has been drowned out by the food manufacturers. My husband and I are living proof that even seniors are healthier on the foods God created for us than on manufactured food. We are all on a learning journey. God bless you on yours!
Thank you Carmie for that thoughtful and truthful post. I totally agree! Getting back to natural foods the way God intended and provided for us, is the best way. He engineered our bodies; He knows best. Blessings to you also.
“pus” 🙂
I have found that using an electric skillet is by far the easiest. I fill it with 2-3 inches of water and set 1-cup glasses in the skillet and fill with my mixture. The skillet holds 14 – 16 glasses. Then cover. I keep a thermometer stuck in between the lid and in the water. I keep the water temp between 104-117 for optimal results. It takes me about 6+ hours and my yogurt turns out very thick.
Interesting! Never thought of that before! 🙂
True private organic dairy is better but we definitely disagree. Just remember one important thing about Weston Price though, his book Nutrition and Physical Degeneration was published in 1939 from his research in the 30s and he noticed certain tribal people eating fish but no game (no land animals) and some who ate dairy and though they had great teeth because they were not eating processed grains and sugars it’s now known that the tribes that ate the most animal products looked great but died young and the ones that ate the least animal products also had great teeth, etc. (because they ate no refined carbs) lived the longest. Had Weston Price ventured into Asia he would have encountered vegan and near-vegan tribes who ate a lot of soy and did very well. Since 1939 there has been a lot of new nutritional data (such as The China Study by T.Colin Campbell). Weston Price wrote a letter to his relatives (unfortunately never published but you can find it) where he says from his observations that one should subsist on mostly grains, vegetables, fruits and nuts with a little bit of dairy and fish. True he was against refined vegetable oils like corn and sunflower which have a bad omega 3 to 6 ratio but eating olives nad avocadoes and cold pressed grapeseed oil is FAR superior for your health than is animal fat. Non GMO sprouted tofu is good for you but I wouldn’t suggest you eat hydrogenated soy margarine by any stretch.
I do practically the same method except I put my filled jars into a crock pot with warm water and turn it on and off once or twice throughout the day. I have also accidentally used the “sippy cup of milk under the front seat” method 😛
I use my oven for an incubator, it’s typically ready after 4.5 – 5 hours of incubating. I also use a jar of my own homemade yogurt for the starter next time, but as another commenter mentioned above it loses it’s potency after awhile so I purchase live-cultured yogurt about every 5th time. I’ll be making yogurt this week.
~Taylor-Made Ranch~
Wolfe City, Texas
I’m not sure if you had already answered this question, but can I use raw milk that is already beginning to naturally sour? I’ve never made homemade yogurt before and I’m fascinated…. my kiddos love yogurt and I just started buying kefir (not sure how to make it yet) and they love kefir too… so I think they’d enjoy homemade yogurt. I got 4 gallons of discounted raw milk from our local health food store, and they are already starting to turn and I don’t know what to do with them.
Emily, you can’t use that because the bacteria will compete. You can make an easy mozzarella cheese by heating soured milk, and just drink it as is. It’s still full of good bacteria, even more so than fresh raw milk 🙂
I just started making kefir myself and LOVE it! It was a little tricky when I first started because I bought dehydrated grains and the rehydration process threw me at first. Well worth the time and so easy once I got started for real! Give it a try.
Yeah, I’m lazy. I have Yogourmet, which is basically a glorified water bath to incubate the 1/2 gal container in. Your directions using mason jars look really simple.
Hi again Jill, “Back to Eden Lady” here. well…I am doing it…9:00a.m. I am in the process of cooling my organic milk and am going to test my food dehydrator for keeping an even level of temperature. So here is how in the “NOW” moment I am….if this is not going to work or a bad idea for whatever reason you have to let me know in the next 10 minutes…HAHAHA!!!!!! Ya! I know. Like you don’t have better things to do than babysit me. ; )
I have yet to research your garden theory but it sounds oh so similar, I hope all is going well with your new experiment and I pray for success with your harvest.
Looking forward to trying my first batch of homemade yogurt, thank you for sharing.
Sincerely,
Wendy in WI.
P.S. I am a beekeeper and have raw honey to use for flavor, at what point do I add the flavor, (honey &vanilla) ….the “NOW” moment….geez!
Lol Wendy– not sure if I caught you in time or not, but I think your dehydrator should work. I’ve heard of other folks using it for that. 😉
and I would add the honey and vanilla right before you are ready to serve it. Good luck! 🙂
Eeks, nope….LOL…I added the honey and vanilla BEFORE putting it in my dehydrator…..with one eye open, squinting at that, but I will let you know what happens.
Thanks again!
Well, it might work anyway– let me know how it goes!
Ok Update……I flavored BEFORE (living on the edge….LOL) incubating my covered jars in my food dehydrator. I flavored each jar with approximately 1/3 cup raw honey and 2 tsp. (overspill required….we LOVE vanilla in this homestead) in each jar. (Note to self, leave more room next time…..maybe make a 5th jar?) Jill, it is WONDERFUL!! The only thing I would maybe want to turn out different is it could be thicker. How would I achieve that??? Thank you SO much for haring this….and THANK YOU so much for holding my hand! HA! Have a great day! ; )
Will this work with using almond milk?
I don’t have any experience with non-dairy milks– sorry! 🙁
Would this work using part milk & part cream for a richer, full-fat yogurt?
Yes, it should!
This may have been asked and please ignore me if it has…once you’ve made the first batch of yogurt can you use some of THAT yogurt to start another batch? Or are the cultures no longer live in this homemade variety?
Thanks 🙂
Yes, you definitely can. However, after doing that several times, you will need to get some fresh starter as it tends to “wear out” after a while.
Wonderful, thank you!!
Love the acidophilus tablets. No refrig., crush 4 for half gallon of pasteurized milk, heat milk , cool to 100 decrees, add crushed acidophilus to a cup of the warm milk. . Stir into the half gallon of 100 degree milk and keep warm for 8 hours.
I have a cloth baby bottle warmer, about 28″ long, I wrap my Pyrex bowl of warm adcioplipus milk with the baby bottle warmer, cover with folded bath towel and leave 8 hours.
I learned this in Beirut, Lebanon and it is delicious. I even strain the cooled yogurt and make cream cheese. Don’t throw the brine away. It is a healthy drink and good for your digestive system.
HI Jill! I’m making my first batch this morning, and I was curious: if you’re not supposed to bump or move the jars while they’re incubating in the cooler, how do you refresh the warm water without covering the jars? Thanks!
I usually fill the cooler 1/2 full of water to start, and then dump more hot water in it when it starts to cool off. 🙂
One more question! If I decide that the consistency is too runny after the yogurt has refrigerated for a day or so, can I still drain the yogurt for more of a greek style yogurt?
Yes, definitely!
Thank you!! I got nervous about the water so I just stuck my jars into my oven like one of the first comments above mentioned. Preheated to the lowest setting (170) then turned off. Just checked on it, now 6 hours later, and I have a very mild yogurt so I turned the light on as the jars are mildly warm and will check again in another 2 hours to see how tart its gotten. Thank you so much for this wonderful post–and quick response!! 🙂
Yep– the oven method definitely works too- as long as you don’t forget the jars are in there and start preheating it. (which is something I’d totally do!) 🙂 Enjoy!
I love this recpie. Wh at can I do with the left over liquid as my family dosn’t like it runny? don’t want to throw it away.
Thanks!
Good question! The liquid is whey and it’s great stuff- there are tons of ways to put it to good use. Here are 16 ideas to get you started: https://www.theprairiehomestead.com/2011/06/16-ways-to-use-your-whey.html
Thanks for this post, I’ve been making yogurt with raw milk too and it seems that heating it up to 180 is basically pasteurizing it. I guessing that step is kill off any foreign cultures? I tried an experiment where I only heated the milk up to 110 then put the starter in and keep it warm for 8hrs or so. The yogurt turns out fine, after that I take keep a bit of that batch to use as starter for the next batch. I was hoping to keep as much of the good stuff in the milk in there by not heating too high and it works.
So, the milk that you heated to only 110 degrees isn’t runny? I might have to try it again. When I did in the past, it seemed that the raw milk bacteria and the yogurt culture bacteria didn’t get along, so I ended up with a runny product…
I usually start the batch with greek gods honey yougurt. It does turn out runny unless you let it sit longer. I’ll let it sit for up to 18 hours that way the milk solids really stick together.
After draining the whey scoop off some starter for the next batch of yogurt. That starter will be better than the store one and your next batch will set up in as little 8 hrs. You were saying that your starter began to ‘wear out’ after a while. I haven’t experienced this and can only guess it’s because I ‘m not heating the milk up to 180. I had it going for three months once but then forgot to take starter off and had to go for the store yogurt to get it going again.
I saw your Mozzarella recipe and I’m anxious to give that a try. My mozzarella always turns out squeaky and chewy. Thanks for the great info!
This is VERY good to know Moroni! Taking notes and going to try it for sure!
For those who like large quantities of yogurt, I use this basic method but use a 4.25 qt. stainless steel bain marie pot. See them here: http://www.webstaurantstore.com/3109/bain-marie-pots.html. Be sure to buy the lids as well. I no longer have to worry about breakage. I bought 3 make 2 at a time.They last about a week.
Incidentally, I have found that heating the yogurt to 180 degrees makes for a much thicker yogurt. A scientist I read said that the high heat reorders the protein molecule so it “gels” better. But if I had access to raw milk, I would not make yogurt with it only kefir. I use greek yogurt as starter and the result is a mild-flavored yogurt even though I allow it to culture a full 24 hours.
Thanks for the tip about the pot– I’ve never thought of doing that! I really need to try the greek yogurt as a starter.
I like the Kirkland brand at Costco best.
When I put the jars of yogurt in the cooler I fill the cooler with the hottest water that will come out of the tap,and then wrap a wool blanket around the cooler to keep the heat in. With the higher incubating temp, I find it only needs 4 or 5 hours to get good and thick, but still mild tasting, since it starts to get tangy the longer it sits. We eat a lot of it with granola and a bit of fruit or homemade jam, and now the kids won’t eat commercial yogurt because it tastes ‘fake’ to them! Makes a mother proud.
Those are some smart kids you have there! 😉
So I made this once a couple months ago and like most I have made in the past it was a bit runny….especially after I added maple syrup or honey …..last night I made it again but I did one thing different ……I added some Great Lakes gelatin…..it turned out oh so creamy and thick 🙂
Yes! Gelatin is a great thickener- and good for you, too!
Did u add the gelatin before incubation or after?
I tried this yesterday but it didn’t work. The milk never thickened up.
Sounds like your starter might not have been active- or the milk might have been too hot when you added it, so it killed the good bacteria.
I don’t usuallly comment on blogs but I wanted to thank you for posting your method for making yorgurt. It’s exactly what I need.
I just discovered making starter from chili stems & milk. It’s much like making yogurt but the stems from about a dozen chilis are added to the warm milk after it has cooled from 180 degrees & left warming for 12 or so hours. At about 11 hours it looks like it didn’t work. A google search will should turn up a site with exact direction.
Thank you again for this post.
Rose
You are very welcome Rose! Wow– that sounds interesting– so is it like chili yogurt?
Hello,
Just wanted to ask about flavoring the yogurt. Is it best to put in vanilla etc right before you eat it, or does it matter if I put it in right after cooking? LOVE your site and all your posts! You are an inspiration to me, whenever I make something new my hubby always asks if I got the idea from you lol
Thank you
I always add it right before we eat it. 🙂 I’m So happy that you’ve been finding the blog useful!
Hi Jill – can you clarify that you do indeed use raw milk? The asterisk note confused me a bit because you say raw milk tends to make this runny and you prefer thicker yogurt, but raw milk is the best? Just trying to understand what you start with!
Thank you!
Perfect timing, Jill! I was just looking for a recipe for homemade yogurt. This looks easy and good, and since it’s coming from YOU I just know it’ll work! Hooray! Off to make some!
I think you like it Amy– this is my absolute favorite method!
Enjoyed your article and all the interesting comments. I have a friend who used to make yoghurt regularly – he used a rectangular Tupperware container and had created an insulated sleeve for it with rigid styrofoam and duct tape. He would pour his prepared milk into the container, slip it into the snugly-fitted sleeve with its styrofoam “hat”, leave that on the counter for a day or so, and it made lovely yoghurt.
Cool idea!
Years ago, I had what was called a “Yogurt Muff” basically, a heavy quilted fabric that fit snugly around a quart mason jar, with a top made from the same material. You just heated the milk in a pan, pre-heated the jar with very hot water, poured that water out then filled it with the milk and starter. Put the top on, and left it on the counter for however long it took, usually several hours. I must have lost it in moving, and am trying to find a replacement, but have had no luck. My next option is to try making my own ‘muff’. It was the BEST yogurt, and I miss it!
What a COOL idea! Never thought of that!
Hi Carol, I’m cleaning out my moms house and found a yogurt muff that’s never been used. You’re welcome to it.
Oh, my goodness! I would love to have it! let me know what I need to do to get it!
Thank you so much! I just loved mine, but must have lost it in a few moves.
jill your posts are awesome!
i started making my own ricotta type cheese and i found out if you add calcium chloride to the milk as it heats it will help retain more of the natural calcium from the milk. i’m guessing it would work for yogurt too?
I made one batch of perfect raw yogurt the first time I tried. However, the last two times I attempted it, all the white solid settled to the bottom, & the yellow liquid rose to the top. Any idea on what could be happening? (The raw milk I’ve been using is typically over a week old, & is sometimes closing in on two weeks. Maybe I should be using fresher milk?)
I’ve never made raw yogurt, but sometimes the whey separates out of mine too. As long as it smells ok, you should be able to pour the whey off and still use the yogurt.
Thank you!
Just finished heating to 180 and my milk has separated into curds and whey. Have you had this happen? I’m wondering if some of the hot water splashed into the milk and that caused it or if it had something to do with the milk. I used half soured and half fresh raw cow milk. It’s cooling now but I’m guessing it will not turn into yogurt. Any ideas? I hate to waste a gallon. Maybe I can strain it and make a soft cheese.
Hi Jill! Super late to the party, here, but just wanted to let you know that I’m trying this out for the first time and I’m SUPER excited! We almost never eat yogurt, but that’s mostly because store-bought is so expensive, and just doesn’t taste right. I’m just waiting on the jars to cool a little, and we’ll see what happens! I’m planning on incubating in the oven – that’s all we’ve got! I’ll let you know how it turns out! Thanks!
Do I have to use raw milk? I’ve been pretty eager to make my own yogurt. We eat a lot, It’s getting very costly.
Nope! You can start out with pastuerized milk if you like.
Taught by my friend’s Lebanese grandmother that you heat the milk until you cannot stick your (clean) pinky in it for ten seconds, then let it cool until you can just hold it in for ten seconds. At that point add your starter, then pour into quart jars, then put those jars into a cooler filler with hot water. Leave overnight, then refrigerate. We use whole milk from our Jersey/Normande and it makes the best yogurt!! Skimmed milk is always runnier. I also know when I haven’t heated the milk hot enough as that “raw” milk yogurt is runnier than anything!
Can you make 0% fat yogurt using skim milk? Just curious.
Can you use some of the yogurt you’ve made as starter for the next batch?
I would also like to know if you can use some of my homemade yogurt to start the next batch, Jill. If so, how long after you make the first batch is it ok to use for starting the next batch?
Thank you,
Deb Casey
Edgewood, NM
Yes, you can use homemade yogurt to start your next batch. However, after several batches, it seems to loose its “potency” so you’ll need to refresh it after a while.
I like the thickness of greek but not the tanginess. Would I mix gelatin in at the same time as the culture? and how much gelatin would I use per quart?
Need to speak privately with you. Please go to my fb page and message me with an email address or other contact information. I sincerely appropriate it!
Hello Jill
Love your website! I’m a stay at home, homeschooling mom of 4 in Ontario Canada. I’ve recently decided to start making more things homemade. I’ve always made my own desserts, pies, breads, and pastas but now want to expand and begin making my own butter, yogurt and cheeses. We don’t have our own animals yet but are looking into that. Milk here is quite inexpensive in the stores compared to butter, cheeses and yogurt so being the frugal person I am, I figure trying to make the homemade stuff is better for us and will help the budget too. I made my own butter and that was a success, now I want to make the yogurt next. I made the mesophilic starter ice cubes from buttermilk like I’ve seen on the web. Now can I use that to make my yogurt? I haven’t been able to find one recipe for yogurt that uses the mesophilic starter ice cubes. Can you help? Much appreciated! Oh and thanks for the 16 ways to use whey! I’ll be needing that once I start cheeses!
I have wanted to make yogurt for awhile now but never have. I am going to have to try using your process.
I love how I leave your blog feeling smarter! Between you and your commenters I feel competent and ready to try anything! Lol. I have made yogurt using the crockpot, adding powdered milk and culturing it in the oven. It worked perfectly every time. I just like having a couple different methods up my sleeve, and to teach my kids, so they can find the one they like best. Thanks for sharing your knowledge! My cow will freshen June and I will be off to the dairy races 😀
I make yogurt with my raw goats milk and it is extremely thick, not runny in the least. As a matter of fact I can literally turn the jar upside down and the yogurt will not fall out. Perhaps it’s the high butterfat in my Nigerian Dwarfs milk? I just? wanted to assure your readers with goats that you certainly can get a nice thick yogurt with raw goats milk.
Good to know! Maybe it was just my goats.
Hi Jill. I’m just now coming across your blog and LOVE it. Thank you! Just what I need to help me get out of the “rat race”. The yogurt you use to culture the milk – is it a standard organic store bought yogurt? Or do you purchase yogurt starter cultures? Would either option work? Thanks!
I admit that this might be overkill, but setting up a Sous Vide to maintain the temperature of the proto-yogurt to 110F for 8 hours is no big deal.
Obviously you wouldn’t want to buy a Sous Vide just for yogurt, but it also cooks up Tri-Tip to die for (and many other meats, for that matter).
Hi Jill! Fanstastic fecipe. I have been making yogurt at home for years now (using the oven method).
How does it work if I freeze the leftover in ice cubes? Can I use it as my starter for my next batch after it has thawed?
Thanks again!
Can I use a seed starting heat mat to keep the yogurt warm?
I’ve heard of people having good success with that type of thing. If you try it out, let us know how it works out!
This was super easy…until I forgot to move the yoghurt from the cooler to the fridge at 12 hours. So it sat for 20 hours, oops! The water was still warm, so I think yoghurt would still be safe to eat?? Has anyone else every done this?
Should be fine. It may be a bit thicker than normal though.
Hi Jill,
I have made your yogurt in the mason jar a ton of times using Greek Yogurt as the starter. The last time I bought the Greek yogurt I froze the rest of it in ice cube trays to use for more starter. I made yogurt yesterday with the frozen Greek yogurt, which I took out of the freezer and thawed the day before. I incubated it for 12+ hours in my Excalibur dehydrator on 115 deg. This morning I checked it after placing in the fridge about 7 1/2 hrs before, and it did not set up. The only that that really changed is using previously frozen yogurt for the starter. Now I’m thawing more yogurt to try, but I have a feeling I’m going to have to run to the store and get new yogurt. Have you had this happen with previously frozen Greek yogurt before? Thanks 🙂
That’s interesting. I wonder if the cultures in the yogurt don’t survive being frozen?
Thnks for the post
we love this post
Hi Jill,
I have made your yogurt many times. I had used organic whole powdered milk reconstituted for it in the past and now am using goat milk powder reconstituted instead. I was wondering what the purpose of heating to 180 deg is if you are using already pasteurized milk? I understand you would want to do that for raw milk. Does it have anything to do with how the yogurt turns out, or is it necessary. I am wondering if I could just make the make, put the culture in and incubate it right away without heating. TIA.
According to my research, “Pour milk of choice into a double boiler and heat to 180°F. This will kill competing bacteria, and the whey proteins will denature and coagulate to enhance the viscosity and texture of the final product.”
I have been making yogurt like this every couple weeks for a long time. I love it! I’m wanting to make extra yogurt this week, and the empty glass jars I have are not mason jars. I only have jars from Adam’s Peanut butter. Would those work, or will they break in boiling water? Should I try to find mason jars to use?
It’s difficult for us to tell you if your glass bottles will break. Mason jars are best, since they should not break in boiling water. Anything else you use you might want to google the specific brand and at the very least be full of caution as you use them in hot water.