Learn how to make mozzarella cheese at home. This recipe is for a traditional-style method for making homemade mozzarella cheese. I have personally found that it consistently gives me a good tasting and great texture homemade cheese. I’ll show you the ingredients and cheesemaking equipment you need as well as a picture tutorial and recipe for making the best tasting fresh mozzarella cheese.

I’ve been promising ya’ll a from-scratch mozzarella recipe for a while now and it’s finally here!
I don’t consider myself to be an expert cheesemaker, by any means. BUT, I have had considerable success with homemade mozzarella cheese (and having a milk cow gives me plenty of milk to practice with…).
There are a million-and-one mozzarella recipes out there, including ones that use microwaves and citric acid as short-cuts.
But, I have personally settled on this traditional-style method for fresh mozzarella because it consistently gives me an end result with good taste and good texture.
I’ve tried the citric-acid recipes, but I never cared for the results (it would always release a lot of whey on my pizza, and leave me with soggy crust…). And the microwave recipes are quick, but the thought of using a microwave on beautiful raw milk makes me cringe…
How Long Does It Take to Make Homemade Mozzarella Cheese?
This homemade mozzarella cheese recipe basically takes all day, from start-to-finish. Now, before you say “No way!”, keep in mind that you don’t have to be in the kitchen all day— there are just a lot of waiting periods– so if you have a timer that you can carry with you, you can definitely still head outside to work in the garden or barn during the cheesemaking process.
Trust me, I have a crazy-busy life, and I wouldn’t be choosing the option that takes longer unless I thought it was worth it. 😉
By the way, if you want to watch me make some homemade mozzarella cheese and other awesome from-scratch recipes, check out my Heritage Cooking Crash Course. It’s full of from-scratch cooking tips and videos for making homemade bread, cheesemaking, sausage-making, and more.
Why Make Homemade Mozzarella?
So, why go to all the trouble of making mozzarella at home?
Here are my top 4 reasons for why you should make homemade mozzarella cheese:
1. It taste sooo much better than the stuff at the store. The bargain-brand mozzarella you find at supermarkets pretty much tastes like cardboard to me… Of course, you can spring for a higher-quality brand, but expect to pay considerably more.
2. It’s (mostly) raw. Well, as raw as mozzarella cheese can be, I guess. You won’t be heating the milk or curds past 100 degrees with this recipe. However, during the stretching process, you will be dipping the curds in hot liquid which effects the ‘rawness’ a bit. However, I’m thinkin’ it’s still way better than the mozzarella made with totally pasteurized skim milk at the grocery store. (Here’s why raw milk is important to me, in case you were wondering.)
3. It uses up lots of milk. If you have your own dairy animals, this is a really, really good thing. When I’m drowning in milk, I make a double batch of homemade mozzarella cheese, which uses up 4 gallons of milk.
4. It freezes well. Make a bunch of fresh mozzarella when you’re swimming in milk and freeze it for the times when your animals are dry.

Homemade Mozzarella Cheese: About the Ingredients
This from-scratch mozzarella technique requires that 3 ingredients be added to the milk. If you have already ventured into cheesemaking, you might already have these in your fridge or freezer.
By the way, New England Cheese Making Supply Company is one of my favorite places to get everything I need for making cheese. They have a huge selection of cheesemaking supplies!
Thermophilic Starter Culture– This is what will culture the milk.
Rennet– I get the organic vegetable rennet from New England Cheese Making Supply Company. There are many varieties of rennet available- tablets or regular strength rennet is ok too– but steer clear of the “Junket” stuff at the grocery store.
Lipase– I also get this from New England Cheese Making Supply Company (I get the Mild Calf Lipase). This is a totally optional ingredient, but I like to use it since it gives the cheese more depth of flavor. And I figure if I am going to all the trouble of making homemade mozzarella, it might as well taste as good as possible.
Milk— I use my raw cow milk, but goat milk will work as well. You can use pasteurized milk if you must, but try to purchase the most high-quality, whole milk that you can afford. Sometimes I lightly skim the cream from my gallons of raw milk (if I happen to be low on cream), but otherwise, I like to use full-fat milk since it gives the best flavor. Here are my tips on how to separate cream from milk.

The Equipment You Need to Make Homemade Mozzarella Cheese
Thankfully, you don’t need a whole lot of special equipment to make homemade cheese. Here is a quick list of the cheesemaking equipment you need:
- A large stockpot with a lid (a 2 or 3 gallon one is ideal)
- A thermometer (I often just use a normal meat thermometer…)
- A long, thin knife to cut the curd (I use our wedding-cake knife, actually. It’s horrible for cutting bread, but great for cutting curds)
- A timer- preferably the portable kind. Or, use the timer feature on your cell phone.
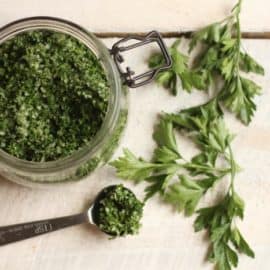
- Big jars or pitchers to capture the excess whey (here’s some great ways to use up your whey)
- Clean food-grade rubber gloves. (Get a designated set for your cheesemaking— don’t use the ones you put on to scrub the toilet, please.)
Make sure all of your cheesemaking equipment is extra clean, since this will be a sorta-raw mozzarella cheese.
*A Note to All Aspiring Cheesemakers* I want to give fair warning before we start. Cheesemaking is fun, but it is also finicky sometimes. So, you can’t get discouraged if this is your first batch and it doesn’t turn out… It’s a learning process! The first few times you attempt to make homemade cheese, you’ll probably be sweating and reading the recipe a million times before starting. But trust me- the more you do it, the easier it becomes, and soon you’ll be making fresh mozzarella in your sleep. Practice truly does make perfect!
*One More Note: This post is very picture-heavy, so it may take a bit for it to load. Scroll to the bottom for the printable recipe with no pictures.
How to Make Traditional Mozzarella Cheese
Ingredients:
- 2 gallons of high-quality milk (I always use my raw milk)
- 1/4 teaspoon of thermophilic starter culture
- 1/4 + 1/8 teaspoon of double strength liquid rennet dissolved in 1/4 cup of unchlorinated water
- 1/4 teaspoon lipase powder, dissolved in 1/4 cup of unchlorinated water
Important: With most recipes, I’m pretty laid-back and adventurous with times, temperatures, and measurements. However, homemade cheese is one thing that you can’t really improvise too much on, so it’s best to follow the instructions as closely as possible.

Pour the milk into a large stock pot and slowly heat it to around 90-95 degrees F. Or, if you just finished milking and the milk is still warm from the animal, you can skip this step, since it will already be sufficiently warm. (I did this the other day, and it made a gorgeous batch of cheese.)

While the milk is heating, prepare your rennet and lipase by dissolving them both into 1/4 cup each of cool, unchlorinated water.

Sprinkle the Thermophilic culture on top of the warm milk, and gently stir in. Then gently stir in the lipase powder/water mixture.

Cover the pot with a lid, and allow it to sit undisturbed for 45 minutes, keeping it at 90 degrees the entire time. This is called the “ripening” phase.
(Depending on the heat of your house and the milk, you may or may not need to turn the burner on and off for brief periods to maintain the temp. During the summer, it’s usually fine as-is, though in the winter time, it needs a little help staying at 90 degrees. I sometimes wrap it in a towel to help insulate it.)

Next, gently stir in the rennet/water mixture- this is going to coagulate the milk. Replace the lid and allow it to sit for 60 minutes at 90 degrees F. (See why the timer comes in handy?)
Now the fun begins. You are looking for something called a “clean break.”

This is when the milk has coagulated and is forming a curd. You want to be able to stick your knife in the middle of the pot and see a “slice” in the curd, with a bit of whey filling up the indentation.
If you don’t have a clean break yet, leave the pot for another 30-60 minutes. If your milk is still entirely “milky” at this point and not thickened at all, you might be able to salvage it by adding a bit more rennet and allowing it to sit at 90 degrees for another hour or so.
Once you’ve reached the clean break stage, you get to cut the curd (this is kinda fun).

Grab a long, thin knife and make a checkerboard pattern in the pot, cutting all the way down to the bottom. You want the cubes to be about 1/2″ square, although I most certainly do NOT get out my ruler and measure…
Let your checkerboard curds sit for another 30 minutes. During this time, you’ll see the curds and whey begin to separate even more.
Use a slotted spoon to gently stir the curds, and cut up any curds that are too long (the reason behind cutting them into cubes is so they will release whey and begin to firm up). They will feel very soft and fluffy at this point.

Now, to encourage the release of more whey, they must be gently heated. We want them up to 100 degrees, but this needs to happen gradually, over the course of about 30 minutes.
You can do this by sticking your pot in a sink of hot water, but I’ve found that method to be cumbersome. So, I prefer to use my stove burner to add a bit of heat. I’ll turn it on and stir the curds gently to prevent hot spots, and then I’ll turn it back off. (The key is to NOT forget and leave the burner on accidentally… *ahem)

Once you’ve reached 100 degrees, let them sit another 10 minutes to settle, and then drain the majority of the whey out of the pot.
I use a coffee filter set-up, similar to my milk-straining system, to strain out most of the whey.

Set the whey aside, and let the clump of curds acidify in the pot at 100 degrees for about 3 hours. Check the temperature every half hour, and flip them over to ensure even heating.
The acidification process is very important, as this is what will enable us to stretch the cheese successfully.
As the hours progress, more and more whey will be released (you can continue to drain it off), and the clump of curds will knit together and become a solid mass.

Now we are ready to stretch!

Pull the curd clump out of the pot and cut it into roughly 1″ cubes. Pour some of the reserved whey back into the pot and heat it to 170 F. (Don’t use all the whey, as it’ll take forever to heat up. Some folks use water for the stretching process, but I prefer to use the whey, as I think it adds a touch more flavor.)
Put on your rubber kitchen gloves, and place half of the curd cubes into the hot whey. (Dividing them into two batches makes them easier to handle.)
Now, this part is a little painful, so you have to be tough. 😉 That whey is hot, and while the gloves offer some protection, you’ll still feel the burn a bit.
Allow the cubes to sit in the hot whey for several minutes. If you grab one, it should start to stretch and feel smooshy. Use a long spoon to swish the cubes around in the hot whey– it’ll save your hands a little bit. After a minute or two, the cubes should start to want to stick together. Encourage them to from a lump and start gently pressing them together in your hand. Once you have all of them, begin to gently work the curd and stretch it out.
")
This is the best part of the whole process. 😉 The amount of stretch you get in your homemade mozzarella depends on that particular batch, but even a little stretch is better than no stretch at all.
If during the stretching process the cheese begins to break, stick it back into the hot whey and let it heat up a little more.
Stretch out the cheese about 10 times, and then form it into a ball. Repeat with the second half of the curds.

Plop it into a bowl of cold water to cool it down and help it to hold its shape. (Instead of just plain cold water, you could also make a salt water brine for added flavor).
Allow the mozzarella cheese to sit in the water for about 60 minutes, then wrap it tightly and store it in the fridge or freezer. (Or eat it immediately for a delicious snack- there is nothing like fresh mozzarella.)
*About Failed Batches* If your homemade mozzarella cheese didn’t turn out quite right, don’t throw it away! Even crumbly, non-stretchable curd is still great in filled pastas, casseroles, or on salads. There’s no need to toss it.
The Condensed Version for Making Homemade Mozzarella Cheese
Whew! I bet your head is spinning right about now, huh? Here the the streamlined-version of the whole process for making traditional mozzarella cheese at home:
PrintHow to Make Mozzarella Cheese
This traditional-method homemade mozzarella cheese recipe will make you a believer in the incredible taste of homemade cheeses over the stuff from the grocery store.
- Prep Time: 30 minutes
- Cook Time: 8 hours
- Total Time: 8-9 hours
- Yield: 1 ball of mozzarella 1x
- Category: cheesemaking
- Method: traditional
- Cuisine: dairy
Ingredients
- 2 gallons high-quality milk (I use my raw milk)
- 1/4 teaspoon of thermophilic starter culture
- 1/4 + 1/8 teaspoon of double strength liquid rennet dissolved in 1/4 cup unchlorinated water
- 1/4 teaspoon lipase powder, dissolved in 1/4 cup unchlorinated water
Instructions
- Heat milk to around 90 degrees F
- Add thermophilic culture and lipase powder
- Stir and let this ripen at 90 degrees for 45 minutes
- Gently stir in rennet and let sit at 90 degrees for one hour
- Cut the curds into 1/2″ cubes, then let rest 30 minutes
- Gently stir and break up curds, then slowly heat to 100 degrees over the course of 30 minutes
- Let rest 10 minutes
- Drain excess whey, allow curds to acidify at 100 degrees for 3 hours, flipping every half hour
- Cut the knitted curds into 1″ cubes
- Heat and stretch the cubes in 170 degree whey, until you can form a shiny ball
- Cool finished cheese in cold water or salt water brine for one hour
- Store in fridge or freezer

I know the whole process for making homemade mozzarella cheese sounds super complicated at first glance, but I PROMISE it gets easier and easier the more you do it. Soon, you’ll find yourself making homemade mozzarella in your sleep. And once you taste fresh homemade mozzarella, you’ll agree that it’s totally worth the effort.
Happy cheesemaking!
Don’t forget to check out my Heritage Cooking Crash Course which is perfect for visual learners (and if you want to learn a lot of heritage cooking tips and recipes).
And read my thoughts about 3 popular Home Dairy Myths (and tell me what you think!).
More Home Dairy Recipes:
- How to Make Sour Cream
- Homemade Ricotta Cheese Recipe
- How to Make Fromage Blanc (raw cultured soft cheese)
- How to Make Cream Cheese
- Homemade Buttermilk Recipe
- How to Make Butter
")


Way to go! We stopped at a farm on a tour of Italy to watch them making mozzarella in big bowls, kneading the whey out and then hanging. Was my first first-hand encounter with cheese making.
Oh– I’d love to see them do it in Italy. How awesome!
Looking forward to the next post on this. I’ve been slowly working my way into cheese making and I’ll be placing another order from Cultures for Health this weekend. 🙂 Thanks for this topic!
How much cheese will this end up making?
Hmmmm… I think about a pound of cheese per gallon of milk? I’ve measured it out before, but can’t remember exactly. Sorry. 🙂
Can I use this method snd start making cheese for sale??
Thanks for posting this. Very timely as cheesemaking is currently a topic of discussion in our home. Our challenge right now is saving enough milk from the does – our 2 goat kids and 8 human kids drink most of it up! Sigh. Can’t wait for part two of this one.
Great post…i was however stoping by for this weeks barnyard hop and cant locate it. Im an avid reader of your blog thanks for all thr hard work.
I have a friend that makes goat cheese all the time…..I will have to ask her if she has made Mozzarella. How fun!
Ooooh, I can’t wait for the recipe! I’ve been wanted a more raw version. And I really appreciate all your little tips of why you use this instead of that. Nothing like someone else’s experiences to learn from!
And after you make mozzarella will you make Ricotta with the whey?
Yep- I definitely do that sometimes! If I don’t need any raw whey, I’ll heat the whole pot to 200 degrees and strain it– makes wonderful lasagna!
Hello! How do you store in freezer without the freezer burn/crystals forming?
Should I use my freshest milk or my oldest? I get about a gallon a day and normally drink the oldest first. Can I use that- 3-5 days old- or do I need to use the most recent?
I personally try to use my freshest– it seems as though I have the most consistent results that way. Although I most definitely have used older milk too. I’d say 3-5 day old milk should be just fine.
ok. I am going to start a batch in the morning and I think i will use my freshest. I have a few quarts that are older than 5 days, probably over a week. I don’t remember exactly. I think I will just toss those few in the freezer for the piglets when we get them. I don’t want to risk ruining my cheese. I am wicked excited about trying your recipe though!
I hope it’s a big success for you! But don’t worry too much if your first batch is a little rocky- sometimes it takes a couple tries to get it all figured out. 🙂
You know how you said at the beginning that you don’t tend to follow recipes very closely? I have the same problem. I sort of followed it and I no have 2 balls of something that looks like mozzarella cheese. Haven’t tasted it yet but it looks yummy!
Well, the good thing about cheesemaking is that you can almost always still use the “failed” batches in some way, shape, or form! 🙂
I just made my first batch of mozzarella with fresh goat milk. I used another recipe with the citric acid. The cheese seemed to turn out okay but it has a strong (almost soured) flavor. I didn’t remember mozzarella in the store as having a strong flavor. Is that from the citric acid or do you think it could be something else. I didn’t have a stainless steel pot so I used one with a teflon coating. Any ideas? Thanks P.S. I might try again or I might try your recipe next.
Hmmm… How old was the milk that you used? Was it more than a couple days old? That might have caused the sour taste. Mine definitely has more flavor than the storebought stuff, but it usually doesn’t taste sour.
I think the milk was about 3 days old or maybe 4 but it still smelled good. I will use the freshest next time and see if that makes a difference. I don’t know if I used the right word for describing the taste. It doesn’t taste like soured milk smells but that was the closest thing I could think of. It has a strong taste almost like when people think of a strong taste from wild game. Anyway I will try again one day this week. Does it really make a difference what kind of pot you use?
I noticed this recipe doesn’t call for any “cheese salt.” Is that just your personal preference? If one were to try adding salt, how much would you recommend?
I am kind of ignorant to all of this and trying to learn. I was really excited to stumble upon this recipe but I am wondering why to steer clear of “junket?”
Is it bad? Artificial? I just want to know why.
Thank you!
From what I’ve read, it’s not exactly the “truest” form of rennet, and it will make you pull your hair out with inconsistent results. So, if you are new to cheesemaking, it’s best to set yourself up for success with the real stuff. 🙂
I live making mozzarella! Any tips for storing it?
just wondering why you dont order the Organic vegetable rennet? I don’t want Propylene Glycol in my cheese!
I usually use the vegetable rennet from CFH? I wasn’t aware of any propylene glycol?
This is the one you buy: Ingredients: Enzyme produced by pure fermentation of Mucor Meihei in salt brine, less than 5% propylene glycol, less than 2% sodium propionate. This is the organic by CFH: Ingredients: Double-strength microbial “vegetable” rennet derived from Mucor Miehei and sodiumchloride (Danisco Marzyme 55 PF).
All ingredients conform to organic standards.
Interesting interpretation of the process. I would love to try this out and see how it tastes. I interned for a cheese house in Tuscany for 12 weeks this past summer and we made primarily pecorini and caprini freschi but we made in total 42 cheeses, including mozzarella, which was my personal favorite cheese to make. So much fun, and can’t beat fresh mozzarella the day it is made.
why steer clear of the “Junket” stuff?
I’m curious about why you say not to use Junket tablets. I find it easy to access junket tablets, and have just successfully made cottage cheese with them. They also have a recipe for mozzarella, but I haven’t tried it yet. What is wrong with Junket tablets?
I’ve never had consistent results with Junket– especially not in this particular recipe.
Could a digital crock pot be use tok heat and hold the different temperatures? Maybe with the lid off? I think there has to be some dodad to heat and hold the temp instead of turning my stove on and off. Maybe an Insta pot?
Yes I agree. This would be more efficient. Did you ever give this a try? What were your results?
Can you use citric acid or mesophilic instead of Thermophilic starter culture?
This is from 2013! I am so late to this party!
Do you have a method for Clotted Cream on a ceramic cooktop? We have plenty of Neill as we are dairy farmers but I’ve never had success with Clotted Cream, something I would love to master! I’ve been told it may be because the ceramic cooktop burner doesn’t achieve a low enough heat? I would love any tips you could give me or if you have a Precious post on this could you direct me there please! Thanks, Michelle
Gordon Ramsey of “Hell’s Kitchen” & Nightmares made the owners of a failing restaurant go and milk cows and make mozzarella cheese. Good episode. How to solve all the world’s problems by making cheese. Ha ha.
HI Jill! I am wondering if you can cut this recipe in half and only use 1 gal of milk?
This recipe looks amazing thank you. Can I just ask if this is US gallons? UK Imperial gallons are 4.5 litres but I think US gallons are closer to 3.5 litres, and I’m trying to figure out how much milk I need!
Looks so yummy! When you say that you can use pasteurized milk, does that include homogenized milk too?
I had raw milk in my refrigerator a long time, a few months. The milk separated. There is a chunk of something in there separated from the whey. What is the chunk of some thing? Is it sour cream? I smelt it, and tasted a small piece. It was really sour. It didn’t smell good. The smell is strong. I took it out of the refrigerator tonight, and saved the whey and the cream in different containers. What can I do with this cream? Is the whey and cream safe to consume?
That milk is bad! I can’t believe you actually tried it. Raw milk usually doesn’t last for more than two weeks at the most. The only way milk can last that long is if it’s preserved as cheese or frozen.
Raw milk doesn’t go “bad” it just makes a new product! Clabber, etc. Raw goat milk oxidizes with time and has a stronger capric acid flavor but I’ve used milk even 3 weeks refrigerated (the way I chill after milking it is almost canned) and it smells & tastes great (but does oxidize faster upon opening). Usually the chunks are coagulated fat and taste delicious.