French bread comes from the store, right?
Did you know that I was approximately 22 years old before it occurred to me that a person could make homemade French bread?
Yeah, for real…
I had it in my head that you simply had to schedule a trip to the store to grab a loaf or two of French bread if you wanted to serve it with your spaghetti or lasagna that evening.
So imagine my surprise, back at the beginning of my real food journey, when I came across a perfectly chewy French bread recipe. And it was even BETTER than the store-bought stuff. Oh. My. Word.
(I’m telling ya– if it’s possible for someone like me to learn how to enjoy whole foods and cook from scratch, then ANYONE can!)
I love making bread of all kinds, but this French bread recipe is one of my absolute favorites.
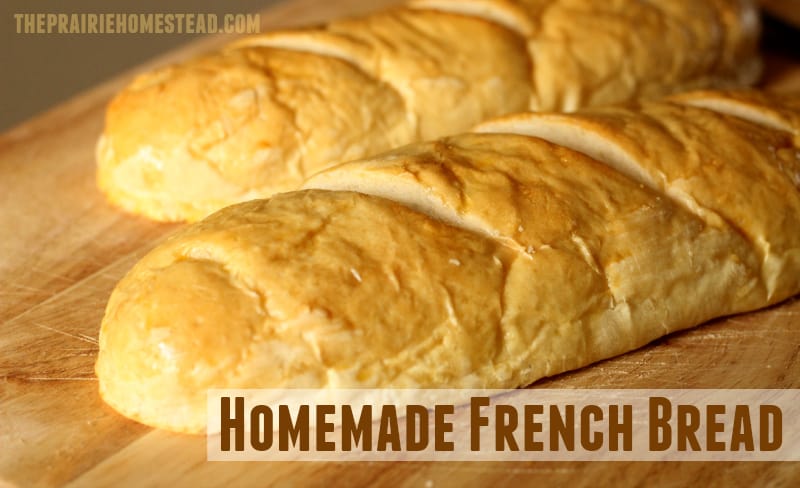
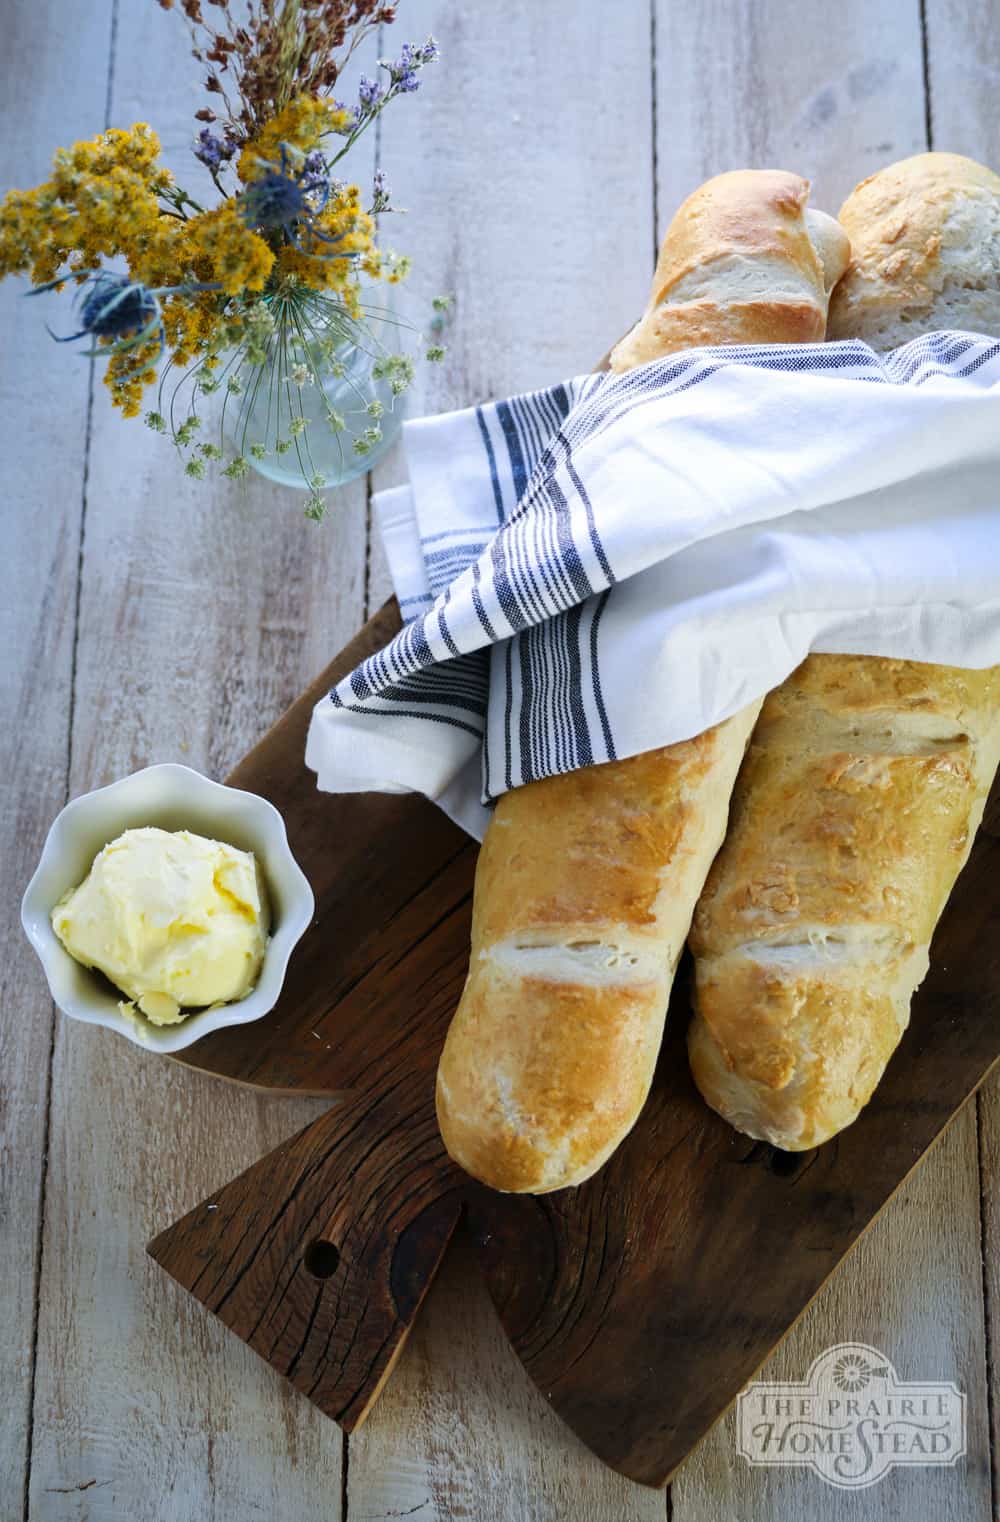
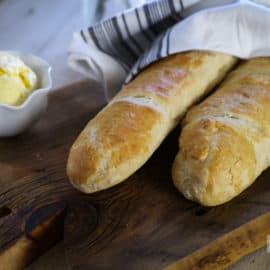
With only five ingredients, you’ll pretty much look like a rockstar when you serve a loaf of this gorgeous French bread alongside a bowl of homemade tomato soup or spaghetti.
Homemade French Bread Recipe
(this post contains affiliate links)
Ingredients:
- 1 1/4 cup warm water (80-90 degrees)
- 2 teaspoons sucanat (where to buy) (regular sugar will work too)
- 1 teaspoon sea salt (where to buy)
- 3 to 3 1/2 cups flour *see note below
- 1 1/2 teaspoons active dry yeast (where to buy)
Instructions:
Place the yeast and sucanat in a large bowl and stir in the warm water until everything is dissolved. Add in the salt, then stir in as much flour as you can. You might not need the full amount, or you may need more– it just depends. You are looking to create a soft, pliable dough that isn’t too sticky.
Knead on a lightly floured surface for 6 to 8 minutes, or until the dough is smooth and elastic.
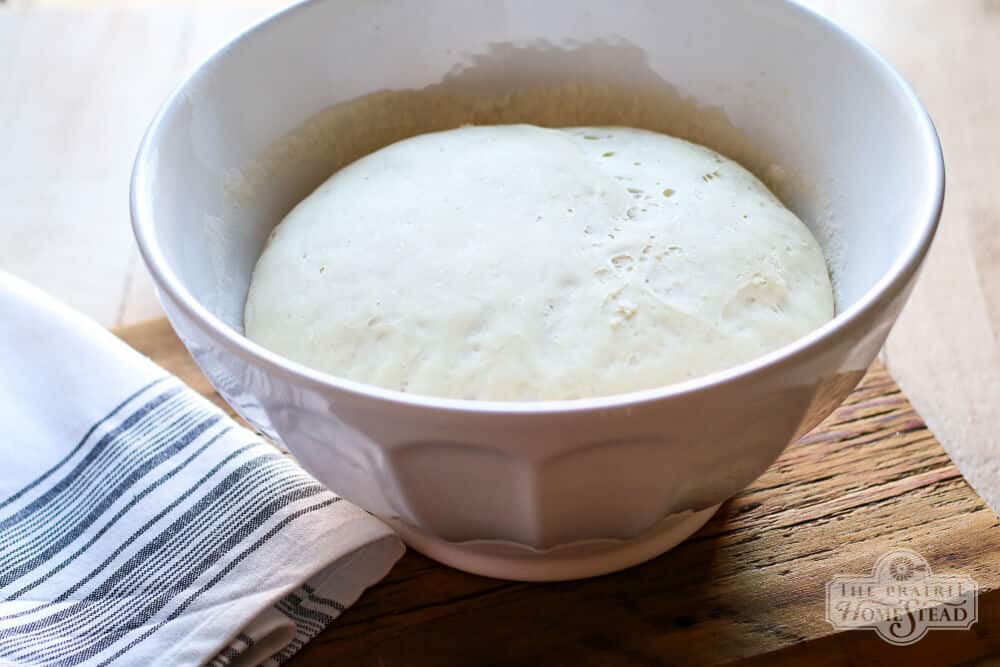
Place the dough back in the bowl and cover with a kitchen towel. Allow it to rise for about an hour, or until doubled in size.
Plop the risen dough back out on your counter top and divide in half. Roll each half into a rectangular shape (it does NOT need to be perfect. Look to make the shape about 10″ by 8″. However– I will repeat– it does NOT need to be perfect.)
Roll up the rectangle starting with a long side. Pinch the ends of the loaf to seal and shape in a “log.” If your seam doesn’t want to stick down, you might need to dip your finger in a bit of water and moisten the dough to encourage it to adhere. Otherwise, it’ll try to unroll during the baking process.
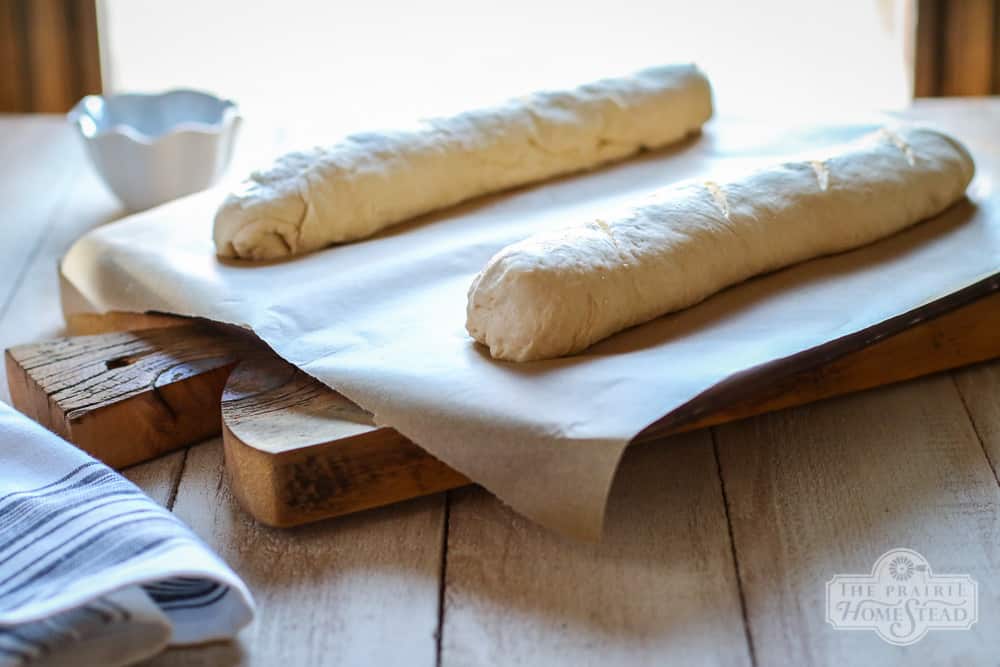
Grease a pizza stone (where to buy) or stoneware baking sheet and place the loaves on it to rise for another 30 minutes.
Meanwhile, preheat the oven to 375 degrees, and prepare an egg wash by beating one egg with one tablespoon of water. (The egg wash is optional– however– it gives the loaves a lovely, shiny brown finish)
Right before you pop the loaves into the oven, brush the tops with the egg wash and make 4 diagonal slashes across the top using a sharp, serrated knife.
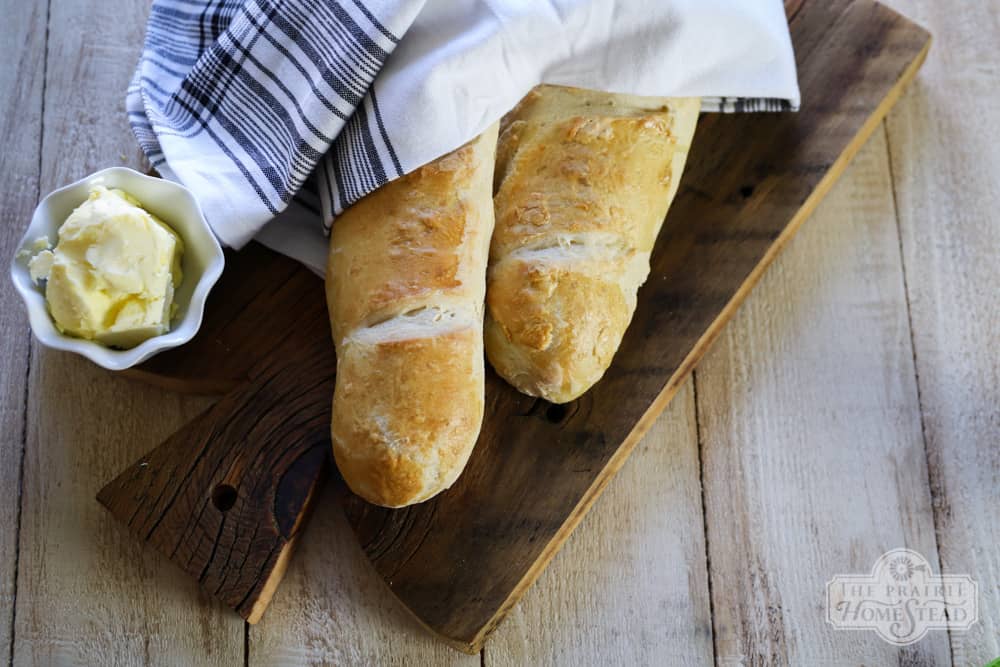
Bake for 20-25 minutes, or until golden brown. Allow to cool on wire racks before serving.
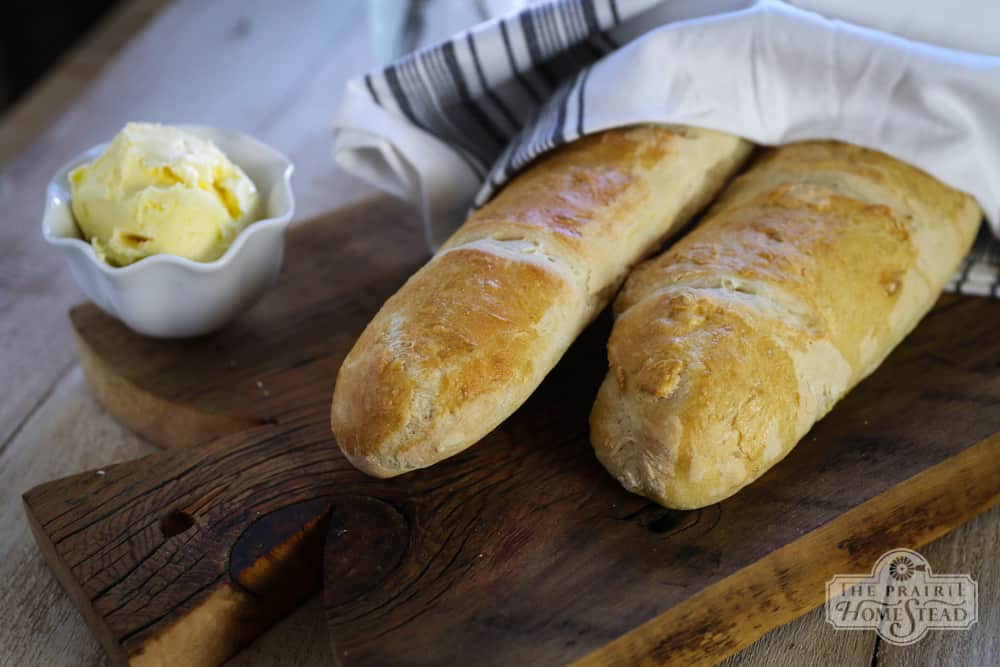
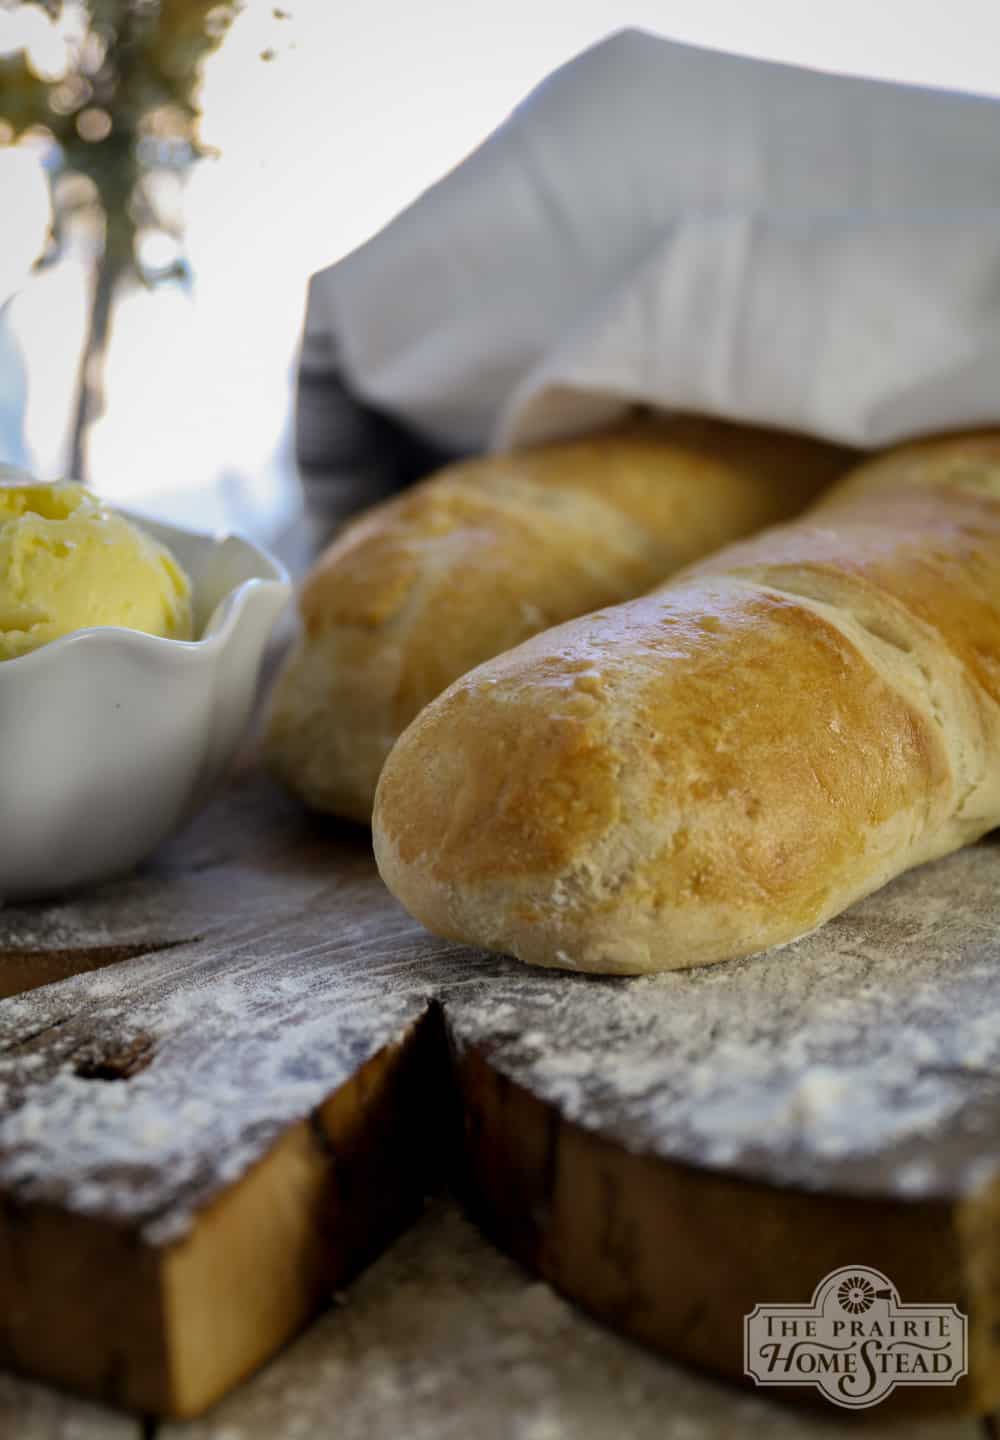
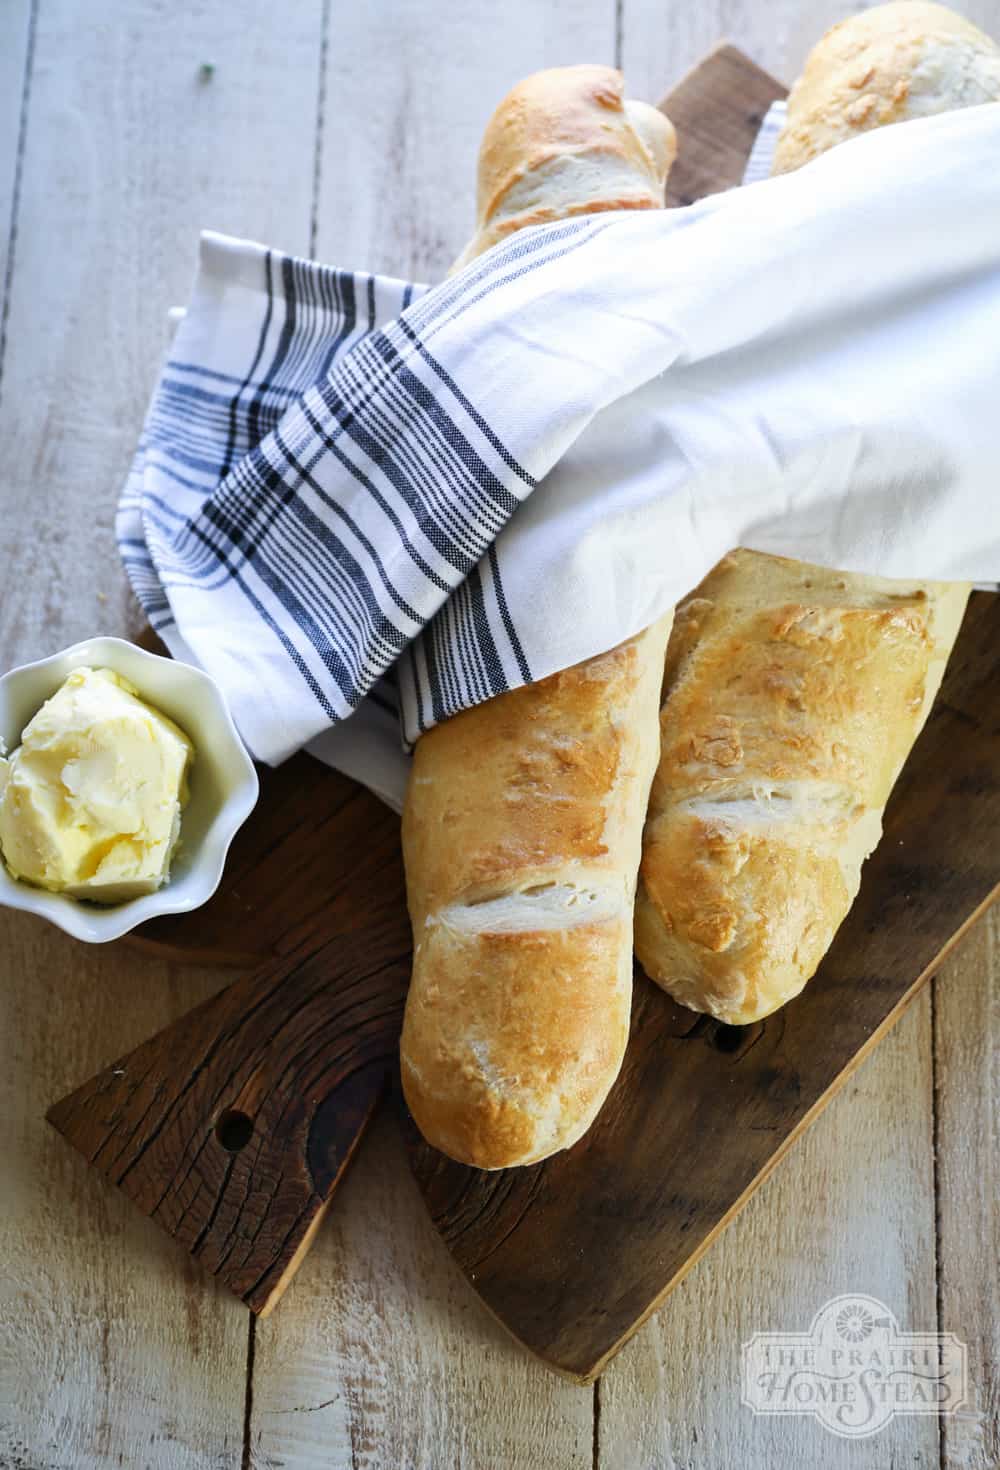
Serve warm, with lots of butter.
Kitchen Notes:
- You can really go with whatever type of flour you like here. Feel free to use whole wheat or half wheat, half white. I generally use unbleached white, and sometimes I’ll throw in whatever freshly ground wheat flour I have hanging out in my fridge. For a chewier bread, try adding 1 Tablespoon of vital wheat gluten to the yeast/sucanat mixture at the beginning. I have no experience in trying this recipe with gluten-free flours— so I have no idea if that would be successful or not.
- I have never tried preparing this recipe using the “soaked grains” method. Feel free to try it out.
- You could totally make this recipe in your mixer if you have something like a Kitchenaid mixer or Bosch. However, I’ve found that I prefer making my bread by hand. I just need to have my hands in the dough in order to know if it’s right or not. 😉
- If you have a large family, you might want to double the recipe. It’s enough for my little family, but the loaves aren’t huge.
- I supposed you don’t *have* to use stoneware to bake this bread, but I sure recommend it. I think my pizza stones are some of my most-loved kitchen tools. Couldn’t live without ’em.
I was also going to add that if you have some left the next day, it makes a great garlic bread. Just slather some butter on top and sprinkle on garlic powder and parmesan cheese before sticking it into the broiler.
But let’s be honest… there probably won’t be any left the next day. 😉
French Bread Recipe
- Yield: 2 loaves 1x
- Category: Breads
Ingredients
- 1 1/4 cup warm water (80–90 degrees)
- 2 teaspoons sucanat (regular sugar will work too)
- 1 teaspoon sea salt
- 3 to 3 1/2 cups flour *see note below
- 1 1/2 teaspoons active dry yeast
Instructions
- Place the yeast and sucanat in a large bowl and stir in the warm water until everything is dissolved. Add in the salt, then stir in as much flour as you can. You might not need the full amount, or you may need more– it just depends. You are looking to create a soft, pliable dough that isn’t too sticky.
- Knead on a lightly floured surface for 6 to 8 minutes, or until the dough is smooth and elastic.
- Place the dough back in the bowl and cover with a kitchen towel. Allow it to rise for about an hour, or until doubled in size.
- Plop the risen dough back out on your counter top and divide in half. Roll each half into a rectangular shape (it does NOT need to be perfect. Look to make the shape about 10″ by 8″. However– I will repeat– it does NOT need to be perfect.)
- Roll up the rectangle starting with a long side. Pinch the ends of the loaf to seal and shape in a “log.” If your seam doesn’t want to stick down, you might need to dip your finger in a bit of water and moisten the dough to encourage it to adhere. Otherwise, it’ll try to unroll during the baking process.
- Grease a pizza stone (where to buy) or stoneware baking sheet and place the loaves on it to rise for another 30 minutes.
- Meanwhile, preheat the oven to 375 degrees, and prepare an egg wash by beating one egg with one tablespoon of water. (The egg wash is optional– however– it gives the loaves a lovely, shiny brown finish)
- Right before you pop the loaves into the oven, brush the tops with the egg wash and make 4 diagonal slashes across the top using a sharp, serrated knife.
- Bake for 20-25 minutes, or until golden brown. Allow to cool on wire racks before serving.
- Serve warm, with lots of butter.


I use a similar recipe for making sandwich loaves! 🙂 Instead of the long loaf, I plop mine into bread/loaf pans and cook that way. For those who want a softer crust, the moment the bread comes out of the oven, take a stick of butter and just slide it over the top once to coat. You end up with this lovely soft but slightly chewy top crust that slices like a dream. 😉
Oh yeah… Love the butter idea!
Are yall sure about the temp of the water….in my experience the water had to be about 100 to 105 to activiate.????
I test the temp of the water by sticking my finger in it and if I can count to five and leave my finger it, it’s not too hot.
While pouring the water from a measuring cup into the bowl, the water will cook off significantly. The bowl will also absorb a lot of the heat, too.
I hope we have this right. Hi Jill. Have read your site, and am very excited about the future info. My wife and I (both Christians) chose to go this path mearly by chance a number of years ago. So to find something else out there for the all natural thing (not always being dependent upon Mother Earth News) is great.
We really like the Eggshell story on your site. We have but two laying hens, but they keep us well indowd in eggs/shells.
Sense I had to retire (Line of Duty injury Fire/Medic) I’ve really got busy with the house, and trying differant ways to save on our budget. Poor Karen must work yet, but it won’t be too much longer.
Looking forward to more info.
Tim and Karen <
I was going to try and make it more healthy can you use almond flour to make the bread with Trim Healthy Mama gentle sweet sugar substitute. Not sure how to tweak it to make it work. Or just leave out the sugar?
so you don’t have to kneed it or let it rise a second time, just wondering, because mine didn’t turn out it was like a rock. lol
I do the same thing with my french bread too! 🙂 I love the soft crust it gives! Sometimes, to change things up a bit, I will sprinkle some shredded cheese & herbs (and maybe a little garlic) on the rectangle before I roll it up. It goes SO well with stew & it looks pretty when you slice it!
Can an organic sugar substitute like Agave Nectar be used instead?
Sucanat is unrefined whole sugar (and they do sell organic), and it is much better for you than sugar that is refined. 2 teaspoons throughout the whole bread is not a lot anyway. But most agave on the market is made through a highly chemical process from the starch (similar to corn) and actually has even more fructose than corn, so I’d not recommend using it.
I have a question, why is the recipe on here different from your cookbook? Should I be using sugar in the recipe? The book does not call for it. Along with a different amount of warm water. My bread does fine without the sugar, but curious if it would taste different with it?
I just received the cookbook. I have the same question. There are a bunch of differences between this 1 and the book. I am new to this and highly confused.l
Found this recipe yesterday cause my mom couldn’t get me her recipe for French bread on time. Was amazing. My husband loved it! Will be making this recipe often. Thank you!!!
I’m gluten intolerant can you please give me gluten free flour options ty
gluten free would be achieved by using an organic yeast starter, for instance you can go to youtube and look up how to make organic sourdough starter and you can then use that starter if it was made the right way without store bought yeast, or you can experiment with putting some fruit or even a handful of raisins in a half cup of water and then use that water the day after and add that to your dough, it will rise your bread…when you use an organic yeast starter, this is what pioneers did and all the way back to biblical times, the organic yeast breaks down the part of wheat that causes intolerance now days, it is just that store bought yeast which has only been around for a hundred years and less for quick rise, has chemicals in it that prevent the yeast from breaking down that part of the wheat…thus gluten intolerance began…. if you have an intolerance then go to educational videos on you tube from experts in organic yeast and learn how to make a variety of them and you will never have to do without hot homemade bread again because it wont make you sick
great info, thank you.
Can you use a cast iron pizza pan.
Yum!!! Will try this recipe soon. I’ve been making your basic one . I won’t eat store bought.
I use a similar recipe but I leave off the sugar, making it only 4 ingredients. It takes a little longer to rise, but it’s so worth it!!
YUM! I love fresh baked bread and this one looks like an easy treat I could pull together in a pinch 🙂 Thanks for sharing!!
Any changes to temp/time if using a regular cookie sheet? I don’t have any sort of stoneware to bake on. Thanks for sharing this recipe!
Hi Carol,
I’d definitely start out by reducing the heat if you are going to use a regular sheet.
I used a dark non stick cookie sheet at the same time/temp and it worked out beautifully.
I love french bread, but have never attempted it before. I really only have one everyday bread recipe that I use, but this looks really good! I would love for you to share it at what i am eating http://www.townsend-house.com/2013/04/what-i-am-eating-homemade-coconut-milk.html
I can’t wait to try this with some Einkorn wheat flour!!!!
Oh heck yes! 🙂
Wow, that seemed easy enough .. definitely have to give it a try now.
I’m thinking this would make AWESOME french toast! Thanks for the recipe. 🙂
Ooooh… yes it would! 😉
This recipe seems much more simpler than others I’ve tried in the past….which is why I haven’t made french bread in over a year. I’ll be trying your recipe this weekend. Thanks!
Would a cast iron griddle work as well as a pizza stone?
Hmmmm… It might– I’ve never tried it– but I can’t see why it would hurt!
Yummm!!!!
Was looking at your pizza stone right now on Amazon . . . . .Does it really work well? Have you used it awhile with good results ? The reviews on there are not so hot. . . . .
Was thinking of going to Lowe’s and getting some tiles or something. . . . I SO want a baking stone 🙂
Try Pampered Chef. My mom has a lot of stone bakeware from them and they are great! They are a little pricey – which is why I don’t have any – but they work awesome!
Ugh– thanks for pointing that out. I have a “generic” brand circular stone, and a Pampered Chef square stone. I wanted to link to one on Amazon, but didn’t realize that that particular one was getting bad reviews. There are definitely other ones on Amazon, so I’d look around first. 😉
Just buy a Pampered Chef one, there are things you get what you pay for and seriously, they really aren’t that much when you break down how often you use it and what a great product it is. I’d rather pay a few dollars more for quality, than not much for junk!
I have a couple of the Pampered Chef pizza stones and they really work well, especially after they are seasoned. The more you use them the better they become. Like cast iron pans.
Thank you so much for this! I’ve been trying out bread recipes like crazy but this one looks extremely successful through it’s simplicity! Thanks again.
I’m a big fan of simple! 🙂
Saw your Facebook post & couldn’t comment there. Just wanted to say that I think you’re awesome and I have so much respect for you to stand up for what you believe in. I hope that everyone’s comments are sliding off your back and you realize how great you are. Thanks for staying true to yourself.
Jenny- Your comment means so much! Thank you! It’s been a long afternoon– I’ve been attacked, cussed at, and berated… But I’m still glad I posted it. 🙂
Me too. 🙂 Wisdom from my daughter’s Veggie Tales DVD: You never have to be afraid to do what’s right. As someone who’s a ‘convert’, it DOES make a difference when people aren’t afraid to tell others about stuff like that. You”re a blessing.
Jenny- You have encouraged me more than you’ll ever know. Thank you. 🙂
Yup. Felt like a rockstar last night cuz of this recipe. Had to do it on a cookie sheet and it was still fine. I put a shallow pan of water in the bottom of my oven as I typically would when I bake bread and preheated to 50 degrees higher and turned the oven down to correct temp just the moment before I slid it in. I’ve read this helps the temp not drop too low at the start of baking, allowing for maximum rise before the loaves start to harden. I love love love your blog and appreciate the info you share! Blessings to you!
Wahoo! I’ve tried the pan-of-water trick, but never the deal about preheating the oven hotter– it totally makes sense though! Definitely gonna implement that next time I make this recipe. Thanks for the tip!
Great idea! The steam from the water is good for the bread too.
Great alternative to rolls with our Saturday soup.
Just cooking the second batch now 🙂
I did three sticks from each batch to fit on the tray better and sprinkled with sesame seeds. I also added a small amount of olive oil (1tablespoon) and had a mix of white flour and spelt for the second batch.Will see how it goes.
Awesome! Love the sesame seed idea– hope you enjoy it!
I have a similar recipe. The only real difference is that I use honey instead of sugar or other sweeteners. I try to get local, raw honey in wherever I can.
Yes, I think honey would be great in it too!
Hi Jill,
I tried this recipe not long ago, and it turned out as a bit of a disaster. I live across the Pond and my world revolves around the metric system, thus silly little me thought you actually meant the oven temperature in CELSIUS so I turned it up to max (220 C or about 428 F…), thinking that I’ll just leave it in a little longer than you recommended, since my oven can’t do 375 degrees… Uh-oh! So yep, 25 minutes later there was a dark, dark brown, hard loaf of bread sitting in my British oven! 🙂
However, even before popping the bread in the over, something must have been already wrong with my measurements as although I converted your cups of water and sugar into metric measurements, my dough ended up being extremely sticky even after I added DOUBLE the amount of flour you recommended. So my dough ended up kind of flattening out on the rack before I put it into my scorching hot oven.
Learning from my mistakes, I would really like to give this another go so I wondered if you could advise what an actual cup means in your world and if your teaspoon is the “smaller” spoon – ya know, teaspoon vs. tablespoon kinda thing….? Thanks in advance!
Oh dear– that doesn’t sound so good! My cup measures are 8 oz– although I usually just add flour until it looks and feels right. And yes, my teaspoon is the small one. 🙂 Hope your next attempt is better!
A cup is 8 oz or 250 ml, a teaspoon is 5 ml, a tablespoon is 15 ml.
375 F is about 190 C
There are conversion tables and calculators available all over the internet.
Brian, instead of automatic mansplaining, perhaps you could have read my comment properly: I *did* convert the measurements. Plus, Jill and Penny kindly already answered my question, so there was really no need for your comment.
Can you divide it into two loaves and freeze one? My dough is rising right now and I’m excited to try!
I think that would be ok Vicki– I’ve never tried it, but I know that most yeast doughs do fine when frozen. 🙂
A friend of mine used to make slings for bakers to let their french bread dough to rise in. It was basically a cotton duck long sling. They would let their dough rise in it to get the french bread shape.
Wondering if anyone has tried using regular table salt instead of sea salt as i don’t have any on hand.
Yep- table salt will work too. 🙂
I have rapid rise yeast. how much do I use?
Amazing recipe! Just now I have thrown it in the oven and I can’t wait to use it to top my French Onion Soup tonight! To God be the glory forever!!!!
Oh YUM Leslie- that sounds delish!
Yum! Just made these! They’re delightful. I have to say though – do NOT oil your pizza stone! You may ruin it 🙁 I just greased some tin foil to put the bread on for the second rise and then put the foil/baguettes on a preheated pizza stone. Worked like a charm!
Ooh… good to know- I’ve oiled mine in the past without trouble, but I supposed I’ll stop! glad you enjoyed the bread!
I don’t use oil on my stone at all. I’ve had excellent success using corn meal on the stone. Just make sure you have a even coating and allow room for the bread to expand as it bakes. Haven’t had a loaf stick yet! 🙂
Im making this right now. Can’t wait for it to be finished!!!
Yay! Enjoy Jessica 🙂
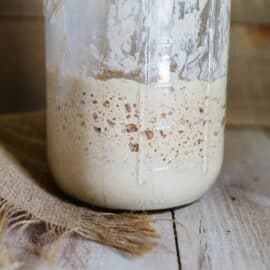
You should try baking bread from natural wild yeast starter (my starter is over 200 years old passed through generations from Sicily, so neat!). Without getting into all the amazing science the basic gist is that it breaks down the wheat (through fermentation) which actually allows it to be digested properly by our bodies…in addition to actually being good for us. The only way to achieve a healthy bread is by using a starter and allowing your bread to ferment and rise for at least ten hours. Modern bread, using man-made dried, rapid rise yeast (whether you are buying it or making it) is a long term death sentence. Rapid rise yeast was created merely to pump out more loaves of bread at a faster pace to make more money and deterioration of health became the side-effect. Great book on wild yeast is called The Art of Baking with Natural Yeast. I’ve browsed through your blog and it definitely seems you’re about natural, sustainable etc, so maybe you would be interested in reading up on it!
That would pretty much be the same as sourdough, right? I’ve done sourdough in the past (and love it!), but I need to get a starter going again!
I’m trying this recipe now! it looks awesome, I’m hoping mine comes out the same (:
I was just wondering how i would go about making it a garlic bread to be pared with spaghetti right away?
is there any certain way that comes out better?
Hey Lori-
My garlic bread is pretty basic– I butter slices of bread, and then sprinkle a tiny bit of garlic powder, and then some Parmesan cheese on top. Stick it under the broiler for a few minutes until it’s golden brown. Yum!
You mentioned that the type of flour , white or wheat, doesn’t make a difference. I was wondering, however, if you’re referring to All Purpose or Bread flour? That usually does make a difference. I was assuming you meant Bread flour, but I didn’t want to try the recipe without being 100% certain..
Hi Joy- I’ve actually used both all-purpose, as well as bread flour for this recipe, and it works either way.
Just made this. Everyone loved it. I didn’t split the dough, just made one big loaf and it turned out fine. Next time I will double the recipe and do two loaves so that I can have one for snacking on the next day.
Yes- doubling this recipe is Highly recommended! 🙂 We actually had it for supper tonight as well!
HEY!! I am so happy I found this ! I am working on my second go at the bread. I added garlic and cheese last time…big hit! Tonight its garlic, basil, and onion bread to go with alfredo pasta and salad!
Darn it Levita– you’re making me hungry!! 🙂
The recipe you have here is pretty close to the one I use but you should try something I do that I actually stumbled on by mistake…on the beginning when you are dissolving the yeast in the correct temperate water…instead of sugar or anything else the using maple syrup!.. I don’t know why it works but itALWAYS seems to proof perfect and finished product is so soft and fluffy. Also when dissolving the yeast just dissolve the yeast,syrup, water, and maybe 1/2-3/4 cup flour then whisk it. Let that sit for10 minutes and you will see it grow and fluff out and you will know its gonna be HAPPY dough.. I mean is there anything better than HAPPY dough?? After it has sat for10 minutesthen add remaining ingredients and proceed as directed. Hope this works for someone ..
Nope- ain’t nothin’ better than happy dough! Love the syrup idea!
Definitely want to try this. I really like the idea of “Happy” dough. 🙂
to the person who suggested this method…I use organic honey like the maple syrup in your yeast mixture. But i am going to try your recipe for “happy” dough. i like the idea of mixing a small amount of flour with the yeast,water&whatever you use for a sweetner. For everyone on the site…. I just really started baking bread in the last 6 months. I had made it in the past but very few times, and sometime used a machine but now i am trying to learn home baking bread. I am better with wheat bread but am still trying also to master the french bread crusty type loafs. Hopefully I will get the hang of it soon…my husbands grandmother was a master baker that worked for the Queen so thats a lot of expectation for me!!!
thank you so much. I’ll try your way.
Mmmm. I just made this bread (at three am!) due to an intense bread craving. Perfect! I paired it with a reduced balsamic vinegar paired with brown sugar and some spices to give the balsamic a faux aged taste and syrup consistency. Perfect pair! We ate half the first loaf just out of the oven, so hot it was burning our mouths. Tasty.
YUM- the balsalmic vinegar reduction sounds to-die for!
Please give us the ingredients for the balsamic/brown sugar/spices mixture – please.
yummy….. best recipe yet. going to make it into smaller rolls for beef dip next time.
Oh yum! Love the beef dip idea!
I just have to say how much I love the “print” button on your recipes. This make it so much easier for me to use your wonderful recipes. I’ve been searching high and low for an easy and delicious French bread recipe the last couple of days. I have now printed this one and it will definitely become a recipe I depend on. THANKS!
Whoo-hoo! Yes, my assistant just finished updating all the recipes, due to popular demand. Glad you are putting it to good use!!
Just baked this – we have 2 gorgeous loaves with a crunchy crust and soft, chewy interior – perfect for our carrot ginger soup.
Thank you so much for sharing your recipe – good wishes from Edmonton (:
Enjoy! And carrot ginger soup = YUM!
Off to the kitchen to make this immediately, I already have the spaghetti sauce brewing, so it will fit in with my supper great tonight. Thanks for the simple recipe!
I notice you have the loaves rising on the pizza stone, so the stone doesn’t get preheated. I followed the directions the first time, and my bread was undercooked on the bottom and very dark on top. Probably because it takes the pizza stone so long to heat up.
I’m making 8 loaves using this recipe for Thanksgiving today, and I plan on preheating the stone and transferring the loaves to the hot stone just before it goes in the oven. I think reducing the oven temperature would also work fine, though.
Anyway, this is a really lovely, delicious bread. Thanks!
I’ve made this bread at least three times in the past few weeks since finding this recipe and every time I make it I feel like a total rock star! I just made a double batch yesterday, made the loaves into rolls and froze a dozen so I have fresh, homemade bread within reach at all times! Thanks for making homemade bread look so easy!
Yay Allie! You are a rockstar. 🙂 So happy you are enjoying the recipe!
I have never in my life baked a successful loaf of bread before trying this recipe but I did try it and guess what?! It came out awesome!
https://www.facebook.com/photo.php?fbid=10202321516313759&set=a.3531935231548.149135.1667298397&type=1&theater
Yay Stephanie!!
Just made this today and how easy it was… And the bread was amazing in taste… My family loved it.
Whoohoo!
I have made this several(10+) times winner every single time. I dont use a baking stone I put parchment on the sheet. I have also used this for pizza pies. Roll i out, put in pie plate,layer with toppings, pull hanging dough over and pinch it closed. Awesome!(http://coeurdelamaison.blogspot.com/2013/10/layered-pizza-pie.html)
Thanks for sharing…
Awesome ideas Jodi!
If you want your French bread crusty you put a dish of water in the oven during the preheating. That gives it that characteristic crunch.
Angela, cold or boiling water? do you leave the dish of water throughout baking? thanks for the tip.
You put in cold but it starts to boil and evaporate during the baking and yes leave it in there until the oven cools off.
Mine ended up looking more like baguettes than French bread because I must have rolled it out thinner than required. Still delicious! Thank you.
Do you think spelt flour would work?? Thanks!
Made this last night and love it! Thanks for sharing 🙂 I tried to share via FB but the button isn’t working. Just letting you know. 🙂 I pinned it though 🙂
my bread turned out terrible. it did not rise at all. i used yeast that was fresh, i used plain flower. what did i do wrong???
Was your water possibly too HOT rather than warm when you attempted to dissolve your yeast? That will definitely kill the yeast … no rising, no matter how fresh it was.
You used flower instead of flour.
Made this tonight without a second thought. Bread was perfect. Eating it right now. Sooooooooo darn good. Great recipe!
So i tried this again and found what i did wrong. my water was twice as hot as it should have been. i never checked the temperature until today. my french bread turned out AWESOME!!!!
family loved it. thank you so very much for this simple but great bread.
Ah yes– the little yeasties don’t like too hot water. 🙂
Does anyone know if this can be done in a bread machine on the dough cycle?
Yes–it should work!
Made this tonight it was fantastic!!!!!
Yay!!
I need to try this! I’ve always been very comfortable in the kitchen except my Achilles heel is yeast breads. Maybe I haven’t been trying the right recipes, and maybe I’ve given up too quickly!
1. Never grease or oil a pizza stone
2. Always put a stone in a cold oven and preheat the two together. Use cornmeal on the stone to keep from sticking
3. Let rise on a parchment paper and put on the stone removing 1/2 way througj the cook.
4. Put a pan on the ravk under the stone and add a cup of hot water when putting the bread in to help steam the crust
Hi Jill – Just a quick Thank You!!! I have had the worst time making bread since we moved to Utah – the altitude adjustments were killing this southern girl from back east.
Anyway, I made it today and my Italian husband literally stood at the stove with a stick of butter and ate 3/4 of a loaf before it was even cool enough for a sane person to touch.
Tomorrow I am using your biscuit recipe to make a southern version of meat pies for a church luncheon…wish me luck.
Thanks!!!
Yay! So glad to hear this! Hope the biscuits turn out great too. 🙂
I made this bread, but only got as far as allowing it to rise before I realized my yeast must not have activated because it didn’t rise at all. Could it be that the water needs to be between 100-115 degrees?
Yes–use warm water and make sure that it’s rising in a warm spot (but not too hot!)
I have tried to make bread to go with my soups or spaghetti but none of the ones I’ve ever made have actually tasted like the French bread I know and love. I also hadn’t come across such and easy recipe either. I think this recipe will definitely be a keeper for me. I could eat a whole loaf by myself in one sitting and feel good that it does not contain all the added doubtful ingredients that the store bought version has. (Not that I really do eat a whole loaf…because I force myself to stop). Thanks for sharing it. ; )
yeah… I usually have to force myself to stop too. 😉
Thank you so much for this amazing recipe. It is so straightforward to make and the bread is so delicious – lovely and light inside with a super crust on top. I have tried other French bread recipes but have never had this success before. I will definitely be making it again.
Yay! Thanks what I like to hear!
Okay, we are just now cutting out ALL processed foods from our diet. We’ve always eaten fairly well, but decided to go ahead and make the jump to get all of those chemical preservatives and natural flavorings. Anyway, I was under the impression that white flour, even unbleached, was considered a refined type of food and not whole foods since they remove the most nutritious part of the wheat during that processing.
Can you weigh in on this for me? Everything is very confusing and I am trying hard to figure it out! Especially since you seem to agree that refined sugar is not a whole food…what makes the white, refined flour okay? Does it go through less of a process than the sugar?
Please note: I LOVE your blog and I am not in any way trying to argue with you about what is or isn’t whole foods. I am genuinely trying to understand and I hope that comes through in this comment 🙂
This is a great recipe and super easy. I bake all my own bread, so I know from good bread recipes! I made half the recipe because I just needed enough for one meal for two adults and two toddlers. I hate kneading, so I do it in the food processor. I also buy bulk yeast that I know is good and I keep it in the freezer so I never bother to proof. I put all of the dry ingredients into the food processor and let it mix for about 10-15 seconds. Then I slowly pour in the warm water while it’s running. When the dough looks “right” to me (usually when it starts to pull away from the sides and form a ball) I stop the water and let it run for about 2 minutes. I check the dough by touching it. If it needs more Kneading I run the processor for another minute or so. Everything after that is as normal. Just a little shortcut for ya!
made this tonight. it was a big hit!!! next time im going to try it in the bread amchine
I love this bread!!! I have NEVER made homemade bread and this was simple and easy and fun!!! I’m so glad I found this recipe. Last night I made it for the third time and decided to cut it into three instead of two. I rolled out and rolled up each piece, then BRAIDED them together. Just before sticking the braid in the oven, I did the egg-wash and sprinkled on just a tiny bit of coarse ground sea salt from my grinder. It was amazing!!! The perfect complement to our brisket & veggies!!! Mmmmm!!!
LOVE the braid idea!
Can I use coconut sugar instead? I
Sure! 🙂
I just finshed making this with some minor adjustments but I finally made a crusty chewy french loaf!!! Yea!!! i just found this site & recipe today and already i feel humbly obligated to people I didnt even get to know yet. I still am going to try the happy dough recipe to ferment the yeast with a small amount of flour. But I definately will be keeping this recipe bookmarked. When my husband comes back in town next week im getting him to hook up my printer right away. this was a great recipe
YAY Debbie! 🙂
I am loving this recipe. I have brought it to a few potlucks and it is a hit. Who doesn’t love homemade bread. Sometimes I roll up one loaf with herbs, maybe some fresh garlic and I think cheese would be great too. I have used both maple syrup and honey with the yeast and both produced good results. I might try it with whole wheat flour since I have a lot on hand right now. Thanks so much for this. It is a keeper.
I LOVE the garlic and cheese idea!! oh my…
Hi Jill, thanks for the recipe. I tried it an everything looks good. Unfortunately the bread is a little chewy and kind of heavy. I used all purpose flour, do you think that could be the issue?
How long did you let it rise? Sometimes a shortened rise time or inactive yeast will make it heavy.
I bought new yeast and let it rise for 60 minutes the first them. On the 2nd rise, I let it sit for about 20 minutes. I did add in a lot of flour while kneading which might have caused an issue. The flour was also a little old and stored in the fridge.
Yes– if you added too much flour, it definitely could have made it too heavy. I like the dough to be smooth and pliable when I’m done kneading, but still moist so it doesn’t get crumbly.
Jill, I have made this 8 times this week (it’s Wednesday)! We have ten people in our house and they keep on asking for it!!!
LOL– 8 times? Wow– it sounds like it was a hit! 🙂
I don’t know if someone has posted this yet but I made several loafs and froze them! Its great for those days when I want bread but don’t have the time to make it. Just wrap in plastic wrap that has been sprayed with cooking oil and put the balls of dough in a freezer bag. You will get a good 6 months or better that way.
Hooray for freezing!
I’ve been making bread for years and have only one problem
My bread collapses if I try to score it. How do you make the cuts without the bread sinking?
It might be because it’s risen extra-high before scoring. Mine will deflate a tiny bit after scoring, but then puffs back up in oven.
Jill, I love everything about your homestead work and all the teaching you do, I think you are amazing and I read your blog regularly, this is not a criticism, this is not french bread, from the hydration to the sugar to the method to the shape to the rise time to the oven baking without moisture to the lack of holes in the bread to the lack of crackle…french bread is a specific recipe formula that is a labor of love and has a distinct flavor because of the work that goes into it. Go to any ligit site from a baker and learn about french bread. You can do it and trust me when you do you will feel amazing because it is so much work and such an accomplishment to do it, and it tastes different than this recipe. That being said what you have here is white bread, you can shape this multiple ways and have any form of white bread, and specifically this recipe and shaping idea is what is traditionally called an American white bread baguette, it’s just white bread. If you want to bump up the awe factor of your white bread baguette here, try and egg wash and sprinkle some Italian seasoning all over it and a little parm and you will be blown away by the smell in your house for the entire day. All in all this is a good recipe but it is not a french bread recipe or formula. I make white bread baguettes all the time and they are wonderful and you have a good recipe for it here. Much love and blessings <3
I made this for the first time tonight and we loved it! I was making a pasta dish so decided to add coarsely chopped fresh garlic and Parmesan to one of the baguettes before rolling. Delicious!
This recipe will be a household staple for soups, stews and pasta dishes. The leftover slices will be great toasted for sandwiches as well.
Thanks
Love the garlic and parm addition idea– so glad you enjoyed the recipe!
Well, second time. I hope this works. The first time I was gonna leave it by the front door to beat the @%$^$^ out of unwanted people selling stuff
Jill, what is the difference between French bread, Italian bread, and a baguette? I am confused. I do know what a baguette is as we purchase them on a regular basis. Your French bread looks, to me, like the Italian bread I have seen for sale in the grocery store. I like chewy breads except for some sandwiches. Thanks.
this is a white bread baguette style bread, not a french bread, a french is going to have higher hydration a different flour, no sugar, and a min of four risings, will be smaller in bulk, chewy, lots of holes, harder crust etc… you are right it is much closer to an Italian bread loaf with the shape of a large oversized baguette but none of it’s features. homebakers mistake this stuff all the time, especially people who are really good cooks like Jill, but they don’t usually understand that baking is chemistry and a recipe is a formula, and that specific breads have specific names and since they don’t own their mistakes now because of the internet we just have everyone telling everyone else incorrect things. if I made this and called it a french baguette my family would laugh, they know the difference. it is like calling cinnamon rolls, babka ..two different things, it is like calling steak a hamburger. but they keep doing it and will say stuff like oh well this is how I make it and what I call it. and that is alright except don’t “teach” people to bake and not call it what it is just so you sound cool, just say this is some bread I make and how I make it…that is more real and is closer to teaching
I am using a cookie sheet because I don’t own a stoneware sheet. If I reduce the temperature of my over to 350 degrees, then around how many minutes would the bread take to bake.
I do accept as true with all the concepts you’ve presented in your
post. They’re very convincing and can certainly work.
Still, the posts are very brief for newbies. May just you please extend them a little from next time?
Thank you for the post.
Made this yesterday and the family and I loved it!! Seriously, it only lasted through dinner. And it was made right after the older kids got home from school. I’ve only made bread a handful of times and this was by far the simplest and best recipe!! Thanks so much!
Hi, I will give this recipe a try this morning, thanks! I do question putting the cold pizza stone with the loaves on it into the hot oven. The stone will be a heat sink until it comes up to temp, which takes awhile. Better to use a cookie/baking sheet IMO. Much better if the stone or baking steel is already hot, which will act to spring the loaves. I have a pizza conveyor peel https://superpeel.com/ I will use to drop the loaves onto a pre-heated steel plate already in the oven…
Yes, definitely use stoneware for baking your breads. I can recommend and help y’all with the right Pampered Chef stone.
Jill, in the photo it looks like the loaves are rising on parchment. Do you take them off the paper and put them on a bare stone to bake, or bake right on the paper?
Hey first time making bread, I saw your youtube channel, and ventured to your website. Great content and directions. Any pretzel recipes coming up?
The soft pretzel recipe is in the cookbook! You can find The Prairie Homestead Cookbook on Amazon, or wherever you purchase your books.
I’ve been cooking professionally for a long time, but I’m relatively new to baking bread. All this free time during our statewide shelter-in-place order has inspired me to try new things, and this recipe was great! I did sub bread flour for half of the AP flour, just because I had some around, but otherwise I followed the recipe to the letter. I used one loaf to make meatball subs, and everything about them was perfect and delicious!
So glad to hear this, and that you liked the recipe!
I have been making this for a long time now and been loving it! my friend who is super picky loves it also I mean who doesn’t!
I have made this recipe numerous times. It turns out great every time. No adjustments needed for me! The only problem is trying not to eat it all!
Excellent base recipe for a French style bread – thank you! For fun, I added chopped kalamata olives, fresh rosemary, and 2 cloves of minced garlic. We love savory bread so I doubled the salt and used 2 tbsp organic sugar. I cooked mine on a French bread pan, sprinkling it lightly with kosher salt before putting it in the oven, and it was perfect.