I really debated posting this one…
The topic of acid staining concrete floors strays a little from my usual subject-matter and seems slightly more suited for a home renovation blog. But I decided to go for it anyway, as I figured a) I have a ton of very thrifty, very handy readers who love frugal, DIY stuff, and b) I honestly just wanted a reference for myself, as I have a bad habit of doing a complex project and then promptly forgetting all the details for time and eternity. Ahem.
So here we are.
To catch up those who may be new to the Prairie Homestead craziness, we did a massive home remodel last year (basically building a whole new house onto our little shack), and added a full basement in the process. (Previously we had a teeny tiny hand-dug basement resembling something out of a horror movie.)
We had the new basement sheetrocked with the rest of the addition, but I put the rest of it on the back burner as 2016 had us occupied with other projects. So when I found myself with an unusually quiet week between Christmas and New Years, and decided it was time to wrap up this basement once and for all.
I rushed to acid stain the concrete in the guest room downstairs earlier this year as we had a steady string of house guests coming through and they needed a place to sleep (funny how that works). Doing that smaller room first gave me a good chance to experiment with the acid staining process (for some reason, it felt extremely intimidating to me when I first started researching it). And true to my nature, I messed up my first go-round a bit, so I’m glad I had a chance to make adjustments before finishing the rest of the rooms.
But before I go into the specifics (and my mistakes), let’s talk about why we chose acid stain concrete in the first place:

Why We Chose to Acid Stain Our Concrete Floor
1. It’s not carpet. I have a passionate hatred for carpet, y’all. We have carpet in two small bedrooms in our house and that is IT. Dogs + 3 kids + a rural lifestyle = disgustingly putrid carpet. I just couldn’t stand the thought of putting pretty, fluffy carpet downstairs so the dogs could throw up on it, poop on it, and the kids could spill stickiness all over it. Nope. Not gonna happen.
2. It’s cheap. But not tacky-cheap, or fall-apart-in-18-months cheap. Since carpet was obviously out of the question, we priced wood for the large room (ouch) and tile (bigger ouch) and decided the price wasn’t something we wanted to pay.
3. It’s tough. Since the acid stain actually reacts with the concrete itself, it won’t scratch or peel like paint.
4. You can always cover it up. If I suddenly develop an affinity for carpet in 3 years (ain’t gonna happen, but still….) we can just slap it over the top of the concrete– no big deal. Same goes for other floor coverings.
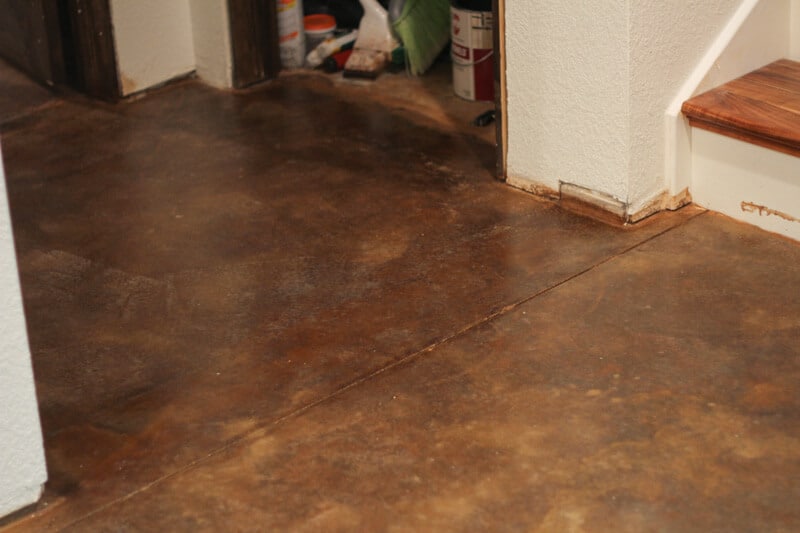
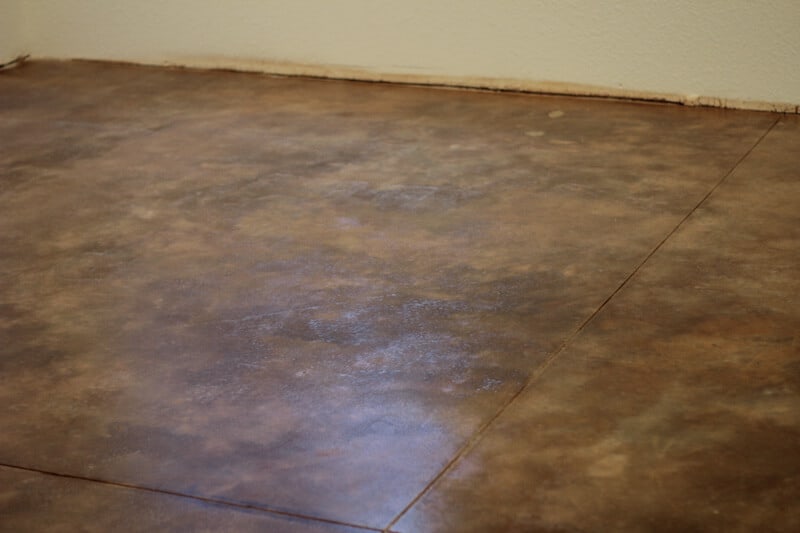
5. It looks darn cool. Acid stained concrete has the rustic, irregular look I love, and I see it going with a variety of styles and designs. It works with the natural irregularities of the concrete to create a rich, marbled look. No two floors will look the same.
Will MY Concrete Floor Work for This?
To be perfectly honest? I have no idea. I am not claiming to be the definitive acid-stained concrete expert in any way, shape, or form. Since this is a considerable project with pretty permanent results, you’ll want to spend time doing your own research and to decide if this will fit your situation. I read DOZENS of articles on acid staining concrete before I even bought my supplies and I suggest you do the same. Here are a few I found helpful:
We didn’t intend on acid staining our concrete when the floor was poured, so we didn’t have the concrete crew take any special considerations. They power troweled it, and we slopped paint and sheet rock mud on it as we were finishing the walls (which I deeply regretted later….). However, the stain still reacted beautifully with the concrete once I cleaned it.
The biggest consideration is the floor with which you’re starting. This is a stain, not a paint. It’s not covering anything, but rather reacting with the chemicals in the concrete. Therefore, you want to make sure the floor is EXTREMELY clean before you start. Any sort of paint or glue residue can mess up the stain reaction. Your best bet is testing a small area of your concrete floor to make sure the acid stain works properly before committing to the whole thing.
Equipment & Supplies for Acid Staining
In the grand scheme of things, this is a pretty low-budget DIY project. However, there are a few tools that’ll make your life much easier:
A Shop Vac: It is VITAL all residue is completely gone from the floor before you apply the stain and sealer. That’s pretty tough to do with a regular ol’ mop, so we relied on the shop vac to suck all the nasty water off the floor.
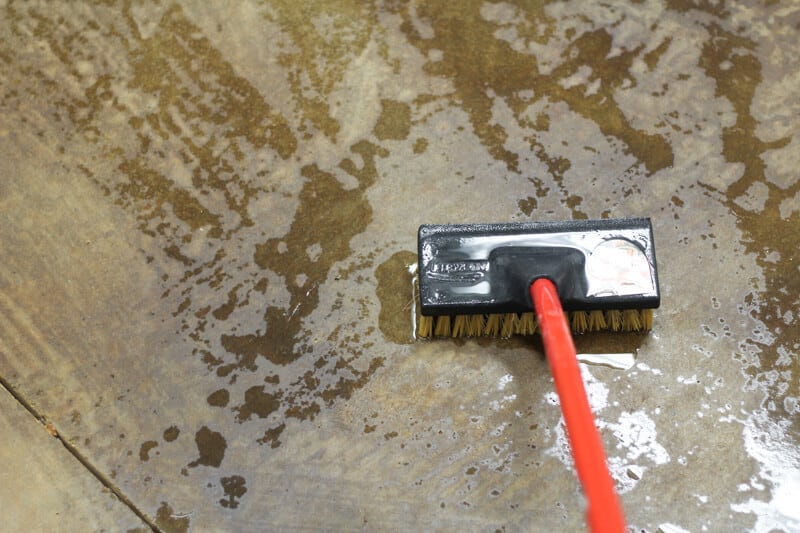
Scrub Brushes: I had a very stiff hand-held brush, along with another brush with a long handle. Both were crucial in the cleaning process.
Squeegee: You could do the project with a squeegee, sure… But it sure made things easier during the cleaning. I used it to scrape the rinse water towards my shop vac.
Floor Cleaner: If your floor is very dirty, you’ll want a heavy-duty cleaner that won’t leave a residue. TSP is what is recommended by most professionals. I couldn’t find TSP locally, but I did find a TSP-alternative that worked just fine for removing the paint residue on my floor. (I think it was a better option, anyway– TSP is rather nasty I think.)
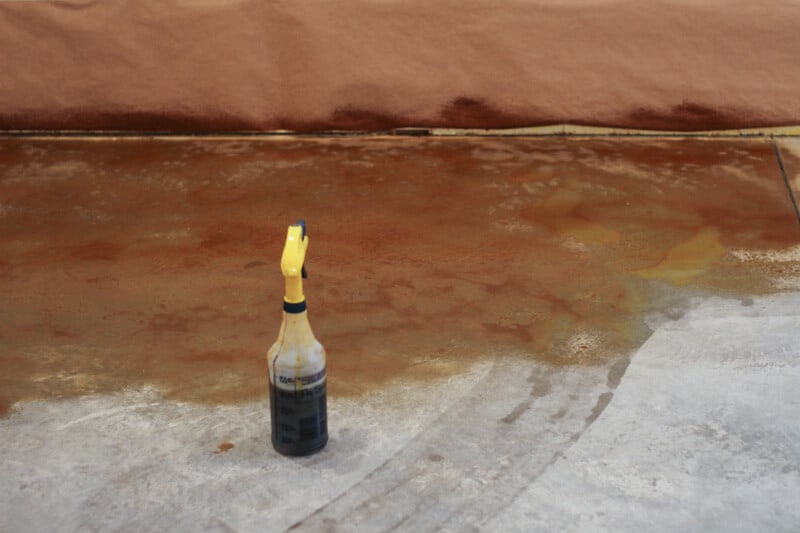
Sprayer: I wanted to use an old weed sprayer for this, but the only weed sprayer I have has metal parts inside the sprayer assembly. You cannot use a sprayer with ANY sort of metal, as the metal will create a nasty reaction with the acid stain. So I just used an all-plastic, quart-size spray bottle instead. Yes, my hand got tired, but it still worked. (And I did’t feel as bad about just tossing it when the project was done.)
Protective Gear: Rubber gloves are a must, and a mask and eye protection isn’t a bad idea, either. The stain can burn your lungs if you breathe it in, so good ventilation is wise.
Acid Stain: There are a bunch of different brands out there, but this is the one I went with from Amazon (affiliate link). The color I chose is dark coffee-brown with some slight reddish undertones. I used just under 2 gallons for a bedroom, storage room, and the large family room. You’ll want to check the manufacturer recommendations on the stain you’re using to see how much you’ll need for your space.
Clear Concrete Sealer: I found the Clarishield Wet-Look Water-Based Sealer at Sherwin Williams and went with that. I know there are a variety of other products that’ll work for this, too.
How to Acid Stain Concrete
{Step One} Prep
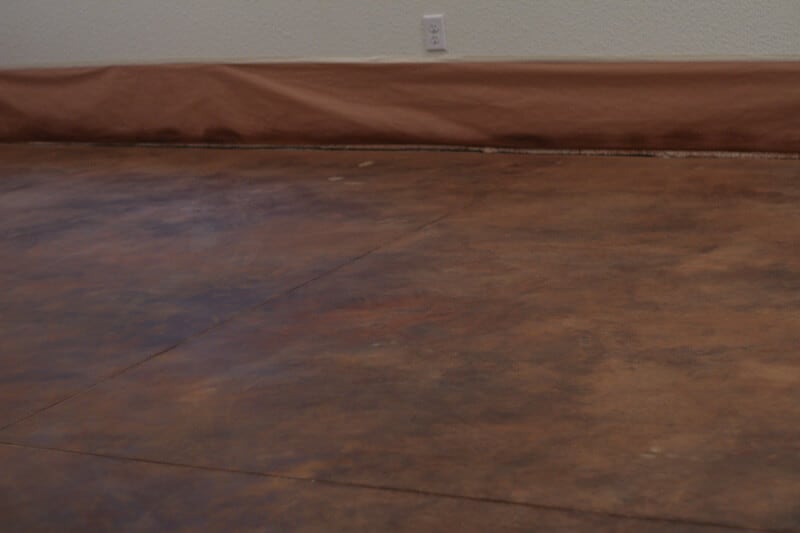
When I did my first room, I decided to be lazy and NOT mask the bottoms of the walls. My big idea was to use a foam brush to apply the stain around the edges of the room, and then follow up with a sprayer in the middle areas. I figured I wouldn’t have the danger of overspray on the walls and I could skip the masking.
And… this was a horrible idea. The stain applied with the foam brush ended up being much lighter than the stain applied with the sprayer…. So that room is rather blotchy and uneven. Not the end of the world I guess, but needless to say, I masked the next two rooms, used the sprayer on the whole thing, and the results are much better.
So yeah, masking is a good thing.
{Step Two} Clean
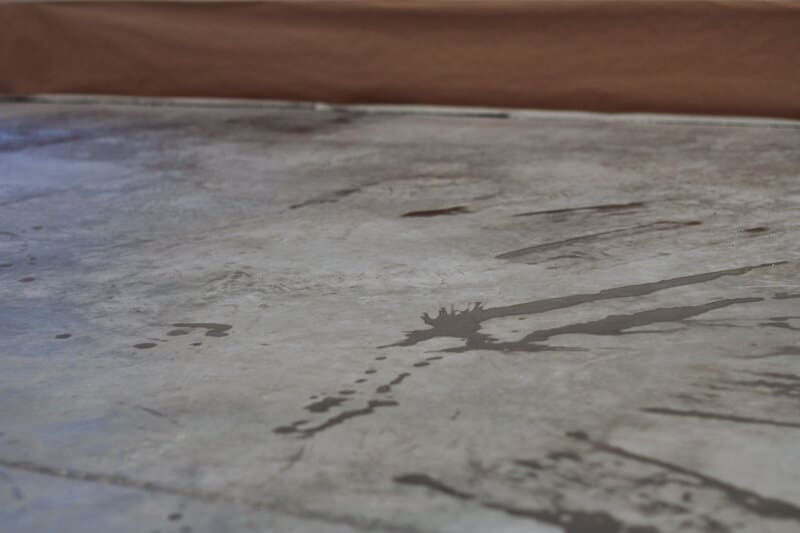
I can’t stress enough how important this step is– do NOT skip it and do NOT skimp on it. You’ll want all paints, dirt, grime, and glues completely removed from the floor before you get started. Admittedly, this is also the least fun part of the process….
We had some pretty thick paint overspray around the edges of our walls. My cleaner wouldn’t remove it on its own, so I had to use a sharp scraper to peel it off the floor. I then followed it up with a hard scrubbing with water and cleaner. In my first room, I used a gel paint stripper to loosen the worst paint overspray on the edge of the room, and I wish I hadn’t. It seemed as though the paint stripper changed the concrete a bit and it caused the stain color to be different where the stripper had been used.
My cleaning routine was: scraping paint/gunk off the floor, scrubbing with warm water and the TSP-alternative, vacuuming up the water, rinsing with fresh water, and then vacuuming again. Yep– it was super tedious.
I did this 2-3 times until the floor was as clean as it possibly could be and there wasn’t any dirty water left anywhere on the floor.
{Step Three} Stain
One the floor is completely clear and dry, it’s time to break out the stain. Give yourself a full day to do this portion of the project. Not because you’ll need to be working the entire time, but rather because you’ll need to stain, wait a couple hours, and then neutralize the acid. There’s really no way to know exactly how long the stain will need to sit on the floor before it’s ready to neutralize, so you want to have plenty of time to be flexible. (However, 2-4 hours is a pretty average time frame. I left my stain on for about 2 hours before I started neutralizing.)
Put on your protective gear, and fill your sprayer with stain. Some websites advised diluting the stain with water, but I didn’t.
Pick a corner and start spraying. Try to keep the spray in an even layer as you go, but remember it doesn’t have to be perfect ( that’s why I love this project so much). Once you get in your groove, it really doesn’t take long to spray an entire room.
When the spray first goes down on the floor, it’s super light. Mine was approximately the color of bile when it first hit the floor (I had a small heart attack at that point), but don’t worry–it’ll darken as it sits. It also might fizz a bit, and that’s normal too.
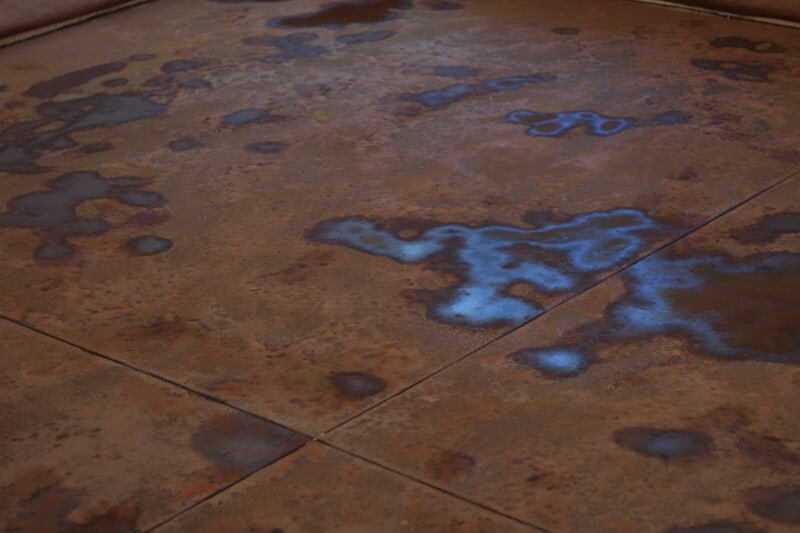
Work over the entire room, then allow the stain to sit on the floor. As dries, it will darken and then turn super chalky and quite ugly. (Another heart attack, but it’s OK…)
The next part is up to you– you will need to watch the floor and see if you like the shade of the stain. Mine darkened to my ideal shade after about two hours, but your floor may take more or less time. You might even need to apply another coat after a couple hours, (but I didn’t).
{Step Four} Neutralize
It might seem weird to scrub a floor you just spend an hour coloring, but this step is important to remove any leftover acid residue which may cause problems when you go to seal the floor. Once the floor is dark enough for you, use a mop and/or scrub brush to scrub it with an ammonia/water solution. (I used about a cup of ammonia to a gallon of water.) I did one application of the ammonia & water, and then rinsed it 2-3 times with fresh water until my rinse water was mostly clear. Again, tedious but necessary. (My shop vac/squeegee method was handy here, too.)
Let it dry complete (at least 24 hours) and then you’re ready for the last step!
{Step Five} Seal
Not only does applying a clear coat to the floor protect it, but it also gives it that “wet look” and brings out the beauty of the stain.
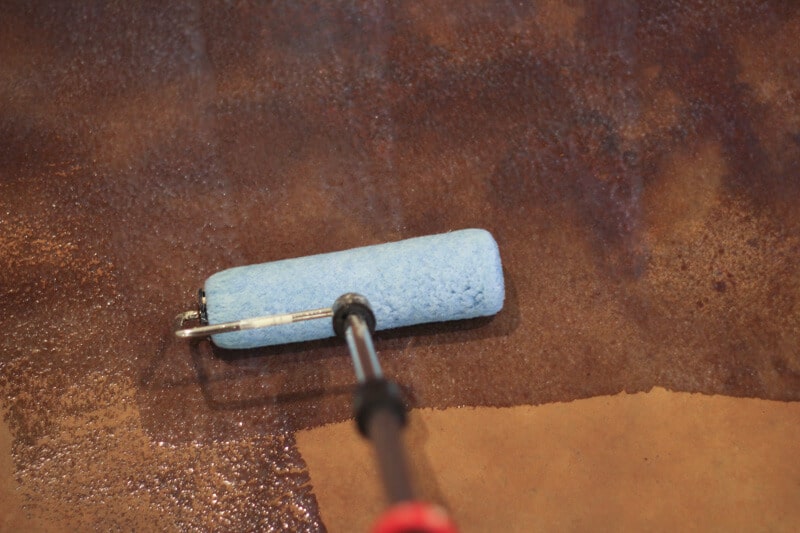
I applied my clear coat with a roller with a long handle. The smoother the roller nap, the better. (I used a 3/8 nap roller on one of my rooms (it was all I had), and I didn’t like the “texture” it left in the finish. A smoother nap would have been much better.)
Make smooth strokes with the roller, and try not to “overwork” the clear coat. I applied two coats to mine. My sealer looked white and milky when I first applied it, but then dried to a clear finish.
Let it dry, and you’re done! I plan to wax my acid stain concrete for extra shine and protection, too, but haven’t found an appropriate wax yet– I’ll update this post when I do.

I had to laugh when I first read this. You had “an unusually quiet week,” and what did you do? Nap? Watch TV? Read a book? Nope. Acid stain the basement floor! 🙂
This is a great idea, and I’m so glad you posted this even though it’s not a typical homesteading topic. I’m thinking this would be a great look and very practical in a porch. With more scoring in the concrete it would look like tile.
Ha! You have a point… I can’t help myself 😉
Thanks for this post! I’ve been thinking about doing this but was a little hesitant as I’ve never seen it done before. We’ll be trying this after we paint the cabinets!!
Good luck Brenda!
How does it hold up to traffic and things draggin on it? I want to do this in our basement that will primarily be used for office/school/exercising and need something that holds up to paint and playdoh..lol
Hello! Did you ever find a wax that you liked to finish the floor with? I’m looking to stain my side/entry porch and was thinking waxing may be important to make it easy to clean since it’s a highly trafficked area.
We are buying a restaurant that has nasty carpet and we are going to do this to both the dining area and the bar area. Any suggestions?
We are almost ready to stain our living room floors. Super excited!
Jill thank you for sharing your acid stain experience. I live in rural Alaska built a home about 8 years ago and acid stained the first two floors. I’m now considering staining my basement floor as well.
I won’t get into the long story with my floors, but the problem I’ve had has been with the sealer eventually peeling in high traffic areas. I was curious how your sealer has held up?
Hi Peter! Our floors and sealer have held up well thus far. However, our basement doesn’t get a ton of traffic, so maybe that has something to do with it.
How did you get the variances in color? Thanks!
I am in the process of staining my floor. I thoroughly cleaned it, but where I patched the concrete holes is lighter after applying the acid stain (I used a hand pump sprayer). Do you think I should give up or should I pr a second coat on and use a spray bottle ffor more density. I really wanted this to work.
I, too, am so glad you posted this, because I have reaearched acid staining. This has given me the courage to go at it with our guest room and family room! What alternative did you use for the TSP? I agree that TSP is rather nasty.
I can’t recall the name of the product at the moment– I believe we got it at lowe’s– it’s what they gave us when we asked for TSP. 🙂
TSP is a fantastic material, the truth is that the substitutes are not anywhere as effective.
For example, all the water from use of TSP makes a great liquid fertilizer. I Have a summer washer-drier in a shed with a lid that pops up, and doors which open in the front. I use and have a discharge hose which runs all that water to the garden.
Municipalities do not want to have to scrub phosphates out of municipal sewage. Your garden is happy to use those phosphates to grow stuff like crazy.
You can buy TSP in most lumberyards, and it can be ordered on Amazon.
thanks for this! i have a huge basement ( with studs only dividing it into 5 rooms) that i want to tackle, though perhaps only room at a time. i’ve been scared to dive in, but this really helps!
You can do it Beth! 🙂
Gostaria de saber a formula do acid que foi usada. No Brasil não tem empresas que vendem o acid stain.
Oh my gosh. I just found your blog, and I love you. I hope that’s not awkward. 🙂
I love you too, Cathy! 😉 Welcome!
Yours is the best article I’ve read yet! I have decided to go with the acid stain in my basement that is roughly 300 sq ft.
I know you put 1 link on here but is there anyway you could reply with an actual “shopping list” of what to buy? Besides the protection gear, etc. Did you mop then suck up the water,etc with the wet vac? Also which exact products did you use and colors? Yours came out amazing!! I hope to hear from you soon! Thanks!
Great Job! The floors look amazing – I love this idea…. We finished out basement a year ago and the floors were pricey – in the future I will be staining!
Love it!
-Candi
We have a cement floor in our basement bathroom (long story) and I’ve been bugging The Cowboy forever to do this to it. It looks SOOOO nice!
Doooooo it! 😉 You will love it!
I love the floors, great job with them! Thanks for sharing the step-by-step process!
Thanks Laurie!
I replaced our carpet with wood floors. With our massive dogs it’s not working out. My ideal flooring is cement. So easy to clean and so scratch resistant. I love that you stained it yourself. Looks amazing!
Yeah… wood floors and dogs can be tough!
I love this!!! More DIY please. You won’t loose subs. We love saving money and making cute stuff or our stuff cuter.
Thanks Summer! 🙂
It’s beautiful! I hate carpet too!
We have no insulation under out kitchen floor, just a gap of one foot and then dirt. I’m thinking about pulling up the floor, and putting in radient heart in concrete. I should be able to stain that, I think. Do you drop many things on the floor and shatter them?
I have concrete floors, and you are right, there is no forgiveness for dropped glassware and jars. And the shards go FAR. But I still would not go with any other flooring. The radiant heat is wonderful beyond words. I do have throw rugs in a couple statregic places.
This is actually just in our basement (not kitchen, etc) so haven’t had much issue with dropping things, yet…
Wow, I was so excited to see this! Our house is on a slab, and I, too HATE carpet. We did hardwood in the main bedroom. I love ceramic tile, but its expensive.. and takes a lot of labor. Vinyl floor is also a joke.
We had considered stamped floors when we poured, and I regret not doing it now. This may be our answer! Please do share more of your DIY projects!
I hope it works for you Janet! 🙂
Can this be done outside and how long does it last?
I know it can– I don’t know about process or durability, tho.
I worked in janitorial for many years and such floors are easy to maintain. Obtain a no slip floor polish from a janitorial supply. In a homesteading situation you don’t want to be slipping in wet snowy boots. If you have a buffer get a spray and buff which allows spraying a mist of the finish and then buffing which removes the dirt and shines the floor in one operation.
I also recommend a no-slip floor polish. I grew up with waxed concrete floors: Mom applied Butcher’s white paste wax to seal and protect the concrete (on top of paint if the floor had been painted), we kids put on white cotton socks and “skated” to polish the dried wax, and she used an electric buffer. This worked, but waxed concrete floors are as slippery as black ice. I now work in an office with white marble floors sealed with no-slip floor polish, they are gorgeous AND safe to walk on (even in high heels).
Thanks for the tips Pat!
I’m so happy to see your results! We’ve actually toyed with the idea of doing this on our concrete patio. I’m also tucking this idea away for a future (hopefully) basement redo…totally agree about the carpet, especially in a basement. Thanks for sharing all your details!
You’ll have to let me know if you give it a try!
So how will it be maintained. Will you have to reapply the clear coat after wear and tear?
I’m not sure yet. I plan to wax it, which should greatly increase the lifespan of the clear coat.
Did you wax your floor? What product did you use?
What’s the approximate price of this project?
I did it all for a couple hundred bucks. It depends on the size of your room, tho.
Is the floor slippery if your shoes/feet are wet? We live on a lake and are considering this for the walk out basement floor.
Possibly yes– although I haven’t personally tested that out yet…
Your floors look great. My husband and I did our whole downstairs of our strawbale house with acid stain on our concrete floors. We scored the concrete first, into 18″ blocks, which are now grouted, so they look like tiles. It’s just about the same color as yours. We too, used quart spray bottles. I had the cola color, and hubby had the red color, and we made it look ‘splotchy’. I wish I could post you a picture or two, but I don’t see how I can do it here. We sealed it after staining/rinsing with the ‘wet look’ sealant, and use a commercial floor wax we get at Lowes. It’s holding up well except for in front of the kitchen sink and counter area. We live in a very sandy area, and our dog (and people) seem to track in sand all the time, which scours the color off the floor in high-traffic area like in front of sink, etc. I need to touch it up and seal it again soon. If I had just kept it waxed and sealed more often, it would’ve been protected better. Live and learn.
Yes, I think wax is key to help protect it! And love the idea of scoring the concrete to mimic the look of tile!
I would advise against waxing over the finish. It will make it super slippery especially when it gets wet. There is a waterbased product called Liquiguard StepCote that you can apply. It provides a non-slip surface in a gloss sheen.
excellent points altogether, you just gained a brand new reader. What would you recommend about your submit that you simply made some days in the past? Any positive?
Great idea!! We are in the process of designing our next home and recently decided to build on a slab rather than a basement. I was thinking acid staining would be beautiful throughout the house. Do you see any issue with this? Next, do you think you could acid stain the slab before the building process and then seal it with a clear coat once the house is move in ready? Or would the building process harm the stain?
Do you have to do the wax finish? It seems like that would be harder to maintain. I was hoping that the sealant would be enough shine.
I just finished an epoxied wood pallet table top, it wasn’t as level as a wanted so I found a tutorial for sanding and buffing it back to a glass like finish. They used turtle wax compound (like for cars). Not sure if it would be super slippery but it was fairly cheap and looked suuuuuuper shiny! ( in his photos, I haven’t sanded mine yet) 🙂 maybe try that?
I’ve been wanting to do this to our Floors. I think it is more than a DIY though, so I have not gotten too many on board. Yours looks great!
Any thoughts on how this would work on a cinderblock wall in a mud room? It is bare blocks still and with the bare cement floor the possibility could be amazing.
I saved this blog on my phone a bit ago. We are building our 30×40 “barndominium” for lack of better word. All concrete floors, this weekend cleaning floors to stain on my days off starting Wednesday next week. So what wax did you end up using, if any?
Thanks your direction are the easiest looking to follow.
Hey! Did you ever find a wax to put down on top? I’m working through staining my concrete floors and just need that extra level of protection from scrapes and moving furniture.
I was researching how to acid stain my cabin basement floor when I ran across your blog. It is my new favorite site! Thanks so much for giving me the courage to quit “researching/procrastinating” and actually dive in and give it a shot. Wish me luck. Monica
Stumbled on this while looking for something different. But ended up hanging out and reading.
Great one Jill ! You seem to like to document your themes in pictures.
We follow more or less the same process with a couple more steps.
There are a many ways to do this step, but I choose to use an all plastic sprayer. One person should spray on the acid stain to the concrete while the other follows behind and brushes it in with a broom.
Luckily the paint on the floor in our basement has been holding up, but after the kids are grown this is what is happening on the concrete! Thanks for the inspiration 🙂
This is great information, thank you for taking the time to even share this concrete content. Keep up the great work.
It’s been about four years since this was posted, how about an update and maybe some things you may have done differently looking back? We stained our office floor about six months ago using your instructions to guide us and it’s held up very well, but to low traffic and areas under our rolling chairs being protected. We are pulling up carpet and cleaning our living room and hallway tonight and will be staining both tomorrow morning. I can’t wait because our office looks amazing. There was a lot of paint and other old glue/epoxy type stuff on the office floor that I couldn’t completely remove, also some areas that polled and still others that just didn’t take the stain as much as it should’ve and even though you can still see color variations in those spots, it all comes together and looks like it was intended.
Thank you for sharing your experience in staining your floors and the pictures too.
I am just curious your opinion of my project….staining the hallway and then later (like weeks later) staining the asking family room. Would that be a color nightmare where the two applications met?
It’s hard to know without being there…you’ll have to use your gut instincts/intuition about that. Or experiment somehow. Maybe do up a spare piece of wood/etc. so you can pick it up and bring it to the room you have already done and compare/contrast the coloring. That might be the most safe way to check.
Fantastic guide on acid staining concrete floors! Your step-by-step instructions make the process seem so manageable, even for beginners like me. I appreciate the detailed insights into choosing the right acid stain and the importance of surface preparation. The before-and-after images are truly inspiring and showcase the transformative power of this technique. Your tips on sealing and maintaining the stained floors are invaluable. Thanks for sharing your expertise and making a potentially daunting project feel achievable. Can’t wait to give it a try and add a touch of elegance to my home. Kudos for this informative and encouraging post!