Guest post by Laurie of Common Sense Homesteading
There are many easy ways to dry herbs so that you can enjoy them year round.
In this post, I’ll cover how to harvest leafy herbs and several drying options, so you can decide what works best for you.
How to Harvest Herbs
The best time of day to harvest herbs is in late morning after the dew has cleared, but before the heat of the day sets in and draws off volatile oils. Dry, sunny days will help maximize the essential oil content of the plants.
Use a sharp scissors or pruners – don’t rip or tear the plants. Clean cuts help the plant to repair quickly and prevent the spread of disease. Speaking of disease, make sure your clippers are clean, especially if there is any sign of illness in your herb garden.
Where to clip depends on the type of plant and how you want to use or preserve. For mints, yarrow and other prolific growers, grasp a handful of foliage and clip the entire bundle neatly just above ground level. For harvesting smaller amounts or plants that grow more slowly, or individual long stemmed flowers such as calendula, clip individual stems about1/4″ above a leaf joint. Clip the flower head from the stalk for drying and compost the unused stalk. Don’t leave a large amount of naked stalk on the plant. It’ll just die back and leave an ugly stub.
Pick only healthy plants that you would use fresh. If the quality is not good – say overgrown foliage, damaged leaves, signs of disease, etc – it’s not going to get better in storage, only worse. Those visible signs of damage will translate to a off flavors, shorter storage life and potential spread of molds or other contaminants to herbs drying nearby. One exception I might make to the rule is minor bug damage. If the leaves are otherwise in good shape but have a minimal amount of nibbling, I might still use them.
Don’t harvest more than you can attend to within a few hours. Leaving a pile of herbs to sit for a day or two is not a good idea. Heaping the herbs can bruise them, releasing the oils you’re trying to capture. The longer they sit before drying, the more they start to deteriorate. Work in batches.
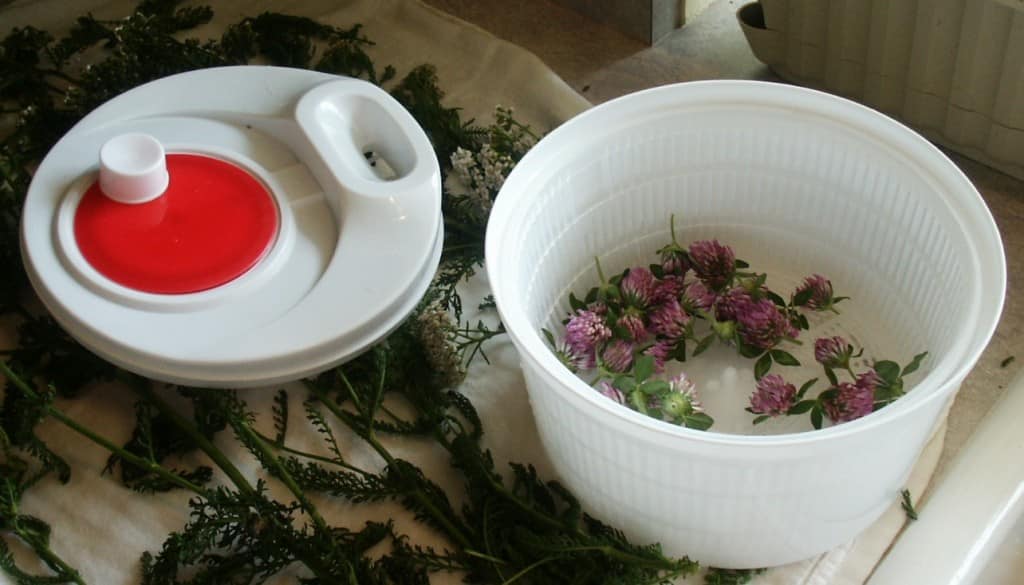
Keep your herbs clean and bug free. I’ve read about bugs breeding and hatching in dried herbs – not a yummy. If it’s rained recently, I usually just give the herbs a once over to look for damaged bits or passengers, and brush them off a bit with a damp cloth or leave them “as is”. If they’re dusty, I’ll rinse them in cool water and run them through the salad spinner, and then pat dry gently with a towel. It’s best not to wash if you can avoid it, because it will slow down drying, but sometimes it’s so dusty (like during this year’s drought) that I needed to wash.
Leaves are usually best to harvest before the plant has flowered. Flowers are best to harvest shortly after opening, when they are at their peak.
3 Easy Ways to Dry Herbs
After harvesting and cleaning your herbs, they can now be dried. There are several ways accomplish this. Your goal is to provide good air circulation out of direct sunlight so that the herbs will dry quickly without bleaching, preserving maximum color and flavor.
Dehydrating option # 1: Commercial dehydrators
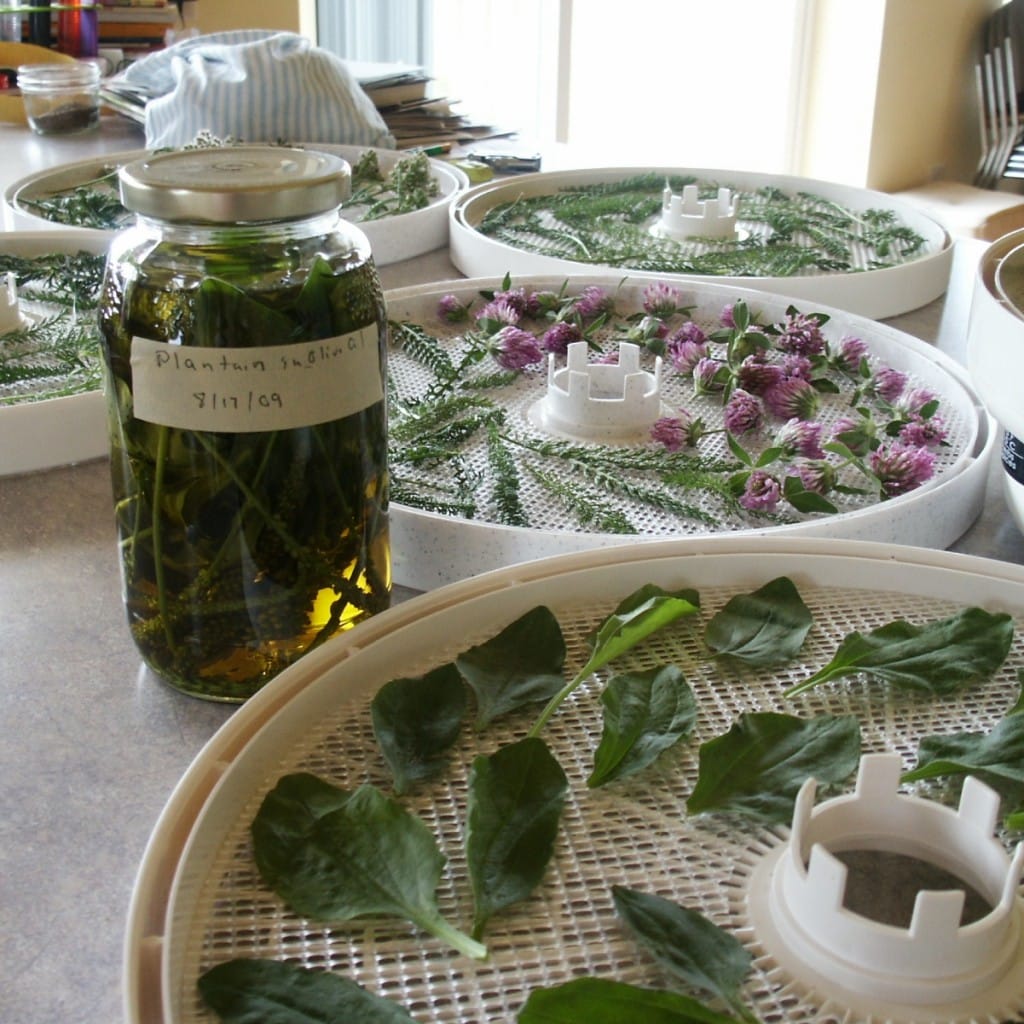
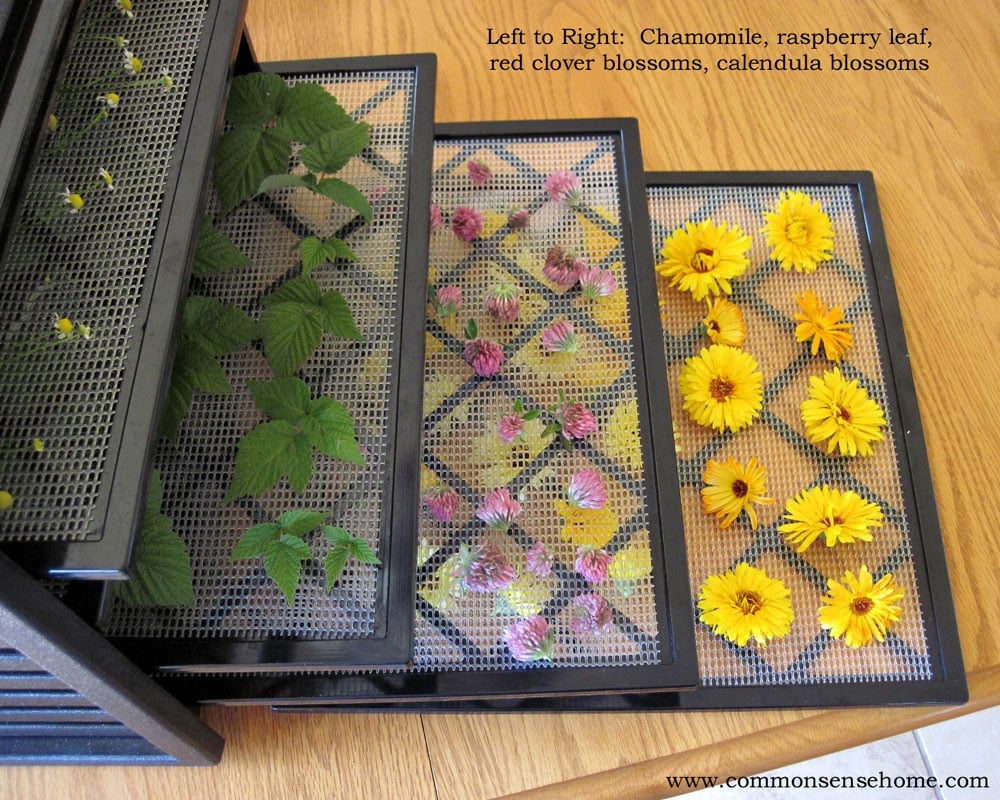
I’ve had a Snackmaster dehydrator for years (around 15, I think), and it has served me well. It was a very good beginning dehydrator. I recently purchased an Excalibur dehydrator (shown at the top of the post) because my Snackmaster was starting to make noises like the fan was wearing out, and because I’m processing larger volumes of food and herbs. Both work well.
To use these dehydrators, prep individual large leaves or stems with multiple smaller leaves (such as the raspberry leaves in the top photo of the post). Leave space between the plant material to allow good air flow. Mesh screens or fruit leather trays will keep your herbs from falling through to lower levels. Dry at 95 degrees until plant material is crisp and snaps easily, overnight or as long as it takes. Strip leaves from stems if needed, and package in an air tight container. I prefer glass jars.
Before placing into long term storage (I do this with all dehydrated items), I leave the jar of dehydrated product on the counter for a day (or two). Then I open the jar and check the underside of the lid for any signs of condensation at the end of each day. If there’s moisture, it needs to dehydrate more. This is especially important with thicker items such as blossoms, which tend to dry irregularly. I lost jars of herbs early on due to mold from incomplete drying.
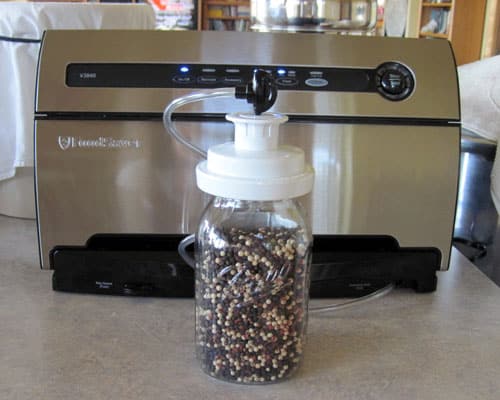
If I have a lot of a particular herb, I’ll use my vacuum sealer with a mason jar to vacuum seal part of the harvest while keeping a smaller jar more accessible for day to day use. (I use this tip for bulk herbs such as peppercorns, too.) Don’t try this with ground herbs, as they may get sucked into the tubing and damage your vacuum sealer.
Dehydrating Option #2: Homemade dehydrators
Any sort of clean, food grade screen can be used to make your own drying racks. Some people use old window screens, some stretch mesh fabric or fiberglass screens over custom built wood frames, some folks just lay out herbs on trays or plates.
For herb drying, it’s probably best to avoid the DIY dehydrators with a boxed-in design and light bulb, because higher temps will drive off the oils in the herbs. There are links to a variety of DIY dehydrators in the article “Getting Started with Home Food Drying“. Covering your drying apparatus with cheesecloth, tulle or other light fabric will allow good air circulation while keeping it dust and bug free. Prep the herbs as you would for a commercial dryer, and be patient. Air drying will take 3-4 days or more, depending on the humidity, air flow and temperature. I’ve seen some lovely drying racks rigged up near woodstoves on some of the homesteading forums. Just be careful not to get them too close – you don’t want them to end up as tinder!
Dehydrating Option #3: Herb Bundles
Bundling herbs works very well for drying herbs with sturdy stems in quantity. Harvest herbs by clipping close to the ground as described above. When cleaning, strip lower leaves from the stems, as they would be crushed in the bundle and prone to mold. Gather the stems in bundles roughly inch inch in diameter, and secure snugly with a rubber band, twist tie or even strips of old cloth. Rubber band will hold the bundles tight as the herbs dry and shrink, but I’ve used twist ties with good results. Obviously rubber bands are a fairly recent invention. 😉
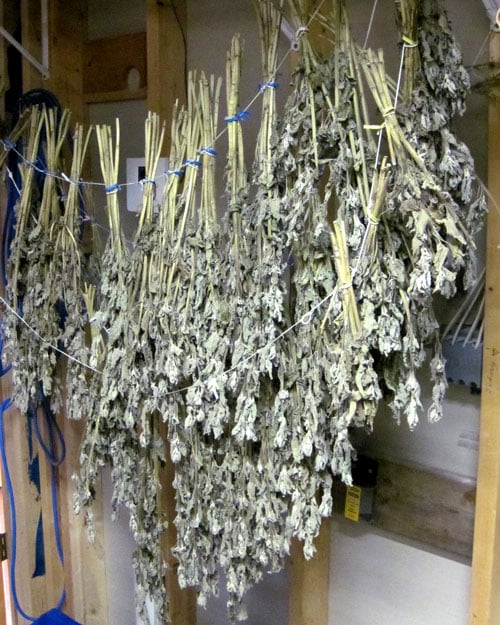
Hang the bundled herbs upside down in a well ventilated area out of direct sunlight. Dry until leaves are crisp, as above. At this point, you can either store them “as is” or strip the leaves from the stems and store in jars. I keep a catnip stash in the basement for refilling the catnip socksicle.
For best quality, once they have finished drying, store dried herbs in a dry, dark location away from heat. Airtight storage will preserve aroma and flavors better than open air storage. I keep my herbs in closed cupboards or covered with old socks. They look beautiful on display, but light fades the herbs. Keeping them on top of the stove is not the best choice, either.
If you’d like to learn more about herbs and wildcrafting, you can visit the Herbs and Wildcrafting posts at Common Sense Homesteading. During the growing season, we feature a new weed each week, and during the “off” season, I’ll be adding a new herb related post every other Wednesday along with the Wildcrafting Wednesday blog hop, which also features lots of great herb related tips.
This is a guest post by Laurie Neverman of Common Sense Homesteading. Laurie and her family live in rural northeast Wisconsin in an environmentally friendly/energy efficient/accessible/new fangled/old fashioned home with solar panels, a root cellar and an herbal apothecary. She has a BS in Math/Physics and an MS in Mechanical Engineering. She is currently employed as a wife and mother with and a passion for natural healing, homesteading and gardening. She and her husband, August, homeschool their two boys, August V and Duncan. You can connect with her at www.commonsensehome.com and on Facebook at https://www.facebook.com/CommonSenseHome.

Hi Jill! The post looks great. 🙂 Thanks for having me over for a visit.
In case your readers are interested, I’m hosting another homesteading book giveaway on my site this week.
Always great to work with you, and all my best to you and your family.
Thanks for the tips. I’ve got an Excalibur and I find that herbs get blown around a bit more than I’d like. Do you have any advice for preventing that?
Leave the herbs on the stem to have the weight hold them down, then strip the leaves off once they get out of the dehydrator.
Great tips on drying and using herbs for healthier family. I’ll try to use some of your tips. .
Any suggestions on a good dehydrator, especially for the value. I’m hoping to spend around $150.
Well, the Excalibur is the best of the best, but they are a little bit more expensive. I have an American Harvest, and it does it’s job– although not quite as nice as an Excalibur.
Yes, My American Harvest Snackmaster has been a workhorse in my home for many years. The Excalibur is recent purchase, and has been great when I want to do large quantities of drying. My neighbors had a larger American Harvest that was over 20 years old before it died, but they bought a new model and can reuse their old trays.
You can certainly see your enthusiasm within the article you write.
The sector hopes for more passionate writers such
as you who aren’t afraid to say how they believe. Always go after your heart.
Feel free to visit my web page – castle clash cheats (Margaret)
http://vk.com/id370235746
Here it is the beginning of spring and for example my plantain has rows of foliage however it is not flowering yet. In this instance I would like to harvest some of these beautiful green leaves and dehydrate them as they will die back before the plant has reached its peak and begun to flower. I would like to maximise the amount of dried plantain I can have. Would you still wait for the herb to reach flowering stage before harvesting and lose potential leaves that could be dried?
What do you use to store your herbs in once dried? Thanks!
I love to store my dried herbs in mason jars! Whatever you store them in, just try to keep them in a cool place out of the direct sunlight!
i dry my herbs with wedryer .
easy , compact, a great solution for mold issues .
excelent for all kind of herbs , tea , flowers .
contact me i have images .