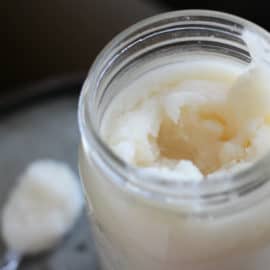
How to Render Lard

- Category: Ingredient
Ingredients
- Leaf fat or kidney fat from pigs
- 1/4 cup water
- Slow cooker or large pot
Instructions
- Start out with cold fat. Trust me on this one– it’s infinitely easier to work with. On butchering day, I just stuck the buckets of the pig fat in the fridge and dealt with it several days later when I had time. You can even freeze the raw fat, and then only allow it to partially thaw before you start chopping.
- Cut off the big chunks of meat or kidney remaining in the fat, then chop into small pieces, or run it through your food processor or meat grinder. The smaller the bits, the faster it will melt down, and the whiter and “cleaner” your lard. (But take care not to over-process it if using a food-processor, as it will heat up and form a big ol’ ball…)
- Place 1/4 cup water and the ground fat in a slow cooker and set on low. You can also render on a stovetop, the key is to keep the temperature VERY low. If you render the fat too quickly, you’re apt to give it more of a “piggy” taste and golden color. It’ll still be usable, but not ideal for pastries or pie crusts.
- Allow the fat to render for several hours, stirring frequently. You are looking for the bits of meat/gristle (these are the “cracklins”) to rise to the top, leaving clear, liquid fat underneath. Avoid boiling the fat or allowing it to burn or stick to the edges. All of those things will impart a piggy flavor to your finished tallow.
- Strain the liquid fat through a piece of cheesecloth and store in glass jars. I’ve read multiple places where people say to just keep your lard at room temperature, but I’m too nervous about it going rancid. Therefore, I keep mine in the fridge, or freezer for long-term storage. It will last a long time in the fridge or freezer.
- Use your lard for sauteing or frying. Or if you cooked it carefully and the lard is mild and white, use it in pie crusts and pastries.